Preparing To Turn A Stave Segmented Beads Of Courage Box
This post is best viewed right here. But, in case of technical difficulties, it is also posted on YouTube and FaceBook.
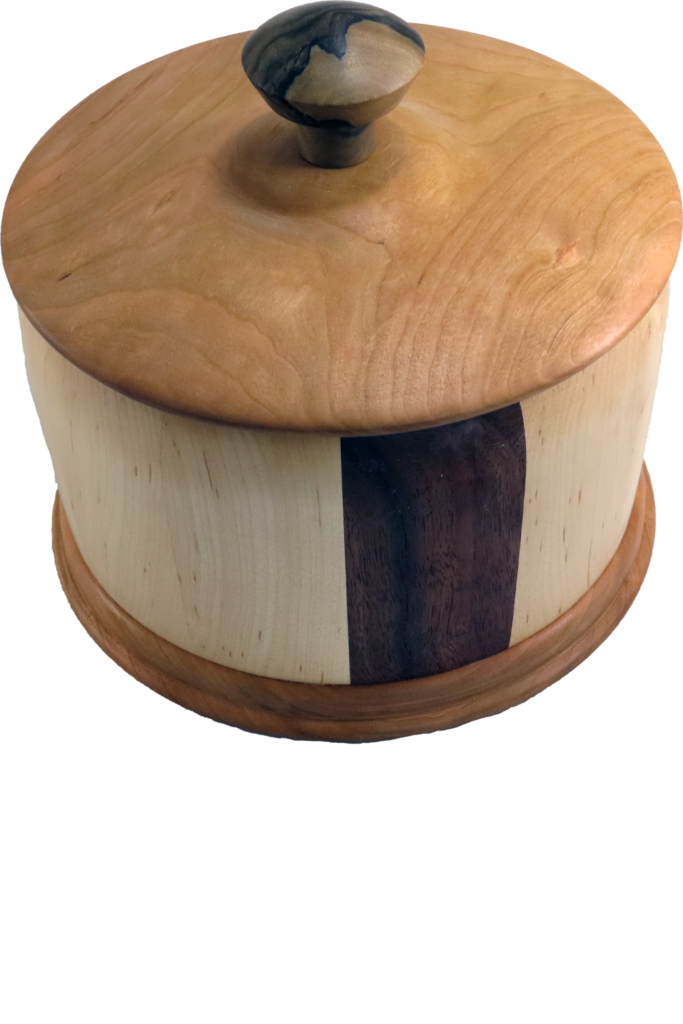
Our club is preparing to support the Beads of Courage program. Beads of Courage works in participating hospitals with children who are seriously ill. At each significant procedure, the child received an additional bead to put in their own box. As a woodturning club, we will help provide boxes. My job was to introduce the program as a demo.
While boxes for Beads of Courage can be any type of construction, I demonstrated the basics to construct a stave segmented box. In stave segmentation, the wood grain runs vertically in the sides of the box. Stave segmenting requires different jigs. My favorite weggie sled could not be used.
I have not been pleased with my previous stave segmenting when cutting the staves. With this in mind, I created a new table saw sled and measuring fixture that made this cutting a pleasure.
Then on to using the rub joint technique to glue staves into half cylinders. After truing the half cylinders, they were also glued together.
At this scale, there are other issues to overcome that are illustrated in the video.
Enjoy.
Turning An Inlay Tray or Platter Without Vacuum Chuck
In case of technical difficulties, this post is also uploaded to YouTube and FaceBook. But it is better right here on this page.
For this project I drew inspiration from a demonstration at the Rocky Mounting Woodturning Symposium and combined it with a monthly club challenge. The symposium demonstration by John Giem inlaid solid wood into solid wood for a coaster. I took away several ideas that I wanted to try.
However, John used a vacuum chuck. I chose to avoid a vacuum chuck and see if I could accomplish the same project.
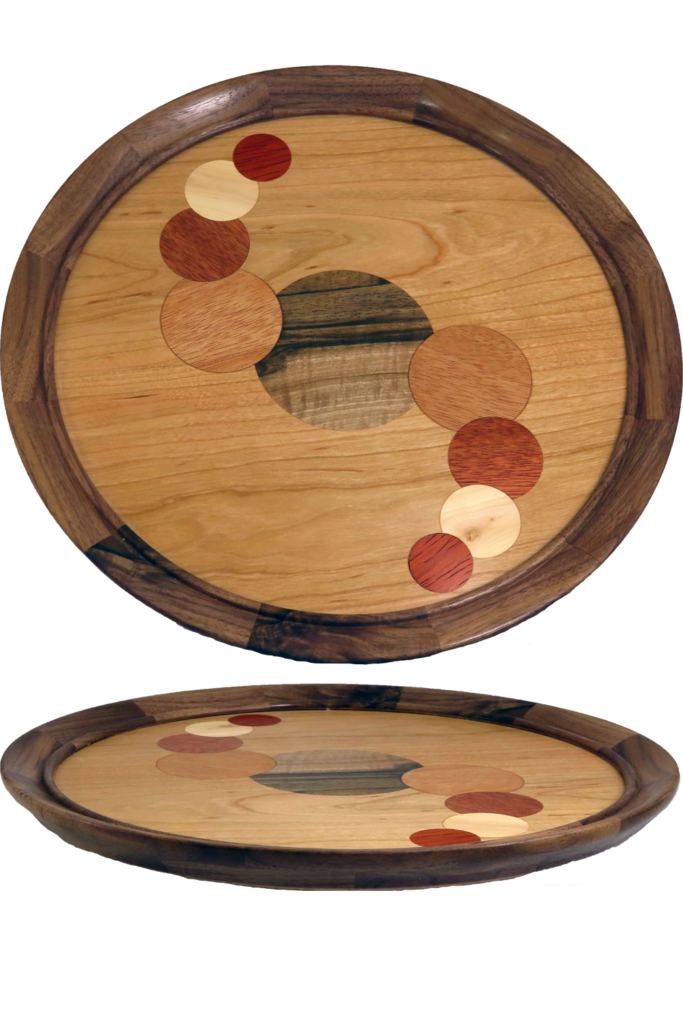
The primary wood is two layers of cherry with internal cross banding with veneer. However, I did not laminate the base wood until the inlay work was complete. This enabled me to avoid issued with drill points going too far. I inlaid disks of walnut, mahogany, bloodwood, apple, and padauk. After the main platter was completed, I made a segmented ring to serve as a rim.
This tray is eleven inches diameter and about 1 inch tall, finished with wipe-on poly.
Enjoy.
Ornament Challenge 2023 Kickoff
Here we are again – The season for decorations and ornaments.
And, the annual Ornament Challenge of 2023. It is time to make your ornament for the 2023 Christmas Ornament Challenge. The time to submit your picture is during the month of November 2023.
Again this year, there is something for everyone. Grand prizes for the top ornaments selected by public vote and the two hosts in the form of gift cards or tools or supplies. Other vendors are providing discount codes for EVERYONE who submits an ornament. The top three craft clubs will receive a free zoom remote demonstration (IRD).
This video has all of last years ornaments for your inspiration or just to admire the creativity they show. Draw from what you see and interpret an ornament your way. Send us a picture of your favorite(s).
We love to see the pattern of inspiration and people stretching their limits.
For official rules, go to www.OrnamentChallenge.com
For inspiration, go to www.OrnamentChallenge.com
During November, go to www.OrnamentChallenge.com to enter your ornament.
Enjoy!
Music:
Carol Of The Bells by Audionautix is licensed under a Creative Commons Attribution license (https://creativecommons.org/licenses/by/4.0/)
Artist: http://audionautix.com/
Joy To The World by Audionautix is licensed under a Creative Commons Attribution license (https://creativecommons.org/licenses/by/4.0/)
Artist: http://audionautix.com/
Silent Night (Instrumental Jazz) E’s Jammy Jams Used with Permission
We Wish You a Merry Christmas (Instrumental) Jingle Punks Used with Permission
Turning A Multi-Axis Faux Sea Urchin Ornament
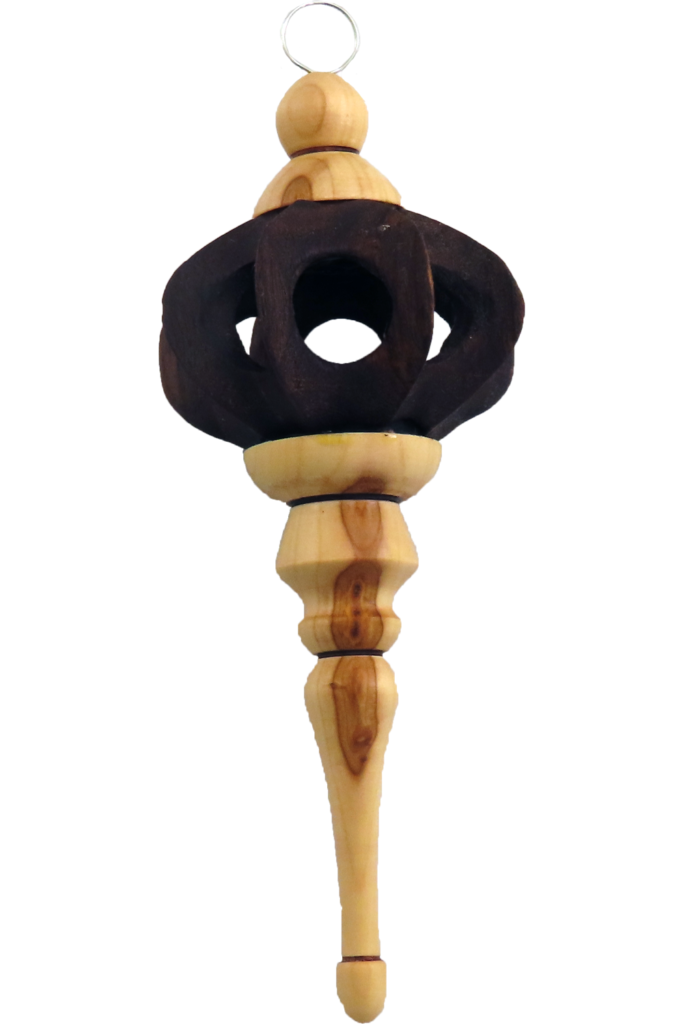
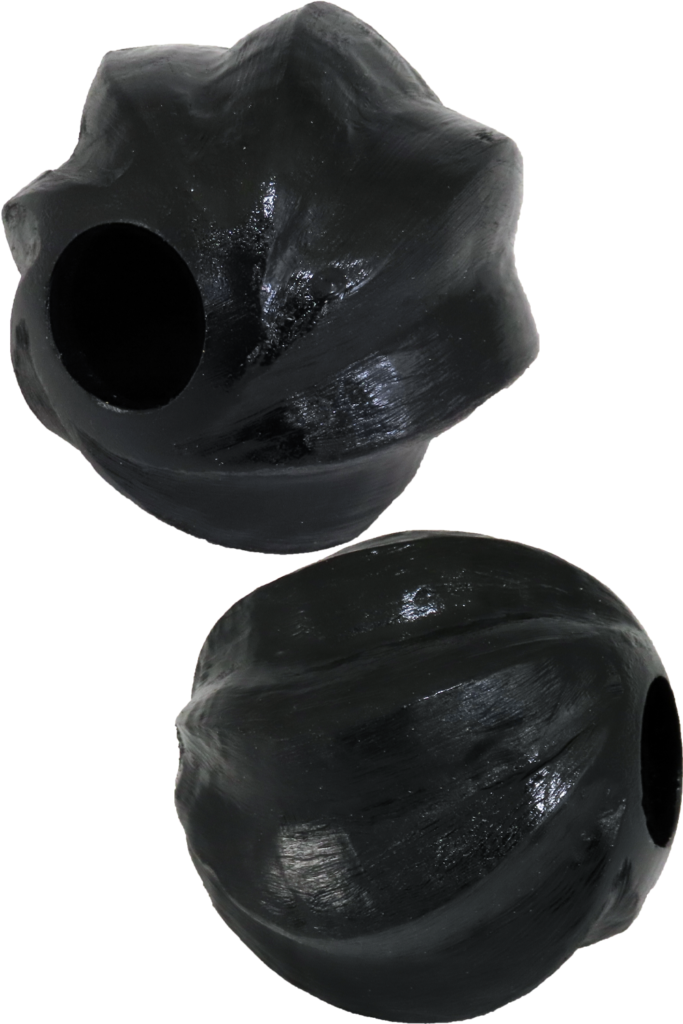
I love this ornament inspired by sea urchin ornaments. Instead of the shell of a sea creature, it is turned from almost any wood.
This one started as a 2.4″ diameter sphere turned using the octagon method. Nothing else gets me closer to a perfect sphere as quickly.
Then after some indexing, it is mounted four additional times at four additional turning axes.
Then some carving cleans and lightens the ornament.
Don’t forget to add appropriate finials!
Get your ornament ready for this year’s ornament challenge. Details are at www.OrnamentChallenge.com
Enjoy.
Resources:
Turn A Perfect Wood Sphere Or Ball – No Expensive Jig
Woodturning Essentials – Octagon Method For Perfect Spheres
Woodturning Perfect Spheres – For Wise Turners
Turning A Winged Bowl From Laminated Cube
In case of difficulty, this video is also available on YouTube and FaceBook. Where Best? Right Here!
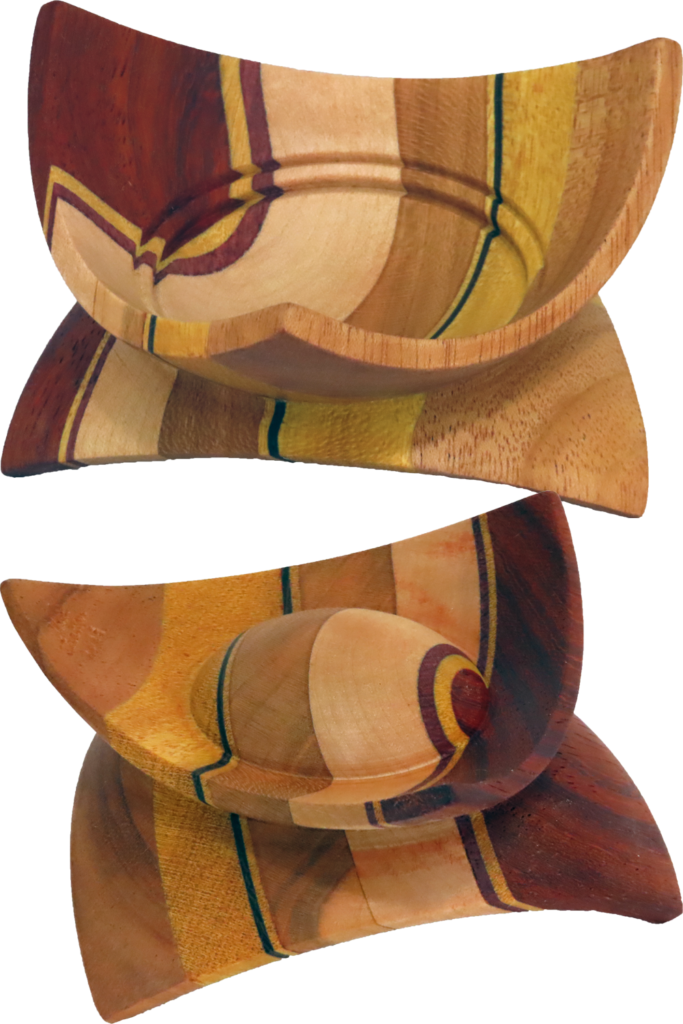
Inspired by fellow club members, this project is to turn a cube into a bowl.
For this style bowl, first a blank must be prepared as a perfect cube of any size. My project uses a laminated block of wenge, yellowheart, padauk, maple, mahogany, and cherry.
The trick is to mount the cube to the lathe with one corner at the spindle and the opposite at the live center. On the spindle side, many examples simply put the coner is the hollow of the spindle – not using any chuck or center. IMHO, this mount is prone to spinning as there is limited friction between the steel and the wood. Instead, I mounted a wood faceplate with a hole at center. The cube edges bit into the faceplate wood for a great hold – no slipping.
On the live center side, some examples pop out the center of the live center and press the corner into this cavity. Others nip off the corner but then need to center the live center. This is prone to error while excellent alignment is required for this style of turning. Instead, I mounted another faceplate to my threaded live center which performed similarly to the opposite faceplate.
Then the turning requires careful gentle work since a lot of air is required to cut; there are corners that can hit hands. The wood is at an angle to usual turning which lends itself to chipping.
This bowl is finished with wipe-on poly. It is about 4.5″ by 2″.
It is time to prepare for this year’s challenge. Details are at www.OrnamentChallenge.com
Enjoy.
Revisiting Tippy Top Failure – New Process For Success
This video is best viewed here on this page. In case of technical difficulty, it is also posted on YouTube and FaceBook.
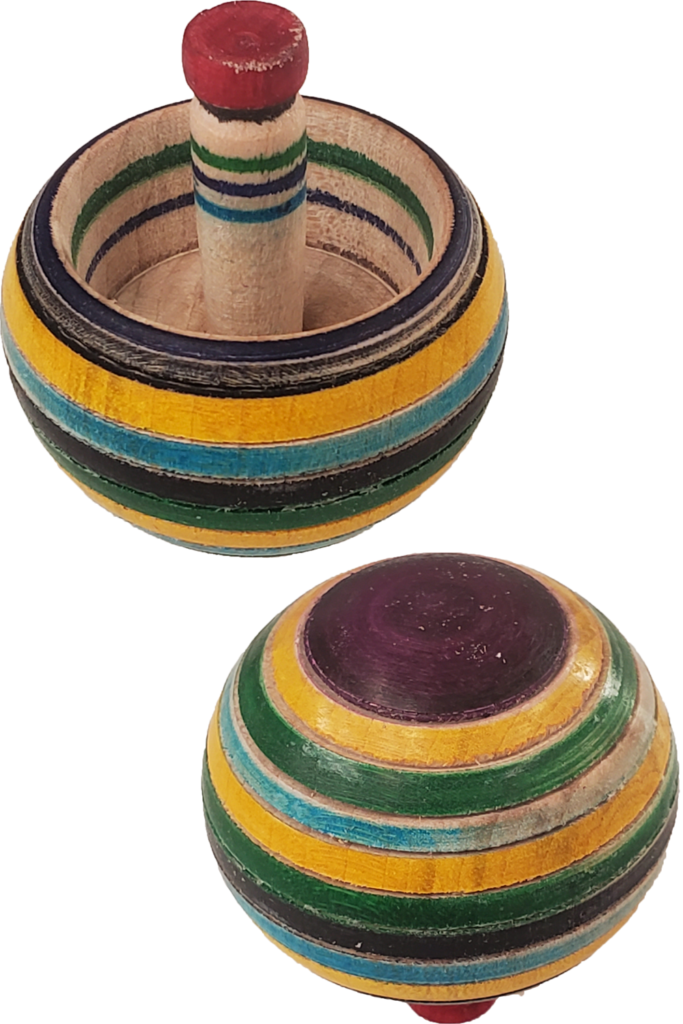
Ten years ago, I failed to turn a tippy top. What is a tippy top? When a tippy top spins, it spins on its axis. But then, the turning axis gradually shifts until it flips over. Believe it or not, the top itself is now rotating very opposite to its initial rotation. No, it does not stop spinning to change. It gradually flips over.
Why not incorporate the octagon process to give a great starting point for the top? But before rounding off the octagon, the straight sides are perfect places to measure from while drilling a couple of holes.
This top is two pieces: the round body and the handle. The body started with 1.5″ by slightly longer wood; the handle about 3/8″ by 2. Coloring was with a variety of Tombow markers. Finish is carnauba wax.
The optional 1/4″ ball bearing goes in the extra depth of the hole for the handle. The ball bearing serves to lower the center of mass to encourage the tippy top to behave.
I also designed a launcher to help my fingers get the spinning started. While mine is 3D printed; it is easily made from wood. The model files are at www.Printables.com at this link: https://www.printables.com/model/582064-tippy-top-launcher
It is time to prepare for this year’s challenge. Details are at www.OrnamentChallenge.com
Enjoy.
Resources:
Turn A Perfect Wood Sphere Or Ball – No Expensive Jig
Woodturning Essentials – Octagon Method For Perfect Spheres
Woodturning Perfect Spheres – For Wise Turners
Turning, Hollowing, & Carving Perfect Sphere With Donut Chuck
This post is best viewed right here. However, in case of difficulty, it is also posted on YouTube and FaceBook.
After observing a good demonstration, I like to turn my own project using the same or similar techniques that I observed. However, I also make it my own using techniques that I have perfected. In this case the source inspiration was a carving demonstration by Laurent Niclot at the annual AAW symposium.
This project turns a perfect sphere, hollows it, and then it is carved.
I do not know how Laurent initially carved and hollowed his sphere. That was a separate demonstration.
I like the octagon method for turning a sphere. No expensive jig or fixture is required and more importantly, the process can be quickly mastered by novice turners. This is in contrast to my first experience turning a sphere using jam chucks. That one was a total failure.
Sometimes, vendors cross the line when hawking their products. At SWAT, I listened to just such an event. In this video, I present my opposing view concerning a donut chuck used to hollow the sphere.
Then on to carving. This art form is finished with rattle-can lacquer.
It is time to prepare for this year’s challenge. Details are at www.OrnamentChallenge.com
Enjoy.
Resources:
Turn A Perfect Wood Sphere Or Ball – No Expensive Jig
Woodturning Essentials – Octagon Method For Perfect Spheres
Woodturning Perfect Spheres – For Wise Turners
Turning Saturn Style Christmas Tree Ornament
Please view this post here on this page. But if there is a problem, it is also posted on YouTube and FaceBook
After last year’s Ornament Challenge, Paul sent me a kit for me to make an ornament similar to one he had submitted. It took me a while to get to it. But now it is just in time to show off before this year’s Ornament Challenge.
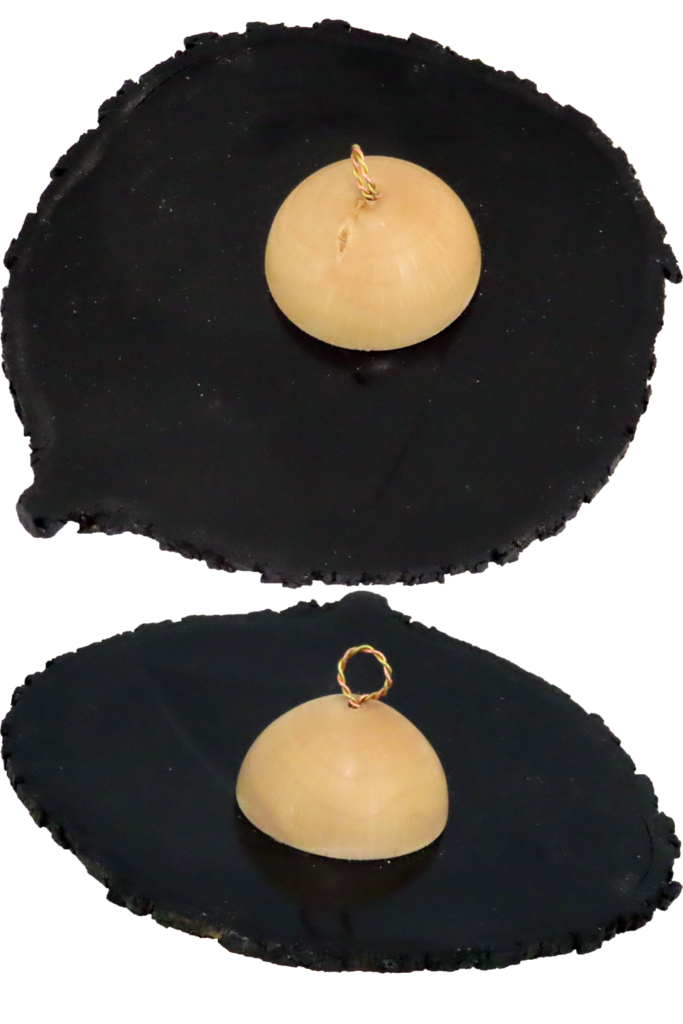
The middle part is a slice of a large branch. Mine was dry and still fairly straight. I prepped it by sanding it on a disk sander and painted it black with rattle-can lacquer.
The upper and lower hemispheres are turned using a modified octagon method. The modification enables splitting the sphere into the two hemispheres and enables it to be hollowed. This portion is finished with shellac friction polish.
The hanger is twisted brass and copper colored wire at about 20-22 gauge. Two pieces about 8 inches long were twisted together to form a long strand. Then strand was then wrapped around a mandrel and the ends twisted together.
It is time to prepare for this year’s challgenge. Details are at www.OrnamentChallenge.com
Enjoy.
Resources:
Turn A Perfect Wood Sphere Or Ball – No Expensive Jig
Woodturning Essentials – Octagon Method For Perfect Spheres
Woodturning Perfect Spheres – For Wise Turners
Enjoy!
Turning Spalted Bowl With Bonus Nail (Not)
In case of difficulty this video is also posted on YouTube and FaceBook.
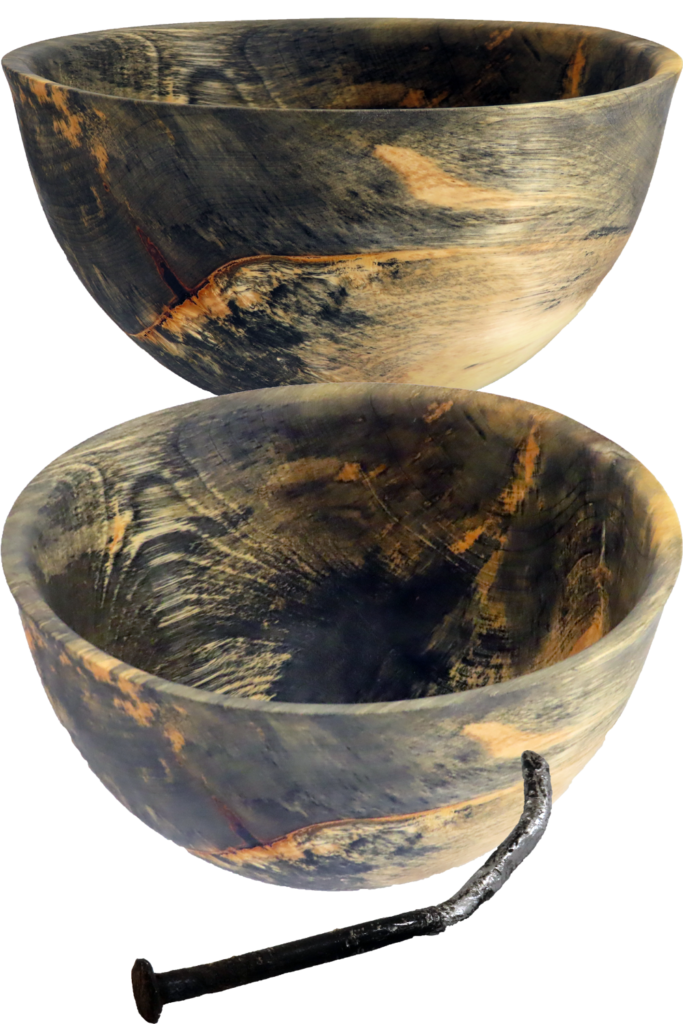
I was happy to be given this block of fresh, green chestnut already slabbed and rounded. It was ready to turn. I had great plans for it: maybe a calabash bowl; maybe a hollow form.
The initial turning for the outside bottom went normally. Then when I started the top and hollowing, my gouge found nail. The nail turned out to be a big 16 penny nail totally embedded in the wood with the head towards the outside. Should I blame the gouge?
I went on to try several ways to extract the nail. It just would not pull out. Afterall, pulling against the nail head is generally futile. As it was this time.
My grand plans evaporated. If salvaged, this would be a normal, once turned, deep bowl.
It was a pain.
We’re preparing for this year’s Ornament Challenge – details will be at www.OrnamentChallenge.com
Enjoy.
Turning Oversize Ornament For Fund Raising Event
This video is best viewed here on this page. However, if there are difficulties, it is also posted on YouTube and FaceBook.
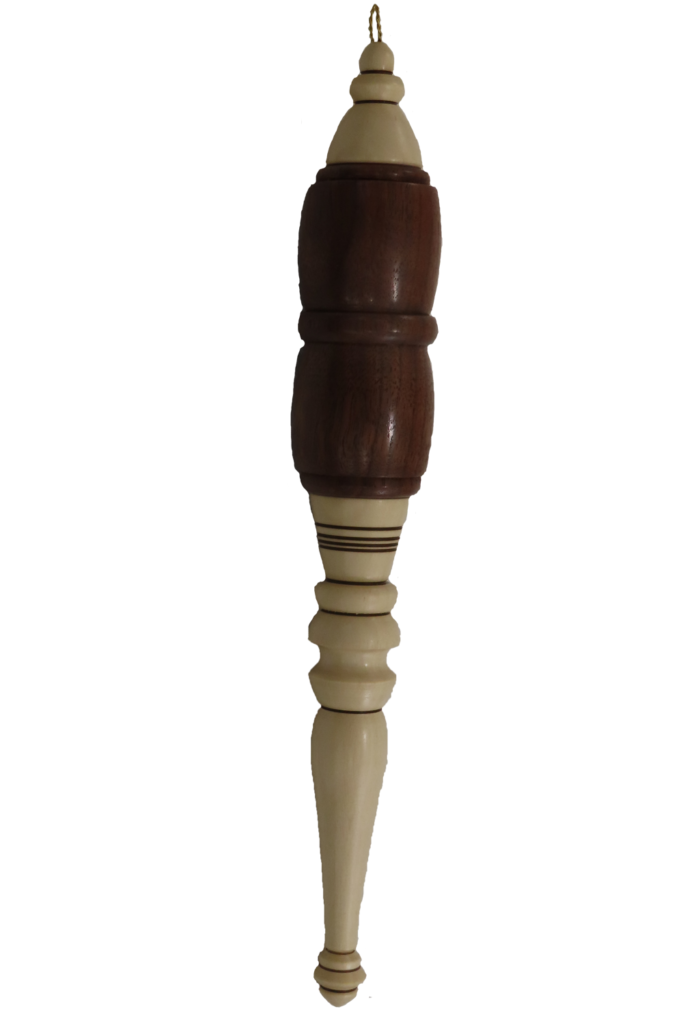
Our club is turning oversize ornament for a Christmas tree to be auctioned in a fund raising event.
By oversized, this ornament is twelve inches long and two inches diameter. It is walnut and maple finished with shellac.
It is a fun project.
Resources:
DIY Triple Wire Woodburner For Woodturning
We’re preparing for this year’s Ornament Challenge – details will be at www.OrnamentChallenge.com
Enjoy.
