2023 Christmas Ornament Challenge Winners
In case of difficulty, this is also posted on YouTube and FaceBook. Best right here.
At last – The votes have been tallied and grand prizes allocated.
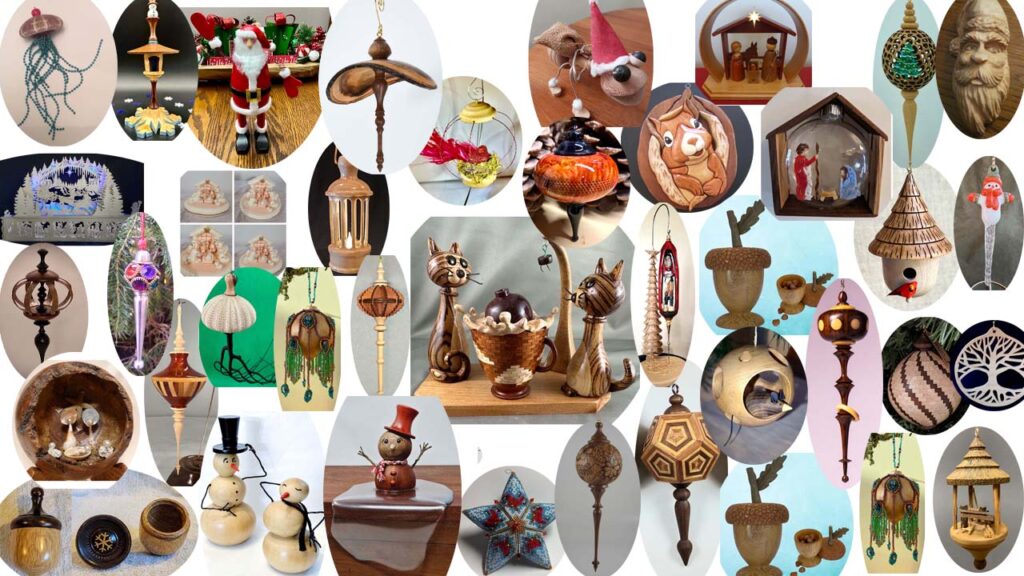
Wow! This is a fantastic challenge with 417 ornaments from twelve countries.
I cannot believe the wide range of talent and creativity. I can safely say that this is the best display or ornaments in the world. All because of your ornament contributions. Thanks to each participant and our sponsoring vendors.
2023 Finalists are:
Michael Lober
Tim Capraro
Myron Robinson
Sarah Slocum
Richard Nealis
Bill Bulkeley
Aubrey Schlappi
Bruce Jordan
Jack Boggio
Jose Esteban Cruz
Eric Rohel
James Norfleet
Paul Stagl
Club Winners are: (Free IRD)
Cape Cod Woodturners
Arizona Woodturners Association
Asociacion Torneros de Madera de Puerto Rico
Detroit Area Woodturners
Club Runner ups: (Thank you)
Woodworkers of Central New York
Front Range Woodturners
Vendor Sponsors – Grand Prizes:
Jacques Vesery
Craft Supplies
Hunter Tools
Air Brushing Wood
Turntex
Robust Tools
Vendor Sponsors – Bonus Prizes:
Alumilite
Air Brushing Wood
Woodturners Wonders
As Wood Turns
REMEMBER NOVEMBER is when the next ornament challenge will be open for your ornaments.
Enjoy!
Turning Multi-Axis Icicle Ornament – My Answer To Skew Challenge
In case of difficulty, this video is also posted on YouTube and FaceBook. Best right here!
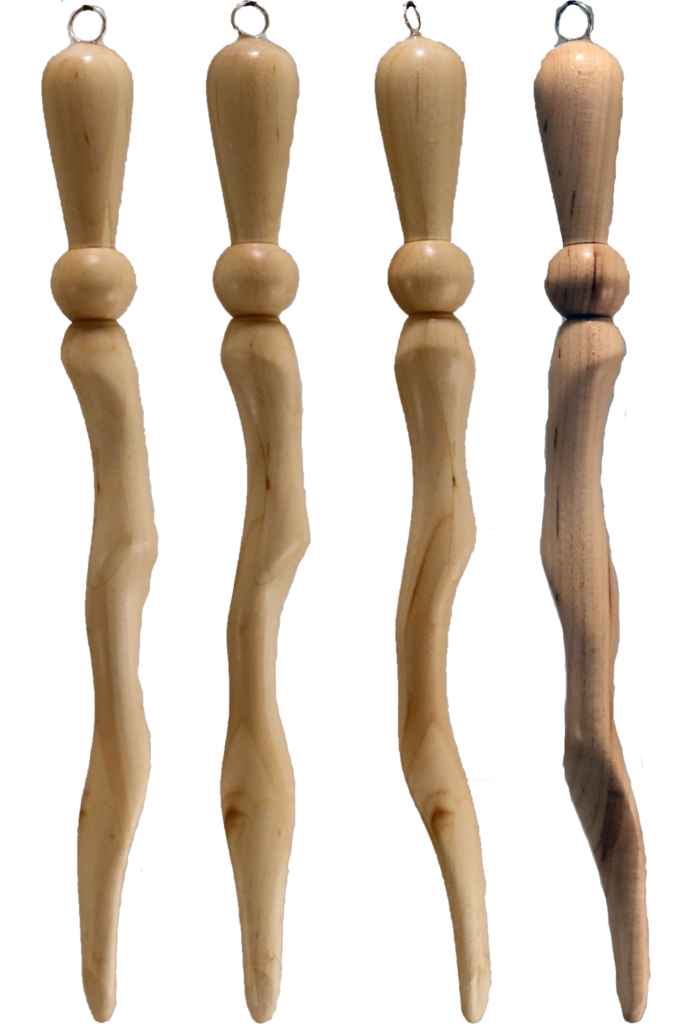
This project is my answer to Richard Findley’s skew icicle challenge. His request as for an icicle ornament turned only with a skew.
But, why not enhance it a little? Who has seen a perfectly round icicle. Multi-axis turning is the answer to give it a little more character. Still with skew only.
They key to a successful long eccentric project is a set of faceplates with the offsets as shallow holes. These faceplates enable positioning and power with a minimum of pressure from the live center. This minimizes the odds of the wood breaking under pressure. This is especially important for long, thin spindles.
On the spindle side, add 2 short (~.5″) brass pins: one goes to the eccentric axis position; one is a drive pin. On the live center, a single pin goes to the central axis or any of the offset holes. Of course, also drill a hole for the pin on the live center end of the project wood and two holes (center and 1 offset) on the spindle end.
For a project offsetting only the live center, move the pin to the appropriate hole in the faceplate. To offset the spindle end, move the project wood with the center pin to an offset hole and the other pin to provide rotation.
The icicle is 8″ long, finished with shellac.
Enjoy.
Turning Eccentric Dancer Ornament From Scrap
This video is best viewed here on this page. In case of technical glitches, it is also posted at YouTube and FaceBook.
While we are waiting for the voting period for the ornament challenge, I made another ornament from scrap.
But,Please vote for your five(5) favorites at www.OrnamentChallenge.com by 10 December (Sunday Night).
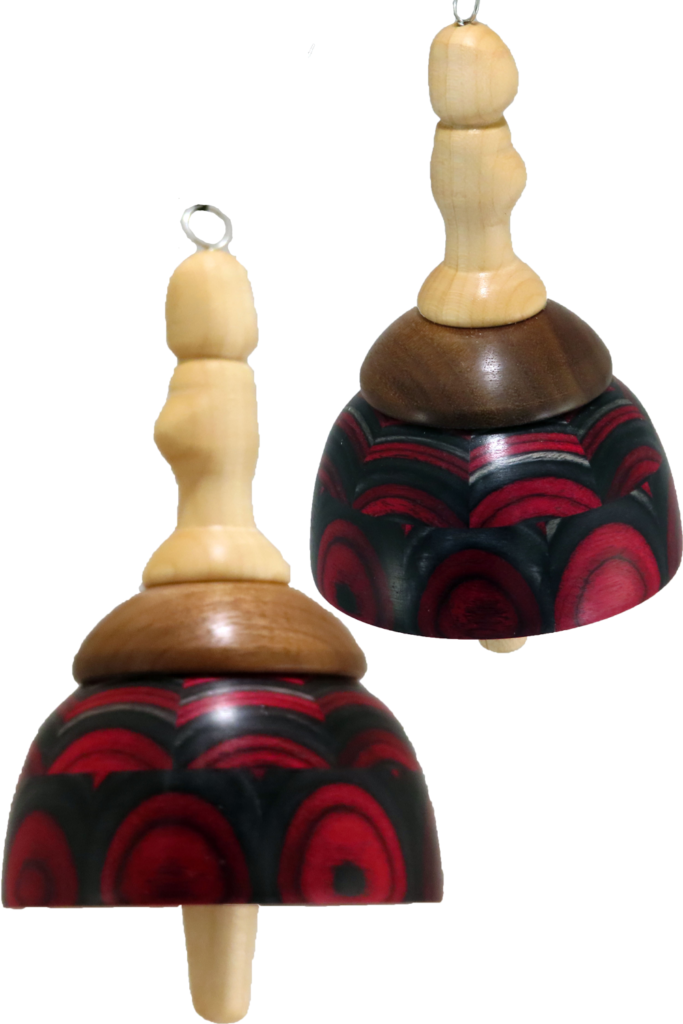
The skirt is dyed birch lamination left over from a failed project. But, it was too pretty to throw away. So, I have added a walnut disk to complete the dancer’s skirt and a maple spindle for her body.
The torso axis is shifted 1/8 inch in opposite directions. The feet axis is shifted 1/8 inch in opposite directions and 90 degrees from the torso axis shift.
All is finished with shellac.
The grippers were 3D printed in PLA. But, also easily turned on a lathe.
Some newer viewers may wonder why I insist on wearing a face shield for safety. Please check out this video:
Woodturning Disaster
While we are waiting for the voting period for the ornament challenge, I made another ornament from scrap.
But,Please vote for your five(5) favorites at www.OrnamentChallenge.com by 10 December (Sunday Night).
The skirt is dyed birch lamination left over from a failed project. But, it was too pretty to through away. So, I have added a walnut disk to complete the dancer’s skirt and a maple spindle for her body.
The torso axis is shifted 1/8 inch in opposite directions. The feet axis is shifted 1/8 inch in opposite directions and 90 degrees from the torso axis shift.
All is finished with shellac.
The grippers were 3D printed in PLA. But, also easily turned on a lathe.
Some newer viewers may wonder why I insist on wearing a face shield for safety. Please check out this video:
Woodturning Disaster
Enjoy
2023 Christmas Ornament Challenge Call For Votes
If you want to go directly to the web page to view and vote on your favorites, please use this link www.OrnamentChallenge.com. This is the only way to vote with our improved voting process.
If you preview the usual video and then go to the page to vote, then view this video.
To vote, note your five favorites and the click this link https://forms.gle/5A83gaDopPoArZvx7 to a google form to enter your favorites.
Thank you in advance for your votes and to all participants. This was the best yet.
We’ll announce results as soon as possible after the voting period ends December 10, 2023.
2023 Christmas Ornament Challenge Preview
in case of video difficulty, this post is also available on YouTube.
This video is a preview with ornaments submitted so far to the 2023 Ornament Challenge.
I cannot adequately express my amazement at the talent displayed. Each seems to show creative talent whether made by an expert or a novice.
Please do NOT vote for your favorites in this video. After the challenge completes, we will create a video with all ornaments and then ask for your vote. The voting process will be different this year. It will use a Google form for all votes.
Be ready.
If you have your ornament, please ensure you enter it to the challenge by EOD November 30, 2023.
Enjoy.
Turning Segmented Vase – Heirloom Sycamore
Please view this video here on this page. However, in case of gremlin uprising, it is also posted on YouTube and FaceBook.
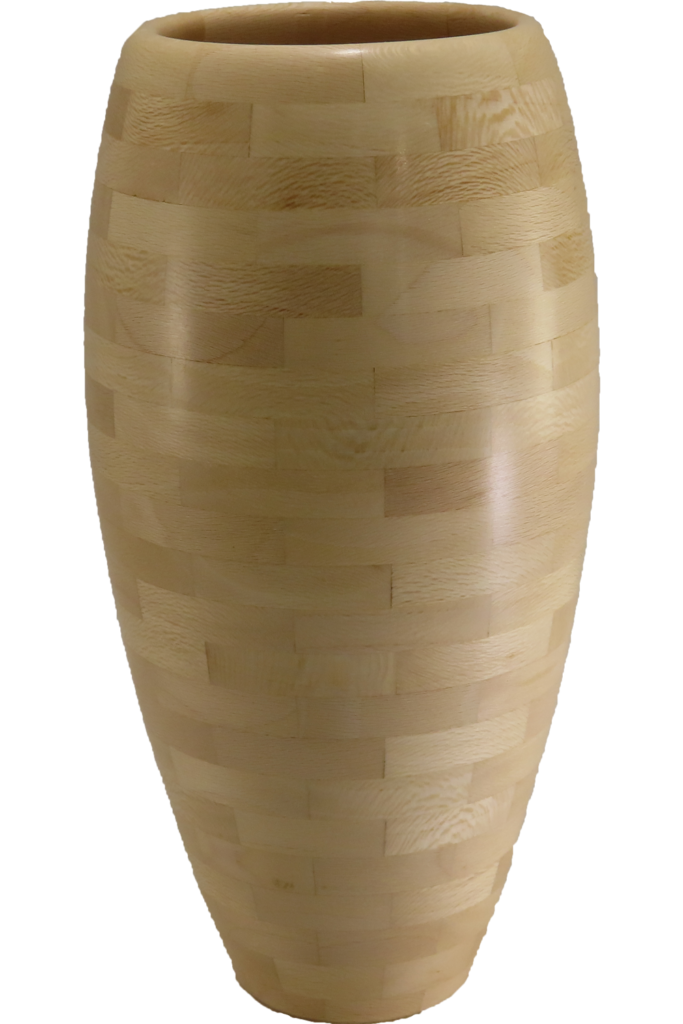
This 4 x 8 inch vase is for a lady whose tree provided the wood.
It is segmented sycamore with 8 segments per ring and 22 rings or 172 segments. It is finished with wipe on poly. The base is three layers of sycamore to prevent expansion cracks.
The wood was difficult to process as it came from short trunk segments that was partially dry.
Some newer viewer may wonder why I insist on wearing a face shield for safety. Please check out this video:
Woodturning Disaster
Enjoy.
Two Ways To Turn Yo Yo’s
This post is best viewed here on this page. However, in case of technical glitches, it is also posted on YouTube and FaceBook.
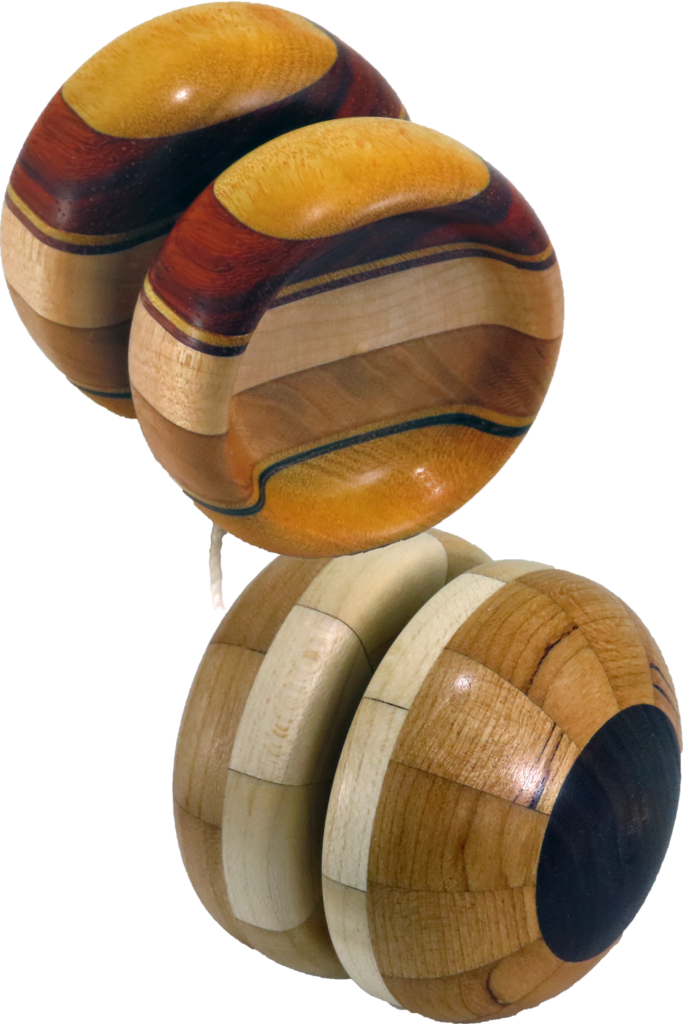
After viewing a club member demonstrate turning a yoyo, my wife encouraged me to also turn one. I wanted to upscale mine. So I went to the internet to research. I hoped to find a specific recommendations. I found that there are no guidelines – it seems that you have to be a professional yoyo artist to appreciate it.
Observations:
- Gap: to tight and the yoyo will not sleep. A larger gap helps sleepy tricks.
- Weight: Weight distribution matters but some like it more to the perimeter; others to the center.
So, I split the difference and turned two yoyo’s to at least illustrate the differences.
BTW, check out the amazing ornaments already entered into the Ornament Challenge www.OrnamentChallenge.com to view and enter the challenge. Entries will be accepted through November 30, 2023. Don’t wait for the last minute.
Some newer viewer may wonder why I insist on wearing a face shield for safety. Please check out this video:
Woodturning Disaster
Enjoy.
Turning Multi-Axis Stacking Rock Box Tower
In case of technical difficulties, this video is also posted on YouTube and FaceBook. However, you are already here. so, Enjoy
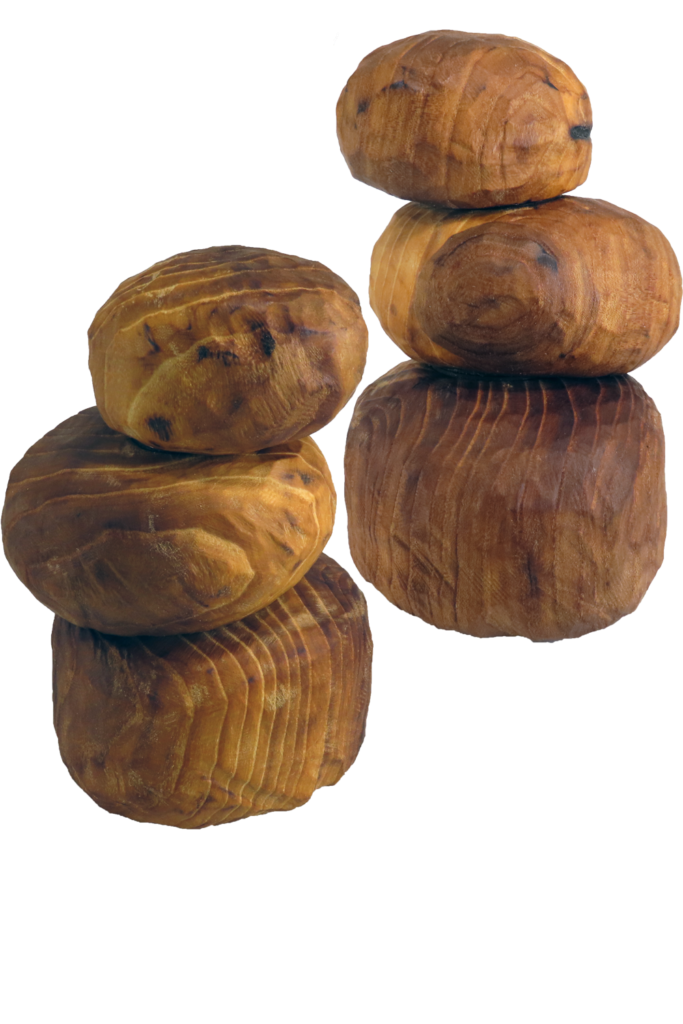
Despite an excellent demonstration by Yann Marot at the Rocky Mountain Woodturning Symposium, I had to turn my stacking rocks my way. To me they resemble a mountain trail marker that I saw frequently in Boy Scout adventures. The main difference is that I used bayonet style bushings between the rocks instead of tenons.
The bottom two rocks are hollowed to lighten the stack and to enable hiding something special inside. The top rock is drilled to lighten it and to accept the bushing. They are finished rough and with walnut oil. The stack is about 7 inches tall and 5 inches diameter at the base. It stands securely on three rocky protrusions on the bottom side.
The upgraded bayonet style bushings will be available soon in my Etsy site.https://www.etsy.com/shop/AsWoodTurnsTools
Some newer viewers may wonder why I insist on wearing a face shield for safety. Please check out this video:
Woodturning Disaster
Enjoy.
p.s. If you would like a more in depth demonstration than my weekly videos, please contact me for an IRD (Zoom Demo) on this or other topics.
Turning From Green To Dry Mesquite Bowl
If you have difficulty viewing this video here, it is also posted on YouTube and FaceBook. Best right here.
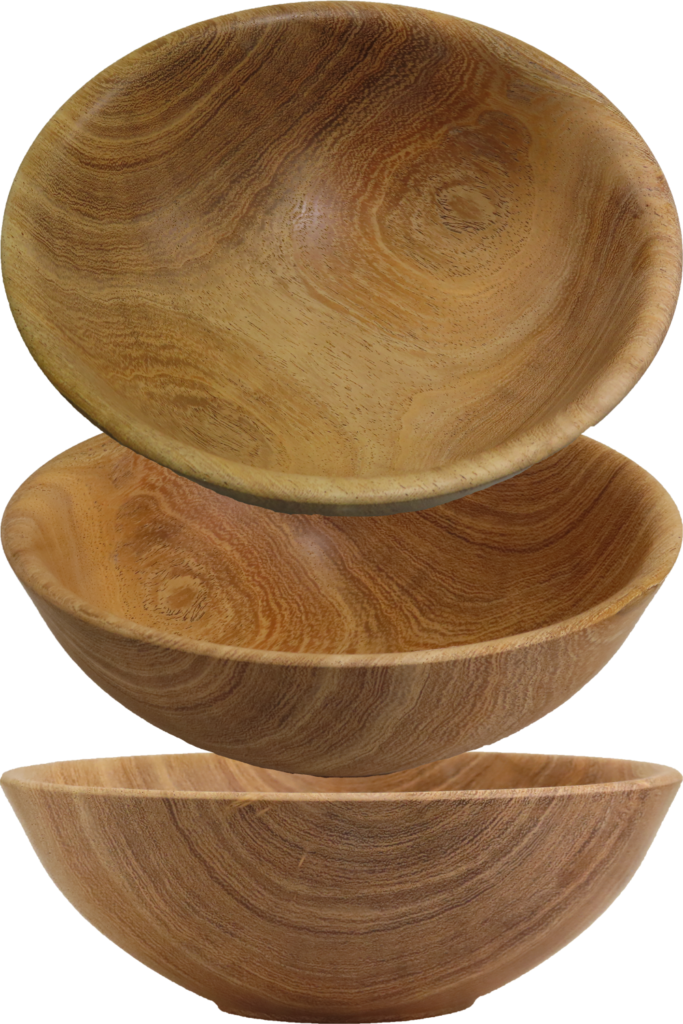
Before the pandemic during a trip to the Phoenix area to visit a son, a viewer offered me some mesquite and olive wood. The wood was recently cut down. I hauled several chunks home and got to work. One chunk of mesquite is this bowl. I turned it while green, leaving the walls over an inch thick to accomodate warping while it dried. After sealing the wood, I weighed the bowl periodically until it stopped losing weight meaning that it was dry. However, I did not get around to a final turning until now.
This turning resulting in a 7 inch by 2.5 inch bowl finished with wipe-on poly. I opted for an extra mount in this bowl beyond what I usually do. Other than that, this was a typical bowl turning exercise. While turning this bowl, I put my Hollow_pro Caliper to good use to measure the wall thickness. I prefer it to typical figure 8 calipers.
Some newer viewer may wonder why I insist on wearing a face shield for safety. Please check out this video:
Woodturning Disaster
Enjoy.
Turning Multi Axis Eight Point Star With Jig
In case of system glitches, this video is also posted to YouTube and FaceBook. Best viewed right here.
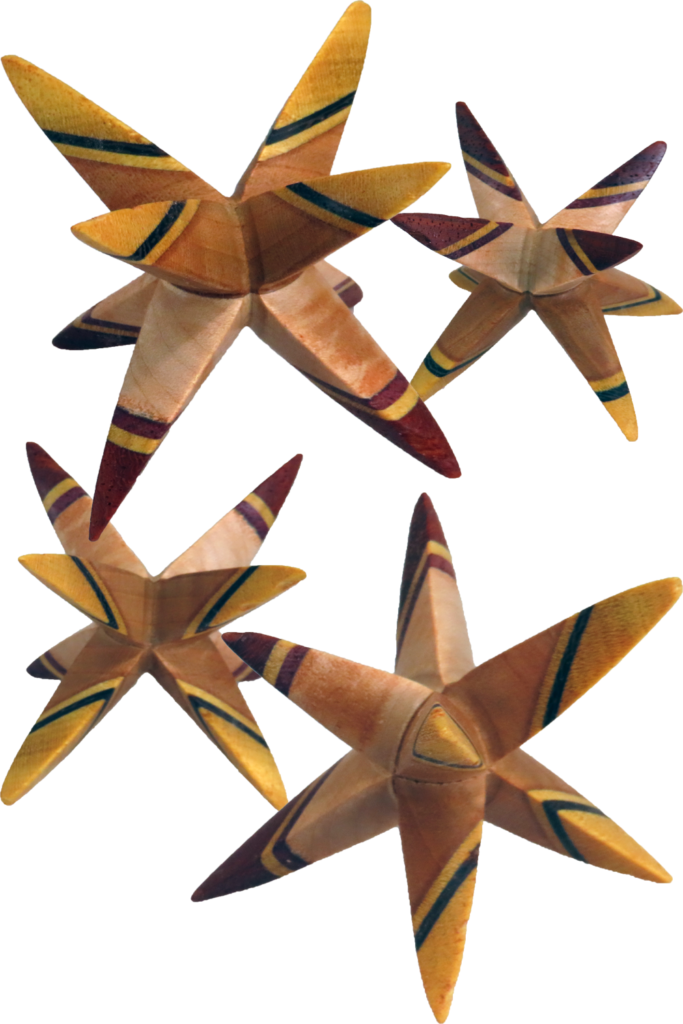
The inspiration for this project comes from Theo Haralmapou over a year ago during an online symposium. This was reinforced at SWAT by Donna Frazier. This star is turned on three axes and therefore requires the preparation of a chuck fixture for the second and third turning. A signicant part of Theo’s presentation involved preparing the chuck fixture.
I own, design for, and operate a 3D printer. This printer has become an essential tool in my shop. Fixtures and other things that I would have made from wood or maybe aluminum, I can draw, print, and tweak until I get it right. If from wood, I would typically have one shot at completing these fixtures. As a bonus, on small items, my hands are no where near sharp blades. This fixture went further to include threads to mount to the spindle and live center.
In addition, I designed a template to guide turning the groove to the best shape and depth.
My star begins with a 2x2x2 cube. Theo started with a 60 mm cube. The wood should be hard and sturdy. If prone to chipping, use a different wood. My star is finished with wipe-on poly. The woods are maple, cherry, wenge, paduak, and yellowheart.
My fixture and gauge is posted to Printables.com https://www.printables.com/model/620500-jig-for-woodturned-star
Enjoy.
