Woodturning Small Mouth Vase From Green Mesquite
This video is also posted on YouTube, Vimeo, and FaceBook. Best right here!
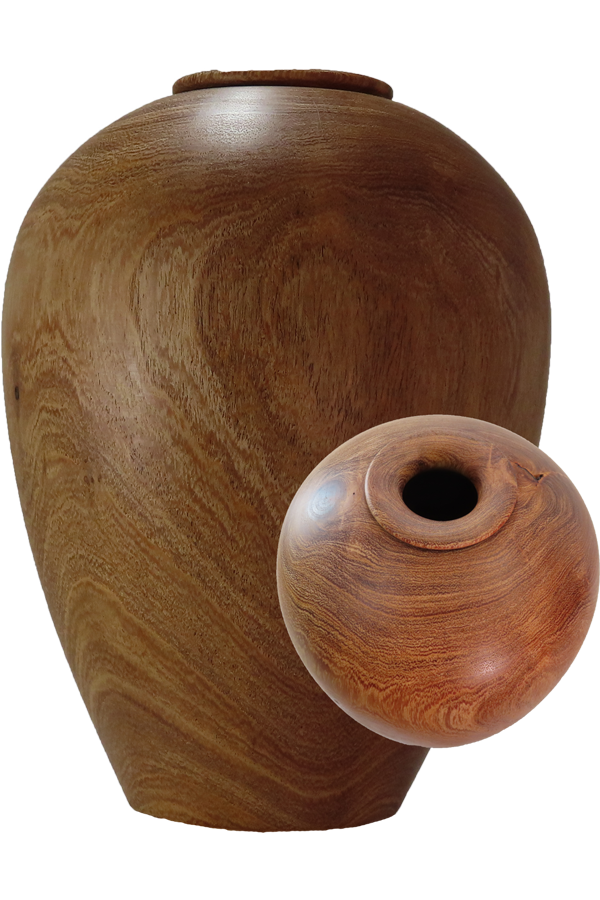
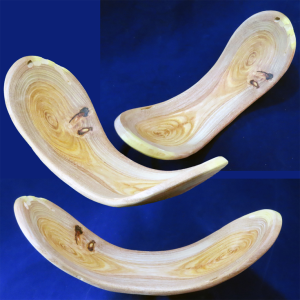
This vase is mesquite. I obtained it several months ago from Mark, a viewer from Phoenix, AZ. I turned it green about three months ago. Normally, I cannot trust leaving the pith in the wood. Actually, I did not leave the pith in this log either. Instead, I bored it out and hollowed the vase from the bottom. I planned to use another piece of mesquite to plug the hole later when the wood was dry.
Since mesquite has a very low moisture content, it only took two months to dry.
The vase is almost 9 inches tall and 6 inches in diameter, finished with walnut oil.
Enjoy!
Resources
Pin Face Plate and Threaded Wood Face Plates For Woodturning
This video is also posted on YouTube, Vimeo, and FaceBook. Best here where you are already!
I have dozens of threaded wood faceplates that is use in many different applications.
The alternative is a steel faceplate with wood screwed to its face. However, due to the cost of steel faceplates, I would have to be constantly unscrewing the wood to exchange it for a different wood piece. Leaving them intact would require a tremondous investment in steel faceplates.
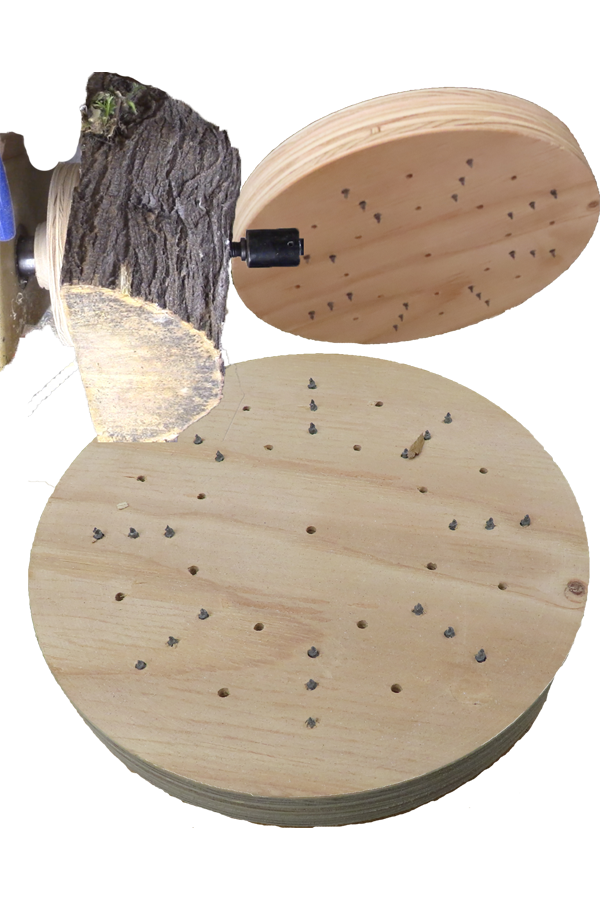
Instead I use poplar thick enough for the length of my lathe’s spindle and a tap that matches the spindle. Cross grain poplar works well; End grain poplar does not work for me. The Beall Company makes taps for woodturning lathe spindles.
Following instructions on the tap, I drill a pilot hole and advance the tap through the wood. While it is possible to tap to a particular depth, I find it easier to drill and tap completely through the wood. After all, I can always glue on more wood. After tapping the threads, I flood them with thin CA glue to stiffen the threads. After the glue has thoroughly dried, I run the tap through the wood again. Warning – if you rush the glue, you may find your tap permanently secured to the wood.
A few final touches mates the faceplate to my spindle. Spindles vary so do what is needed for yours.
This pin faceplate has plywood mortised and glued to the core faceplate. Then screws are driven from the back side of the faceplate to lightly grip wood pressed against the faceplate with tail stock pressure. I drilled additional holes for possible alternate future use. Customize the hole pattern to personal preferences.
Enjoy!
Resource Links:
Easy Wood Faceplates For Woodturning
Simple Wood Faceplates For Perfect Balls Or Spheres
Woodturning Sea Urchin Style Multi Axis Ornament
This video is also posted on YouTube, Vimeo, and FaceBook. Best Right Here!
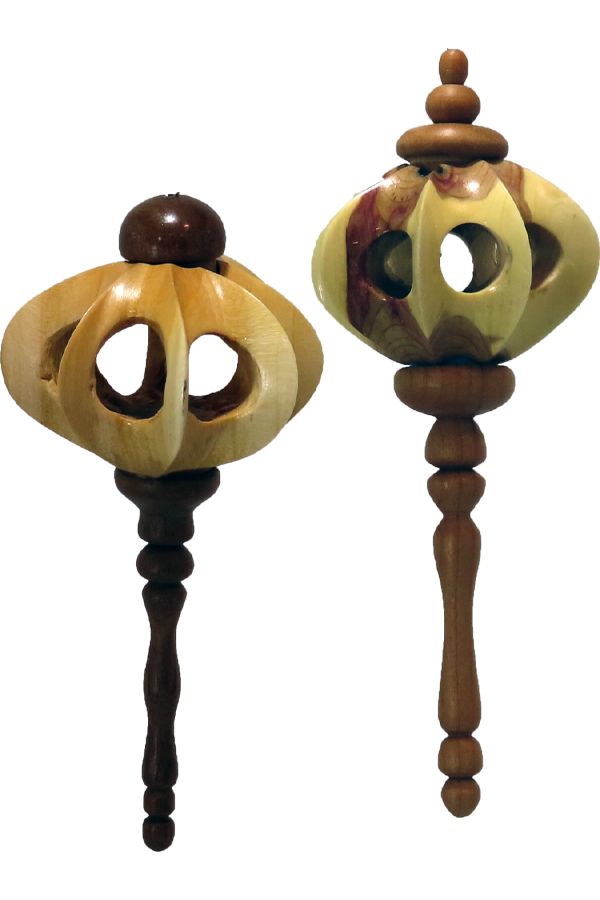
At our club’s Christmas social, I gave away my ornament made as a faux sea urchin. I had promised my wife to make another. However, the process to turn the original was difficult with catastrophic breakage very likely.
I struggled to modify the process to improve the results and satisfy my wife. I think I finally succeeded.
The original process required carving. However, in the modified process, carving is optional. I think the wood is light enough that carving is not required.
I used green lilac for this ornament. The wet wood tools nicely and dries in a couple of days. The ornament body is finished with rattle-can lacquer. The cherry finials are finished with shellac friction polish.
I plan to invite subscribers to more of these remote demonstrations maybe even after this covid pandemic is over. However, I can only invite those who have subscribed on my website – AsWoodTurns.com. If you have subscribed via YouTube, I don’t have a way to email an invite. If you already receive my weekly emails, you’re already subscribed.
But you can remedy this by going to the box in the upper right hand corner of this page. Green and tan. Please use this automatic process instead of email. On a phone, the box may be in a different place – try swiping left or right to find it.
Then you can participate in a demonstration via the internet on your own computer screen. Social distancing overcome! and Front Row seating at the demo.
Enjoy!
Resources:
Multi Axis Woodturning Ribbed and Holey
This Christmas Ornament is Not A Sea Urchin
Woodturning Art From Socially Distanced Demonstration

This video is also posted on YouTube, Vimeo, and FaceBook. Where best? – Right Here!
Last week I did an interactive remote demonstration where I turned one of these fun things. I wanted to edit that video and publish it. However, the computer gremlins prevented that approach this time. I had to reshoot the video.
I plan to invite subscribers to more of these remote demonstrations maybe even after this covid pandemic is over. However, I can only invite those who have subscribed on my website – AsWoodTurns.com. Please tell your friends how to subscribe to participate also.
The subscription box is in the upper right hand corner of this page. Green and tan. Please use this automatic process instead of email.
Then you and they can participate in a demonstration via the internet on your own computer screens. Social distancing overcome!
Enjoy!
Woodturning Pear Bowl – Wet To Dry
This video is also posted to YouTube, Vimeo, and FaceBook. But it’s best right here!
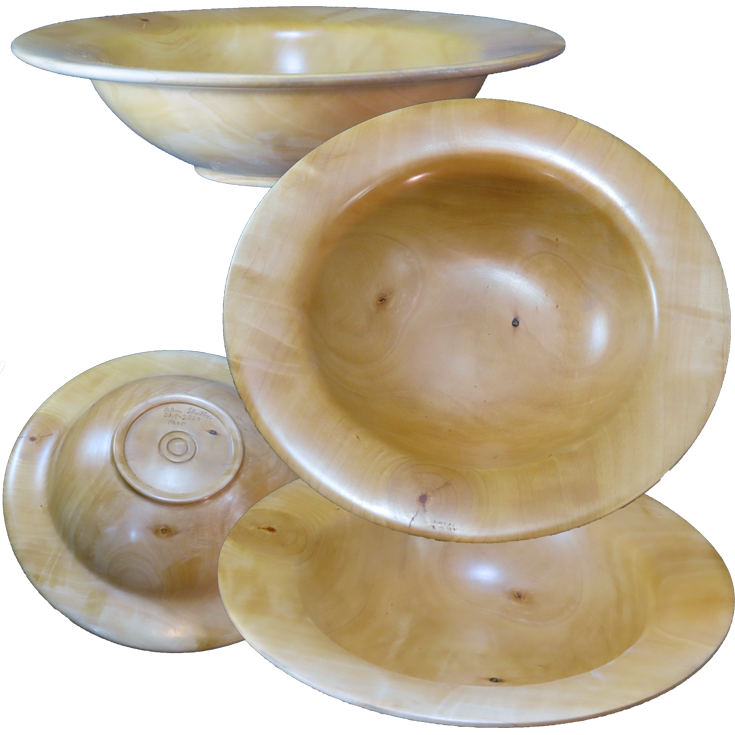
This pear wood comes from a tree that blew down last summer in a micro burst. At that time, I rough turned a large chunk of the wood and sealed it with Bowl Saver. Then, put the wood away to dry. Here in Utah, the climate is very dry. It has been drying for about eight months.
Periodically. I weighed the bowl, recording the weight and date. Once the weight stabilized the wood is dry and ready to finish turning.
The bowl is about 8 inches diameter, finished with walnut oil and buffed with tripoli, white diamond, and carnauba wax.
My disappointment with this bowl is that it was supposed to be much larger, probably 5-6 inches more in diameter and a couple more inches deeper. Despite my disappointment, this is a pretty bowl.
Enjoy!
Woodturning A Rose By Any Other Name
This video is also posted to YouTube, Vimeo, and FaceBook. Where best? – Right Here!
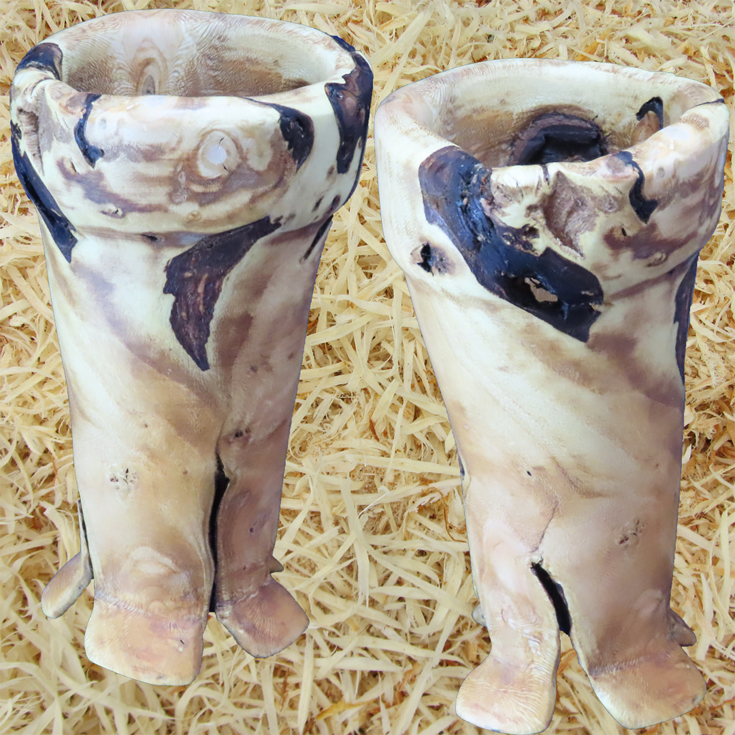
While redoing some landscape in my yard, I removed an old rose bush including the root ball. This root was a bugger to dig out. When I realized how big it was, I just had to try turning it.
I’ve turned other smaller rose roots previously. They are always unique experiences – sometimes frustrating experiences. I planned to turn this one completely while wet. However, when I started sanding it, the sandpaper loaded up with the wet wood almost immediately. I put it away in a paper bag for a day until the surface moisture could evaporate. Then I could sand it and let it warp.
My day turned into two weeks and it beat me to the warp stage. This caused other problems in trying to sand and finish this vase.
However, the delay also generated an opportunity to change the design. The individual roots at the bottom had spread. Incorporating these roots into the design instead of parting them off radically changed (and improved) the result.
I’ll keep a lookout for another large rose root.
My vase is 7 inches tall and about 4 inches in diameter, finished with walnut oil. It has developed its own character.
Enjoy!
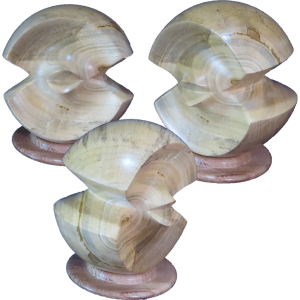
Multi Axis Woodturning Virus Free Kiss Thingy
 This video is also posted on YouTube, Vimeo, and FaceBook. Best right here where we are!
I have been informed that the original was probably by Luc Deroo.
When I saw a similar project in a past issue of American Woodturner, I immediately knew how I would turn this “Thingy”. After turning several projects based on Max Brosi’s work, I had developed the background and experience base to turn this without any previous demonstration.
The wood species is unknown but could be maple. It is 4″ diameter finished with shellac. The wood is from a standing dead tree from my yard. It was not soppy wet but not totally dry.
Enjoy!
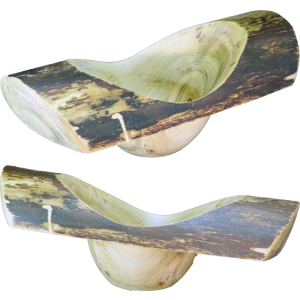
Woodturning Limb Bowl As Winged Emerging Bowl
 This video is also posted on YouTube, Vimeo, and FaceBook. Best right here!
While on the topic of limb bowls, I cut down a small dead tree from my yard. I decided to turn yet another style of limb bowl. This one combines some of the emerging bowl concepts with natural edge and limb bowl concepts.
The wood is mystery wood, could be maple of some sort. It is finished with walnut oil. 10 x 4.
Be sure to check out the other styles of limb bowls in these recent videos:
- Woodturning Limb Bowl – It Learned A New Trick (this link)
- Woodturning Limb Bowl With Bird’s Beak (this link)
Enjoy!
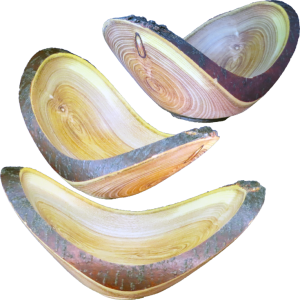
Woodturning Limb Bowl With Bird’s Beak
 This video is also posted to YouTube, Vimeo, and FaceBook. Best? Right Here!
I had a little more of that locust branch from the last video.
Why not turn another similar but different bowl – One where I could vary a couple of things and see what came from it.
So, here we are. Since it is a little shorter but the same diameter, the sides are steeper. I also left the walls thicker overall and thicker near the base (although that is contrary to general practice). Fortunately, I was able to save the bark.
This one is just under 7 inches long. It is an interesting contrast with last week’s bowl. Both have their place. It is finished with walnut oil.
Enjoy!
Woodturning Limb Bowl – It Learned A New Trick
 This video is also posted on YouTube, Vimeo, and FaceBook. But you are already here where best!
Generally, I like large diameter trunks for bowl turning.
But sometimes, I’m presented with smaller wood that tells me it can be beautiful.
I work with what I have.
This bowl is from honey locust. Final size is about 9×3. It is finished with walnut oil.
Enjoy!