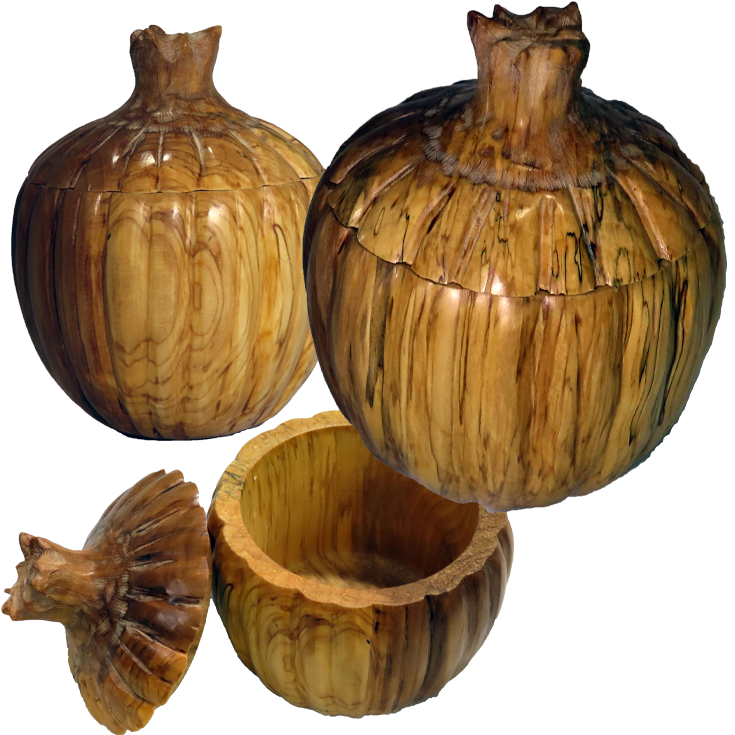
Woodturning – Carved Pumpkin Box
For convenience for some, this video is also posted on YouTube and FaceBook.
Having been inspired by Emma Cook’s demonstration in the Woodturners Worldwide online symposium, I had to turn and carve my own pumpkin box. While I was inspired by Emma’s work, I had to do it my way. She used basswood, a soft easily carved wood but horrible to turn. I used spalted sweet gum, harder and had multiple checks to deal with. She used sharp carving gouges. I used rotary burrs and disks. Simply put. My way.
Since I did not carve a Jack-o-lantern face on my pumpkin, it will have a longer life beyond the harvest season.
Plan now for the Ornament Challenge during November 2020. More info at this link.
Enjoy!
2020 Christmas Ornament Challenge Announcement
For convenience, this video is also posted on YouTube and FaceBook.
The annual Christmas Ornament Challenge will open soon to accept your ornaments during the month of November.
The challenge is open to all crafts, all materials. We’ve tried to make as few rules as possible to allow exploration.
This year, we’ll also offer Interactive Remote Demonstrations at no charge to clubs with with the most people participating.
Create your favorite ornament in your favorite media with your favorite tools. Details and submit at www.OrnamentChallenge.com
Please join the fun as creator or viewer.
Enjoy!
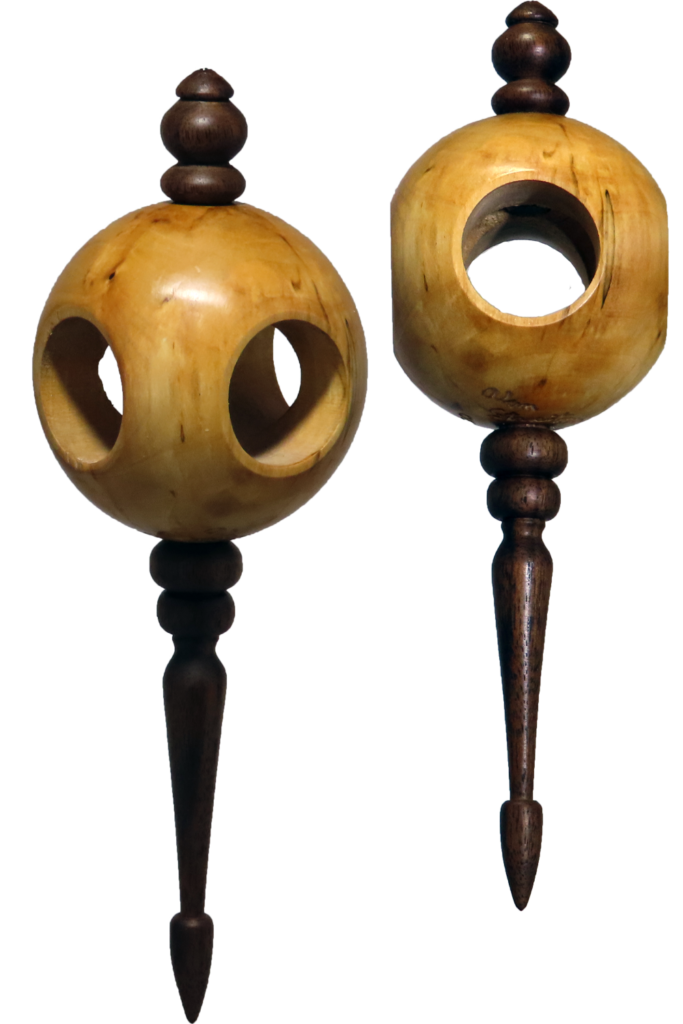
Woodturning – Simple Approach To Ornament Windows
For convenience for some, this video is also posted on YouTube and Facebook. Best Right here!
With the Christmas Ornament Challenge rapidly approaching, I am exploring different ways to peer into the center of an ornament.
Turning inside-out is one way and is the subject of other videos.
In this case, I am extending the perfect sphere process to create a globe than bore windows to look inside.
Egg Chuck Link.
Woodturn Simple Egg Chuck From PVC Fitting
Enjoy!
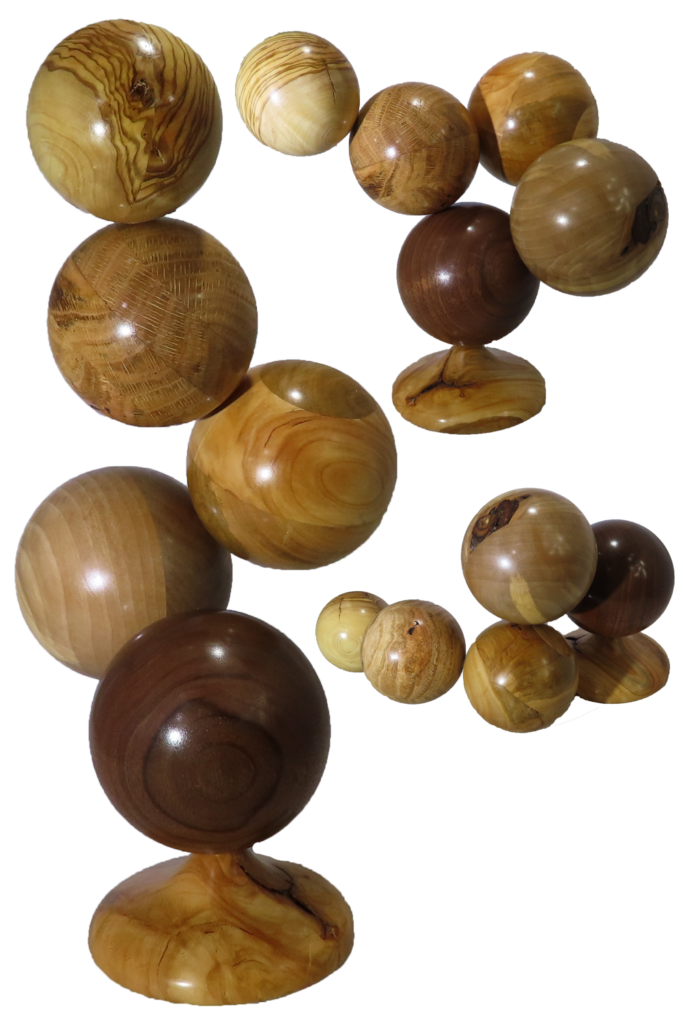
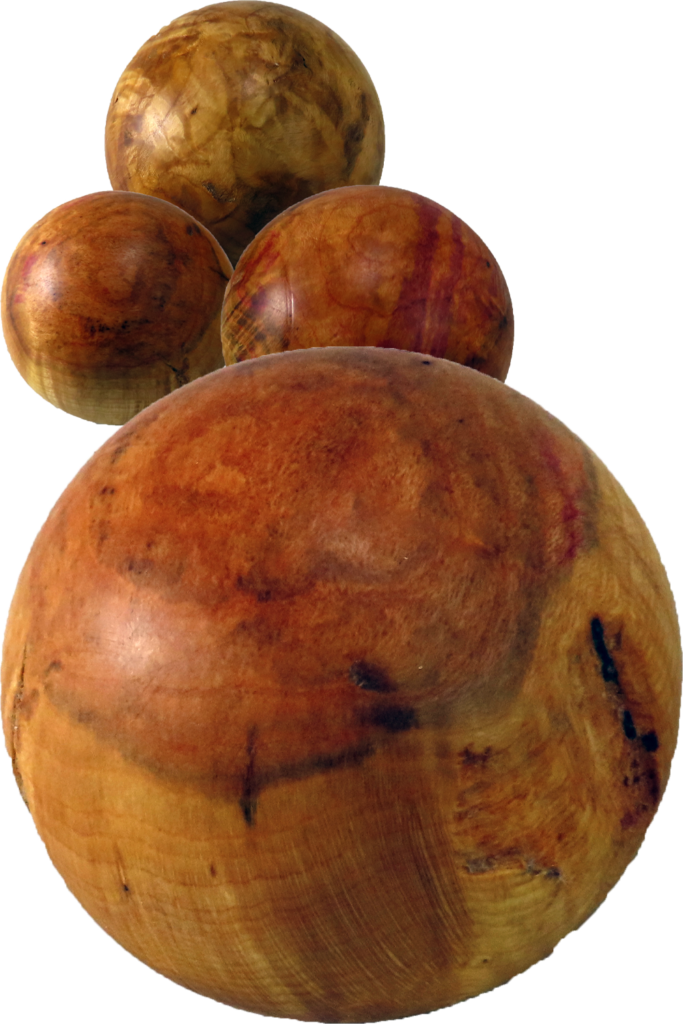
Woodturning – Adjustable Sphere Tower
For convenience, this video is also posted on YouTube and FaceBook.
I am not sure how this came to mind. Maybe by seeing some photos at AAW.
Five spheres: walnut, sweet gum, cherry, ash, and olive. I did not want to fix the spheres in a permanent position. I chose to connect them with short 1/4″ dowels. Solid spheres would be too heavy so I planned to hollow them.
I glued up the wood but the very center joint was a paper joint. A paper joint is like all the others except for a sheet of plain paper between the two glued surfaces.
All are finished with shellac friction polish.
Enjoy!
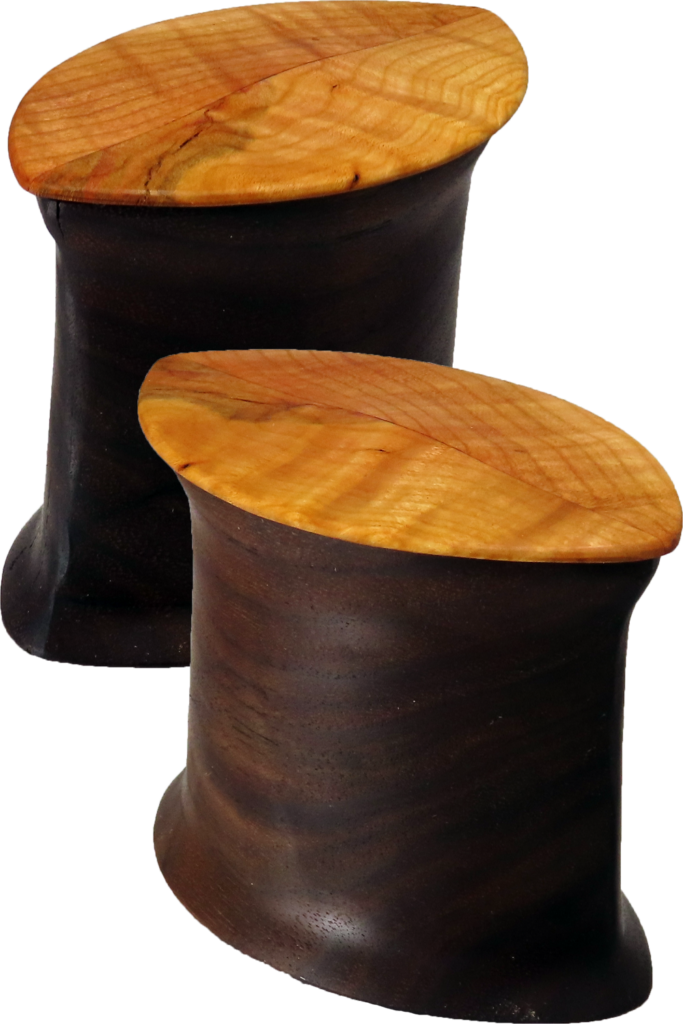
Adaptive Woodturning – Salvaging Cross Grain Box
For convenience, this video is also posted on YouTube and FaceBook. Best to stay right here at As Wood Turns
My last video project was nearly a disaster. I saved it by the skin of my teeth. The original walnut box blew up on the lathe. I substituted a different base and saved the day.
I was disappointed. I picked up the pieces and wondered what, if anything, could be done with it – other than firewood.
I sawed off the ragged edges of the two biggest pieces and glued them together. Amazingly, it worked. The shape was different. But, after all this, it was incomplete – it lacked a lid.
How does a woodturner make a lid that is not round. I thought about it and considered carving it. I talked with my wife. She suggested turning it but slicing it like the box had been. She is a smart turner although she does not turn.
The rest is in the video…
Symposium Link:
https://www.woodturnersworldwide.com/
Use “Alan” as a discount code.
Enjoy!
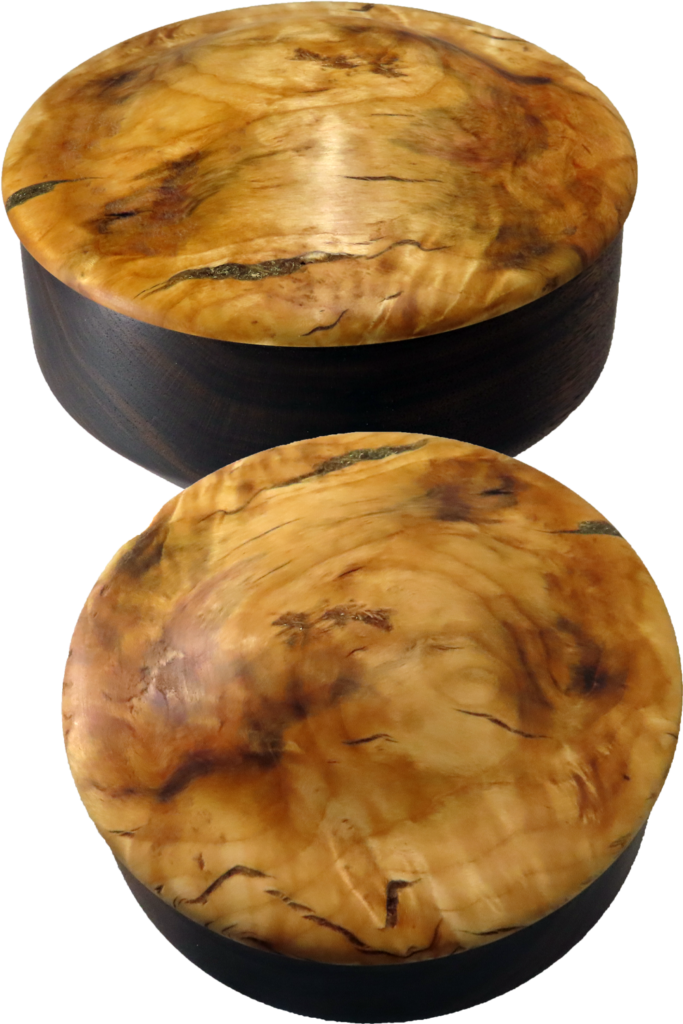
Woodturning Cross Grain Box – This One Had Other Plans
For convenience, this video is also posted on YouTube and FaceBook. Best Right Here!
Recently, our club had a remote demonstration of turning a cross grain box. The demonstration was not so remote for myself since our club president came to my shop to do the demonstration. After a great demonstration, I usually want to turn the same or similar project myself.
A cross grain box is defined by the grain of the wood running perpendicular to the turning axis. This results in a very different grain pattern than and end grain box. Taking advantage of the grain orientation, a cross grain box is often larger in diameter than in height.
However, the seasonal movement of wood is also different. With humidity changes, an end grain box will grow/shrink uniformly at the joint between base and lid. In this case, the lid can be tight if desired. Cross grain does not grow/shrink uniformly. Consequently, the joint must be more loose so that the pieces do not lock together.
Another advantage of a cross grain box then is that the material for the lid may be different than the material for the base. Different species of wood grow/shrink differently. A cross grain box with different wood for lid and box leverages its tolerance for different expansion rates.
In this case, the box base is walnut while the lid is plum burl. It is 5 inches by 3 inches overall and finished with beeswax and mineral oil. The beeswax leaves a pleasant scent to the interior of the box.
Enjoy!
Woodturning 3D Holographic Display
For convenience, this video is also posted on YouTube, Vimeo, and FaceBook. Where to go? Just stay right here at As Wood Turns.
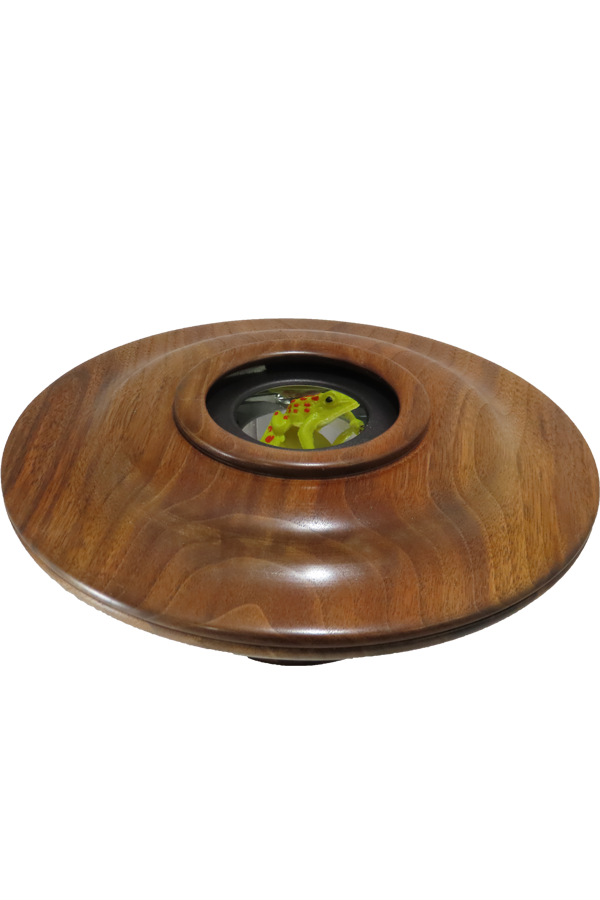
My wife found a 3-D Mirascope on Amazon. This is a child’s toy exploring 3-D projection. It uses a pair of parabolic mirrors to project the hologram.
As is, while interesting to view the hologram, the case is black and uninteresting. My task is to elevate this toy to be worthy of being on display.
I turned two bowl like pieces of walnut and fitted the toy inside. The fitting is the hard part.
The wood is walnut just over seven inches diameter and about three inches in total height. It is finished with shellac friction polish.
From toy box to display – Nice!
Enjoy!
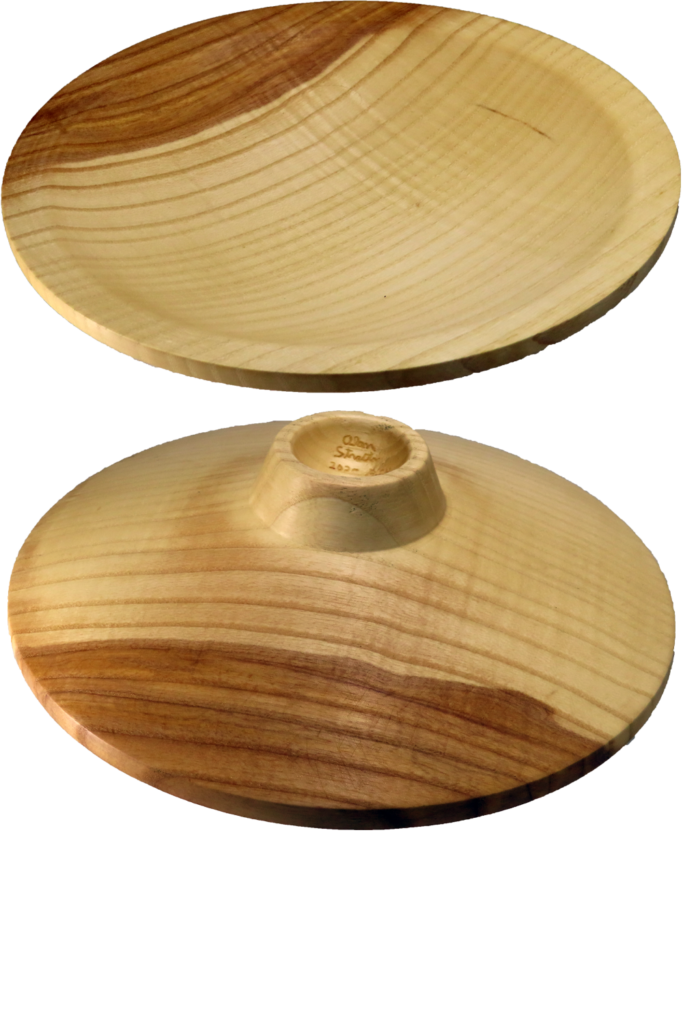
Woodturning Elevated Platter / Bowl – Patience Rewarded
For convenience, this video is also posted on YouTube, Vimeo, and FaceBook. Since you are here, why go anywhere else?
This item is either a bowl or a platter depending on your definition. To me, a bowl is perhaps more of a container and a platter has a flat inside surface. This one is half and half.
The wood is ash, harvested green, turned rough, dried, then remounted and completed. Total time is about 14 months. The platter is finished with walnut oil. Dimensions 9 inches diameter and 2 inches high.
This design has its own elegance.
Enjoy!
Woodturning Beautiful Burl Bowl From Ugly Wood
For convenience, this video is also posted on YouTube, Vimeo, and YouTube. Where Best? You are already here!
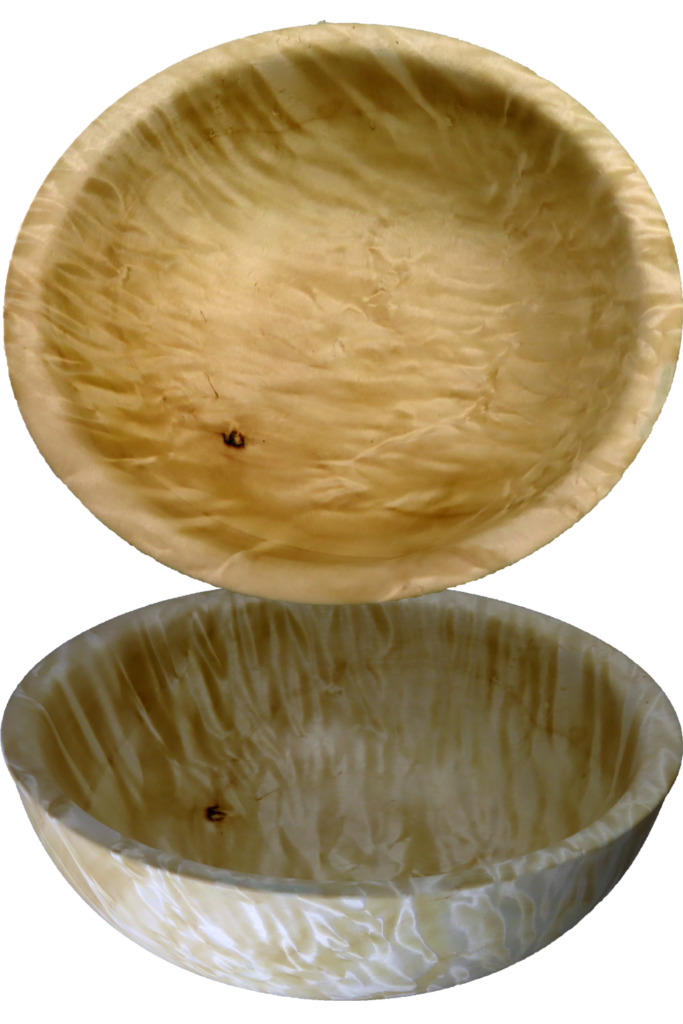
I love turned wood bowls. However, the best ones take time.
I rough turned this bowl from a box elder burl about eight months ago. Since then, the rough bowl has been drying.
It is dry now and I remounted it and finished the bowl. Now I can see beautiful burl figure in the wood.
Well worth the wait. Just for you, I have compressed the time so you can see the whole process in one video.
Enjoy!
Woodturning Perfect Spheres – For Wise Turners
For convenience, this video is also posted on YouTube, Vimeo, and FaceBook. Best place? – You are already here!
Whenever I see someone promote a sphere jig, a conflict boils up in me.
On one hand, I respect someone who can create a good jig and appreciate the apparatus.
On the other hand, a sphere jig is a terrible expense for most turners when the same result can be achieved in the same amount of time with typical tools and trivial expense. I would rather use my budget to purchase a good multi-purpose tool.
Well, I saw another and decided to again present the process to turn a perfect sphere without any expensive jig. This process combines the octagon method and cup centers. There sphere in this video took only 27 minutes from the cylinder stage to completed stage. I did not work quickly because I did not intend for it to be a race. However, after realizing how quickly the sphere turned, I am issuing a challenge.
The Challenge is in two parts: For turners who already have a jig and for turners who do not have a jig. For both groups, start when you have a cylinder of the chosen diameter.
Turners with a jig:
Using your jig – any jig – turn a sphere at your standard pace (not race speed) to completion and report your time. My time was 27 minutes to finished.
Turners without a jig:
Follow the process in this video. Turn a sphere at your standard pace (not race speed) to completion and report your times. An even better plan is to turn 3 spheres to cement the process in your brain and body.
Instead of blowing the budget on a special purpose tool, develop a basic skill to be used again and again in the future.
Enjoy!
spherejig #sphere #woodturning #woodlathe #turning #woodworking #AlanStratton #DIY #woodturningprojects #video #spheresfordummies