Woodturning Inside Out Triple Fascination
In case of viewing difficulty, this is also posted on YouTube(link) and FaceBook(link)
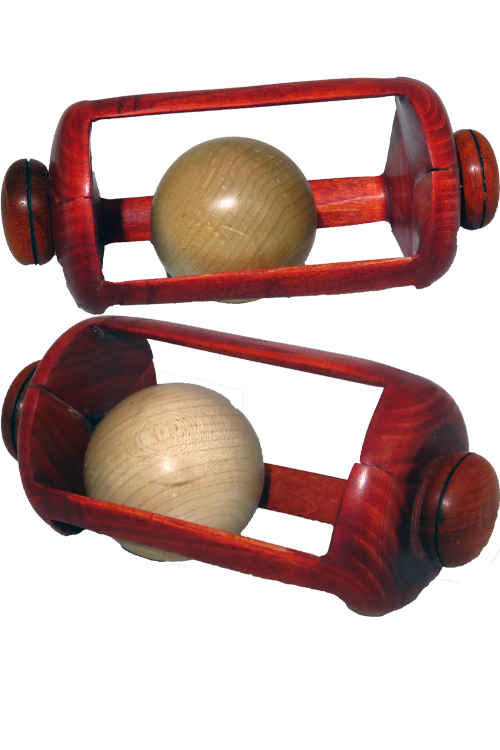
In preparing for a remote demonstration, I guess I went crazy with some inside out turnings. An inside out turning can be fascinating. For an inside out turning, staves are temporarily fastened together while a profile is cut. Then each stave is rotated and permanently joined before turning another profile. The first turning is then on the inside while the second turning is outside.
Usually an inside out turning uses two or four staves. A two stave project is flat with an inner cavity. A four stave is more 3 dimensional with four windows into the interior. Sometimes, another object is placed inside the final turning.
A three stave inside out turning is a little more complex because the initial stock must be cut at a 60 degree angle. After that, the process is the same. However, a triple stave turning has larger windows into the interior. I like the larger windows.
While I was at it, I made two turnings with a captured sphere inside and one with an LED tea light inside.
Here’s a link to the perfect sphere turning video:
Enjoy!
Woodturning Freeform Segmented Vase
In case of viewing difficulty, this video is also posted on YouTube(link) and FaceBook(link).
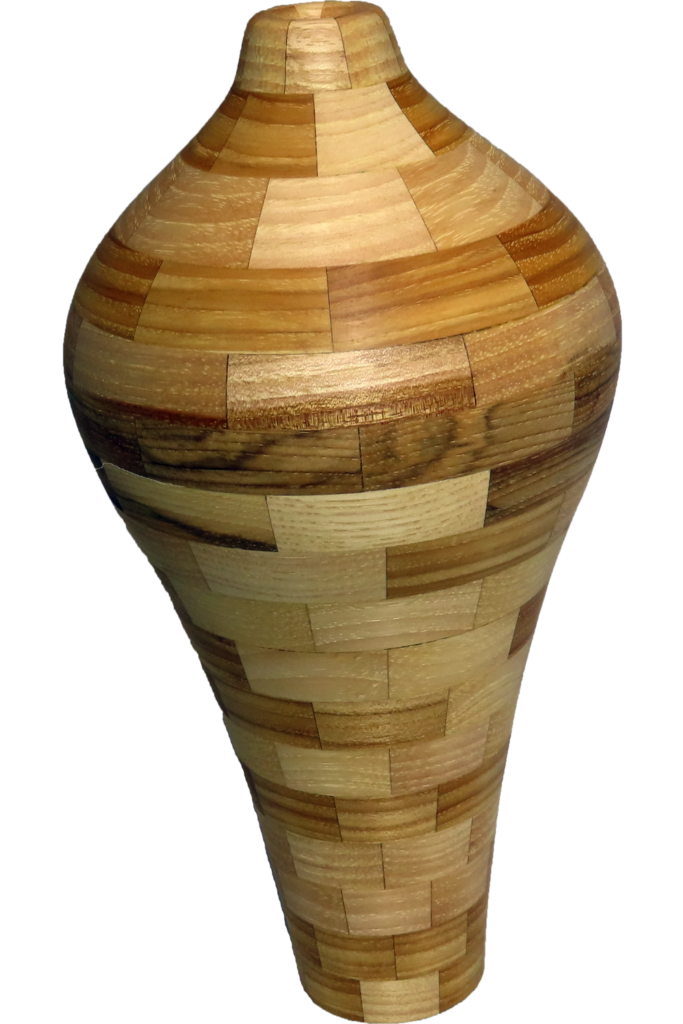
Most often when preparing to make a segmented project, I have to prepare a detailed plan to know what size rings to make. However, not so in this project. I made a total of 17 rings of hickory/pecan flooring wood. (eight segments per ring) Then I stacked them various ways until the wood said “go turn me”.
I also speed glued the rings together. It turns out that each ring does not have its glue fully cured before being glued to the next one. But first-
I turned the exterior nearly to final shape with all rings assembled together on a threaded rod. Then I glued them all together in three sections, hollowed each section, then glued the final form together.
This hickory/pecan vase is finished with walnut oil. It is 10 inches tall and 5 inches diameter. Segments total 136.
My steady rest from a couple of weeks ago also came in quite handy.
Enjoy!
Woodturning Classic Bowl – From Tree To Table
In case this video cannot display here, it is also posted on YouTube and FaceBook.
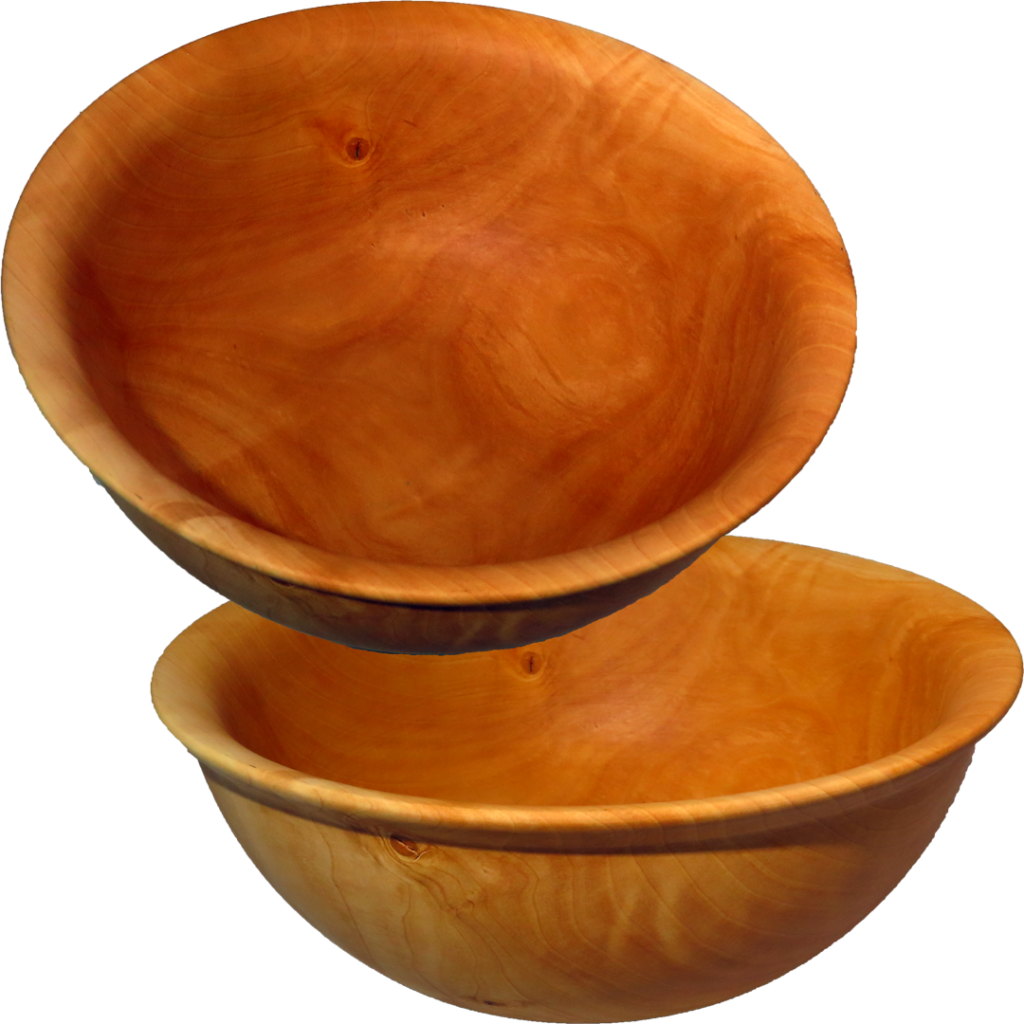
I love turning green wood when I can get it. In this case, a microburst blew down a neighbor’s pear tree. Ornamental pear is often called Bradford Pear. After helping clear the trunk from my neighbor’s back yard, I had several pieces to turn. This wood came from a half section of that wood.
I rough turned the bowl, sealed it and put it away. Periodically, I weighed it and recorded the weight. From August 2019 to February 2021, the wood lost 31% of its weight. That loss is typical in my experience for fresh green wood.
The finished bowl is 10 inches diameter and 4 inches tall. Walnut oil provides a matt finish.
Enjoy!
Woodturning Segmented Dual Profile Vase
In case of this video not playing correctly here, it is also posted on YouTube and FaceBook.
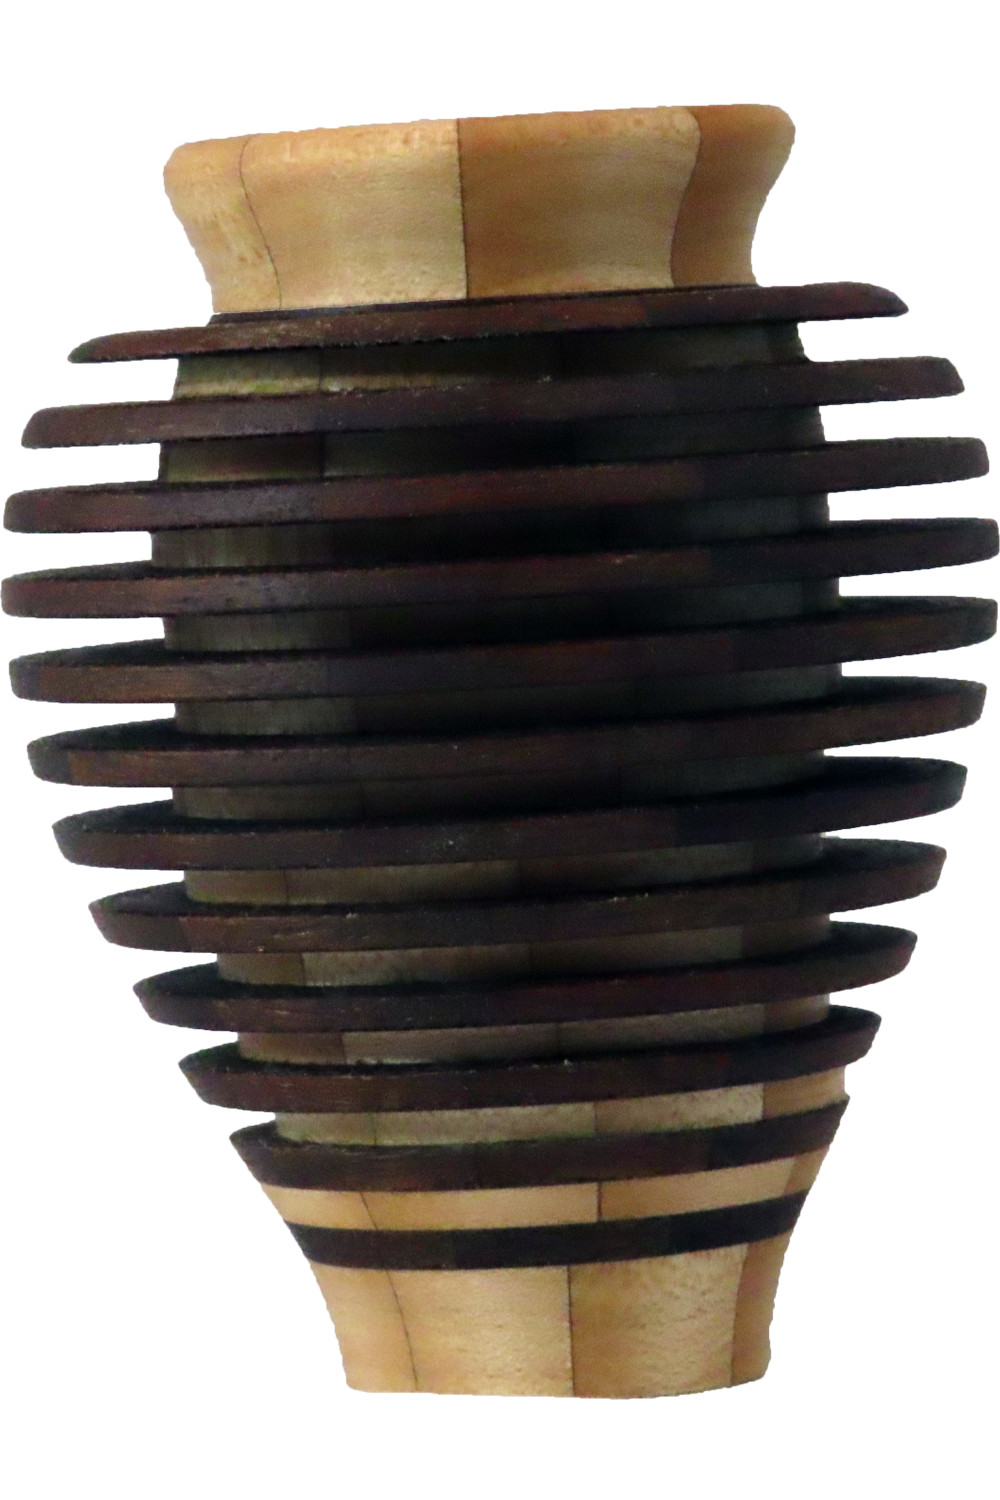
A vase can be pretty. However, these vases are more dynamic. As you look at them the vase has two profiles: a typical outer profile and an inner profile.
I started with eight segmented rings of walnut and nine segmented rings of maple. Each ring has eight segments. Each of these rings was sawn into three rings. In addition, I made top and bottom rings for each vase. Total segment count is 424 segments.
The thinner walnut rings were stacked onto a mandrel and turned for the outer profile. The thinner maple rings were similarly turned for the inner profile.
Then alternating rings were glued to top and bottom rings to form the vase. Therefore, this process yields two similar vases. Final finish is walnut oil.
Please see my video on splitting segmented rings.
Woodturning – Cutting Segmented Rings on Lathe, Band Saw and Table Saw
Enjoy!
Woodturning Ring Tray – A Perfect Wedding Gift
In case this video cannot be viewed here, it is also posted on YouTube and FaceBook.
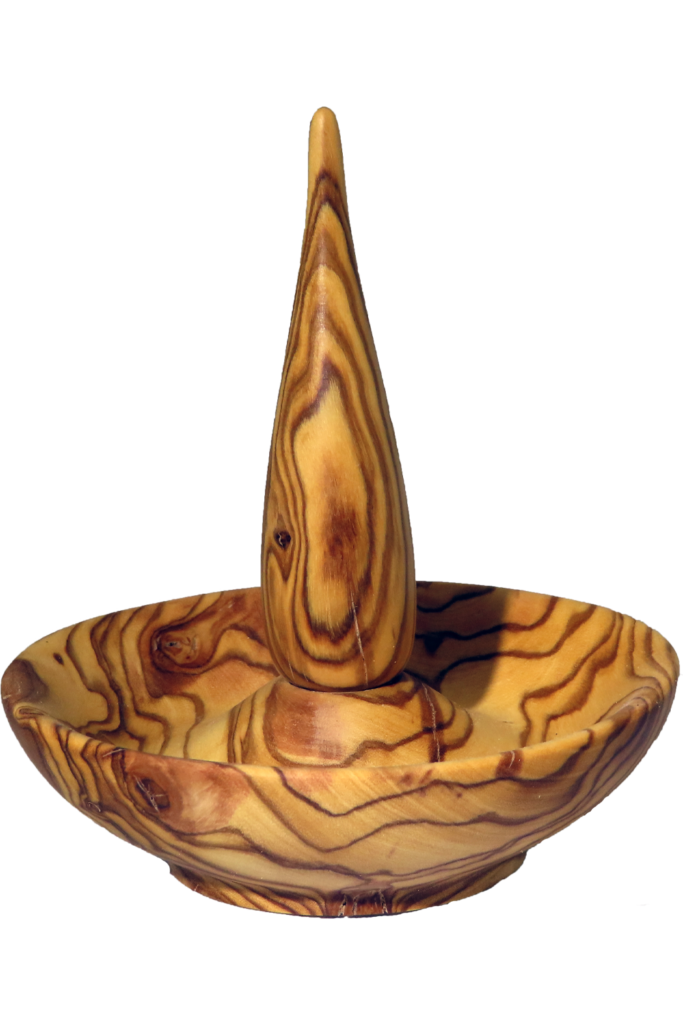
For a couple of wedding presents, I decided on ring holders.
The design includes a spindle for the ring plus a tray at the base for other small items. The shape of the dish keeps the small items spread out near the other edge of the dish portion. Pefect for small jewelry items.
The wood is olive from Arizona. I had to fill portions with epoxy and brass power. The piece is finished with walnut oil. These are only about 4 to 5 inches in diameter and about 4 to 5 inches tall.
Resources:
Pin Face Plate and Threaded Wood Face Plates For Woodturning
Enjoy!
Woodturning – My DIY Steady Rest Is Still Steady
httpvhhttps://youtu.be/BBjhttps://youtu.be/BBjps1xNV3sps1xNV3s
For the convenience of some, this video is also posted on YouTube and FaceBook.
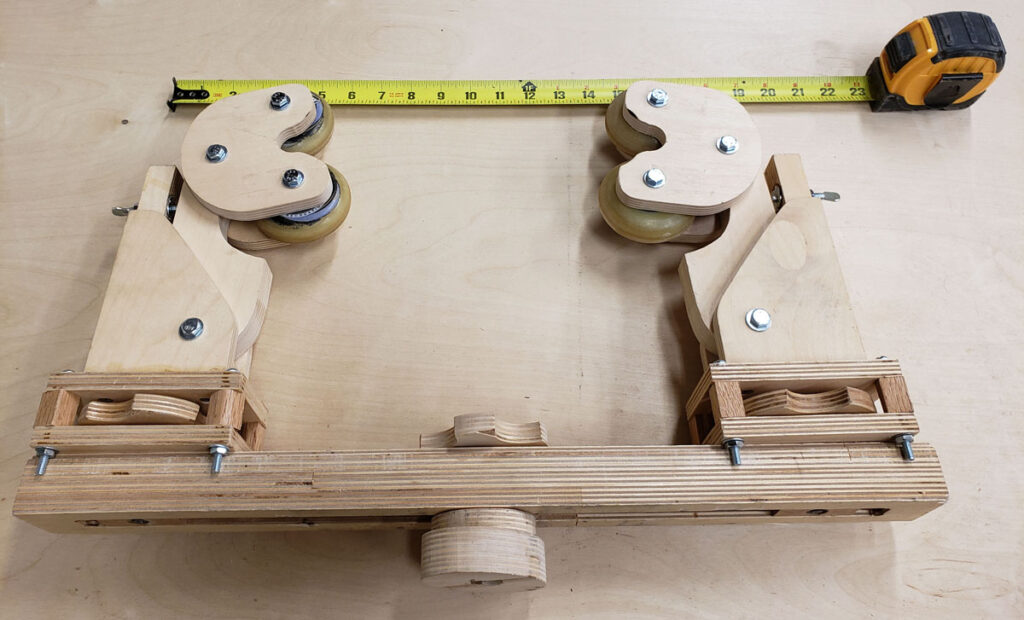
Several years ago, I researched steady rests for my lathe. A steady rest resists lateral pressure that may push the wood out of alignment or even out of the chuck. It works great on long spindles.
After making my steady rest, I revised it so that I could bring the tool rest closer to the steady rest. The original steady rest and the wide banjo on my lathe forced each other to be further away.
A revised base solved that problem. A tricky knob box reduced the need for a wider base. The knob box enabled my steady to be adjustable at right angles to the turning axis.
My revised steady has stood the test of time. I have not felt the need to change it again. There are minor improvements that could be made to make it prettier but would not change how it functions.
I have been asked about measured drawings. However, the steady rest should be customized for different lathes since axis height, bed gaps, bed thickness, bed width and turning styles all vary.
In this video, I am showing the principles involved with my steady rest. Once you understand the principles, you can adapt it to your lathe and style. I would appreciate hearing back what you have done to improve this design.
Previous Posts:
Update To My DIY Lathe Steady Rest
My DIY Lathe Steady Rest
Enjoy!
Woodturning Vase – Wet To Dry – Special Dye Finish
For convenience or in case of problems, this post is also available on YouTube and FaceBook.
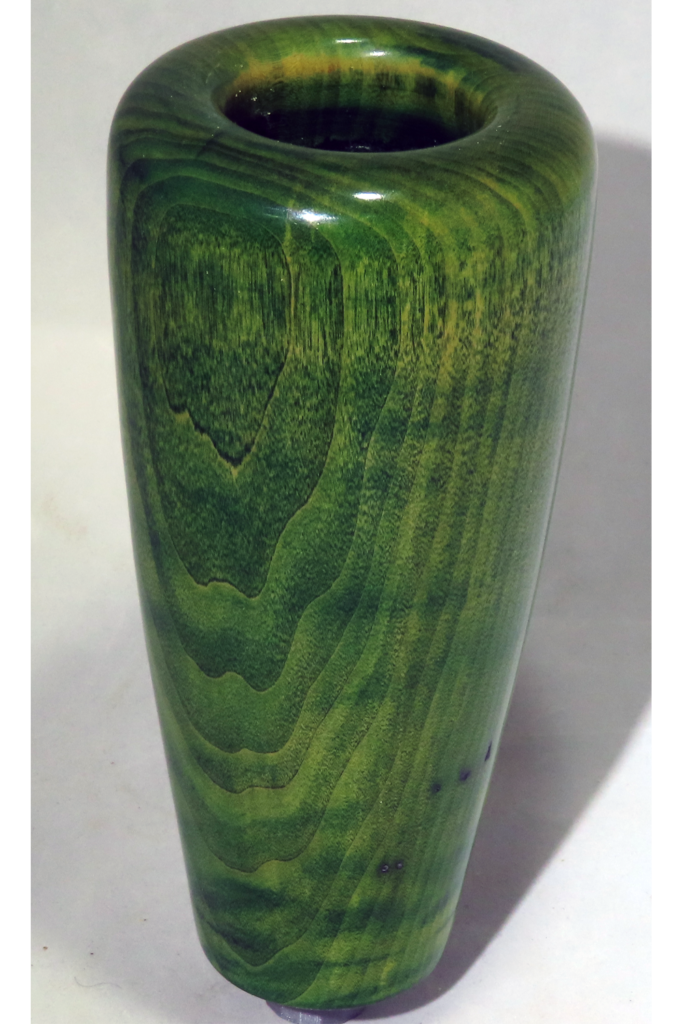
During the recent Woodturner’s Worldwide online symposium, there were many great demonstrations. Of course a couple were mine. But another that I will attempt to emulate was by Phil Irons. In his demonstration, he used dye to finish light colored wood vases.
In this process, the wood is not sanded before applying dye. The wood is scraped, then dye is applied. After the dye is dry, it can be sanded with a coarse grit. However, the dye is not completely removed with this sanding.
Then more dye is applied and sanded with the next grit. I used a green dye until the last application. For the last application, I applied yellow dye which I felt was compatible with the green.
After many coats of rattle-can lacquer, I sanded the lacquer wet to remove the orange peel effect in the finish. The applied another coat of lacquer followed by a good buffing.
Some resources:
Update To My DIY Lathe Steady Rest (link)
Phil’s triangular scraper is available on Amazon.com “Woodcut Tools Irons Shear Scraper”
Enjoy!
Woodturning – Cutting Segmented Rings on Lathe, Band Saw and Table Saw
Thanks to each who commented on my last post. There were a lot of great ideas. Many focused on using a band saw. For this video, I show changes to the original jig for the table saw plus some examples for cutting rings on the lathe and bandsaw.
Each approach has its own strengths and limitations.
Table saw:
Can handle large and small ring sizes.
Slight limitation due to segment width vs saw height.
Takes a wide kerf depending on saw blade.
Band saw:
Narrow saw kerf
Jig and saw capacity limit larger ring sizes.
Lathe
Capacity limitation is moot since the lathe capacity limits ring size anyway.
Requires some form of mounting
For some techniques, I paid a visit to Frank Young, who has been a guest previously on this channel.
Splitting on the lathe:
I demonstrate an unsupported cut risking the ring breaking.
Frank demonstrates cutting while the offset is held securely
Splitting on a bandsaw:
Frank demonstrates his jig for safely and accurately cutting on the band saw.
Splitting on a table saw.
I show updates to my jig for additional safety while cutting on the table saw.
Which technique is best? That depends on your equipment, your project, your skill level. Best of all is to have a variety of techniques available to choose from and to adapt to different circumstances.
Some sources:
Live Tailstock Chuck Adapter: 1 in. x 8tpi – #2MT Shaft – Penn State Industries $36.95
Magswitch MagJig (various capacities) Amazon.com
Enjoy!
Woodturning – Table Saw Cutting Jig For Thin Segmented Rings
For convenience or if there are problems viewing this page, this video is also posted on YouTube and FaceBook.
Help. Please apply your creativity to my problem.
As I create more segmented projects, I like the look of thin segment rings. To me, thick segments look blocky many times.
The segmented woodturning books recommend milling wood stock to thickness. This seems to be a huge waste of wood. Alternatively, some recommend removing excess thickness while mounted on the lathe – again, a huge waste of wood. Some go so far as to splitting a segment ring with a parting tool. While this does not waste so much wood, when a segment ring is parted off, there is some excitement while the newly parted ring spins freely on the lathe and frequently breaks.
Some woodturners saw segment rings on a bandsaw. With good jigs and fixtures and a finely tuned bandsaw and a very good blade, this can work for smaller diameter rings. For larger rings, the exposed saw in the middle of the ring is a very scary safety risk.
Can I use a table saw? Often table saw jigs use the miter slots. However, this limits how to adjust segment ring thickness.
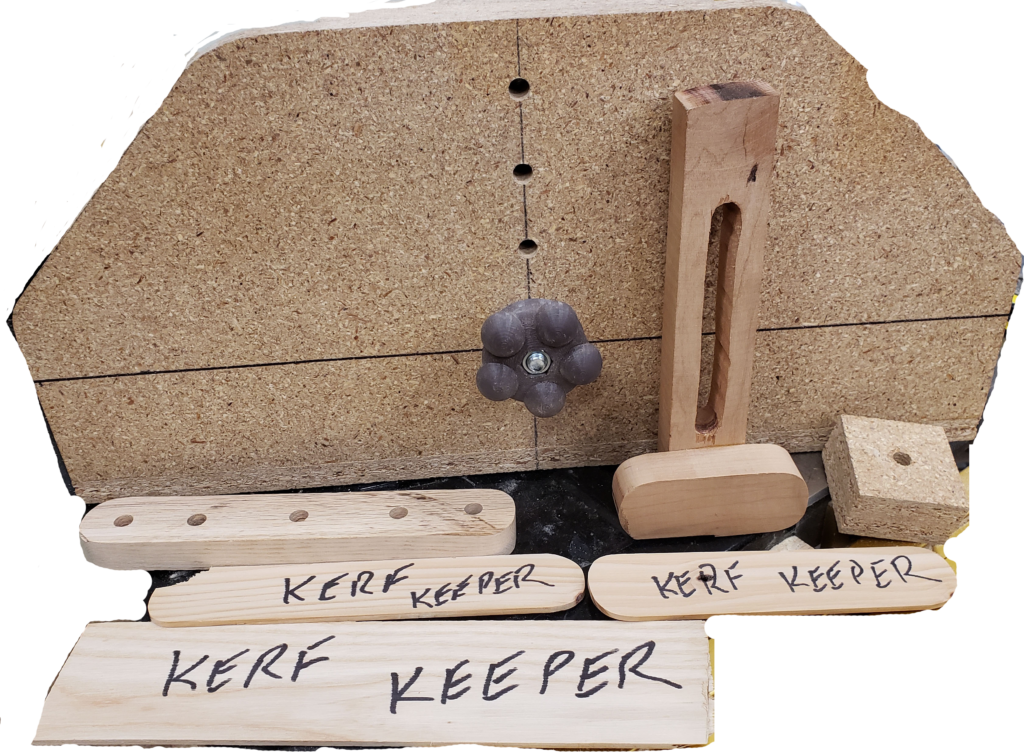
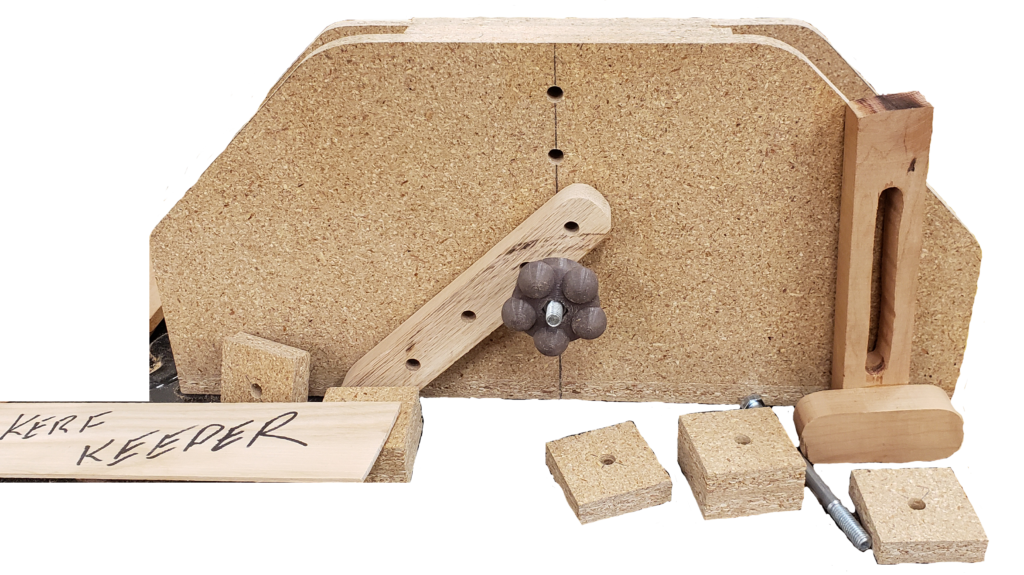
So, I made a box tall enough to support the biggest segment ring I can turn on my lathe. To resist tipping, the box is about 8 inches wide. 20 inches long seems to accommodate large segment rings through the saw blade.
A series of 3/8 inch holes allow a bolt for clamping. Originally, I wanted the lowest bolt to be higher than the maximum saw blade height. This did not work for smaller segment rings.
A large segment ring is secured with a bolt through one of the hole through the center of the segment ring and a cross piece of solid hardwood. Knobs on both ends of the bolt enable secure clamping.
Smaller segment rings cannot clamp the same way due to the possibility of the saw blade hitting the bolt. Instead, I used a different clamp cross piece. This clamping wood has a cross piece to distribute clamp pressure to the full diameter of the segment ring. The clamping bolt is above the segment ring and below a spacer block. Cinching up the bolt clamps the smaller segment ring.
In use, I first make sure the saw blade is as high as possible accounting for how many passes it may take to cut the ring and that the bolt placement will not interfere with the saw blade.
I then position the box against the rip fence and adjust for my target segment ring width.
Then clamp the segment ring in place. Slowly make the first cut, then rotate the segment ring for the next pass. In later passes, clamping pressure may tend to squeeze the saw kerf excessively. A thin slice of wood sized to the saw kerf is my “kerf keeper”
Final cleanup is similar to any other segment ring construction.
Since Covid-19 prevents me from collaborating with other local woodturners, I will appreciate your feedback and suggestions.
Enjoy!
Woodturning – Ornament Adapted From Christmas Ornament Challenge

For the convenience of some or if there are issues viewing this video, it is also posted on YouTube and FaceBook.
In this year’s Christmas Ornament Challenge, I saw an ornament that I would like to emulate for my last ornament for this season. Kurt Wolf-Klammer entered his ornament in the challenge. I thank him for the inspiration.
Essentially, this style requires two elements: a small natural edge bowl from a limb; and a finial. I have turned many of each previously but had never put them together.
I used a 3 inch walnut limb cut several months ago. Fortunately, it did not display end checks since I had sealed the end grain. Some worm holes add extra character and interest.
You may also find inspiration in the rich variety of ornaments from this year and past years at www.OrnamentChallenge.com Plan now for next year’s challenge.
Enjoy!