Woodturning – Three Ways To Turn Flowers
This post is best viewed here on this page. However, in case of difficulty, it is also posted on YouTube and FaceBook.
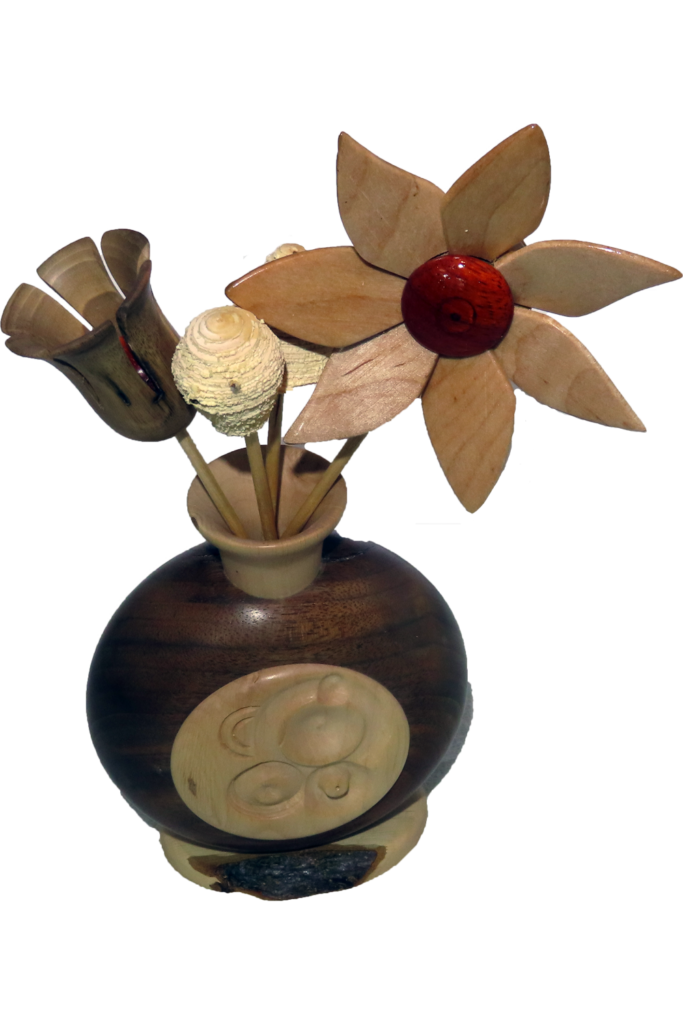
For this post I turn three types of flowers:
- A daisy type with distinct petals. This requires a fixture to hold the petals in place while a small flat is turned at the base to glue to a small round base with a tenon bead. When reversed, the front is turned flat to receive a center. The base and the center are required to hold the petals together.
If you have access to a 3D printer, here is a link to a model file.
https://www.printables.com/model/171818-7-petal-flower-fixture - A tulip type with cut petals. This is turned freeform — not requiring precise dimensions. Also with as many petals that may appear in nature. A contrasting center is also turned for the inside.
- A fuzzy type that did not work as expected. As it turned out, it looks like a bud with a bee on it.
Enjoy!
Woodturning – A Segmented Basket For My Perfect Easter Egg
This is best viewed right here on this page. But, in case of difficulty, it may also be viewed on YouTube and FaceBook.
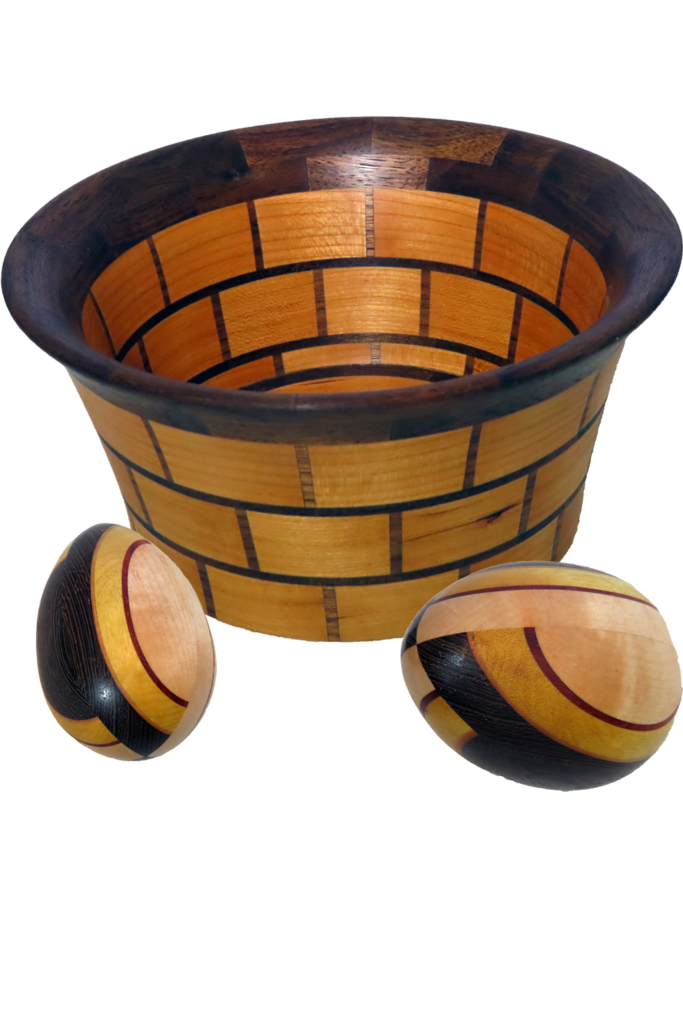
After turning a batch of Easter eggs, I need a basket to hold them. But not an ordinary wood bowl. Instead, one that looks like a basket. For this I need a segmented build up of cherry and walnut.
Build includes:
-Three rings of cherry with twelve segments per ring and twelve small pieces of walnut between each cherry segment.
-Two rings of walnut sliced thin to match the walnut between the cherry.
-Two rings of walnut for the top ring.
-One ring of walnut to fill between the base and the bottom of the wall. (more on this in the video)
-One piece of 3 ply cherry DIY for the base.
Totaling 99 segments or slices.
This basket is finished with walnut oil and measures about seven inches in diameter and three inches in height.
I am really ready for spring with my basket and eggs.
Enjoy!
Woodturning – A Search For The Perfect Egg
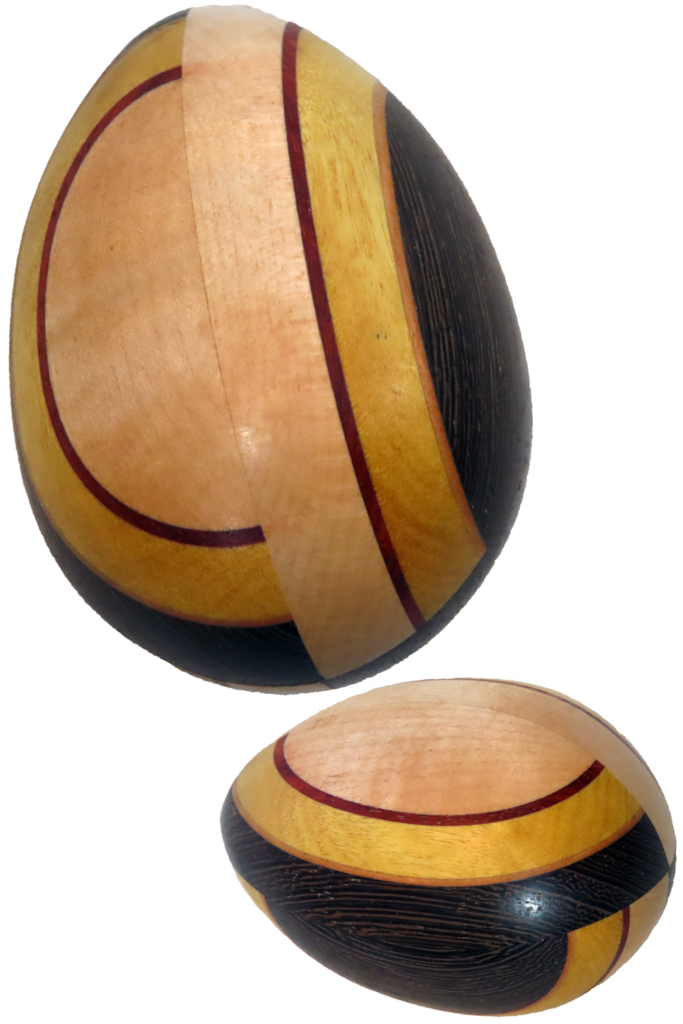
For years, I have searched for the perfect egg. Years ago, I thought I had the answer. An article in a club newsletter gave a formula where the length was 1.29 times the diameter. However, my eggs seems short. So, I researched where that formula came from. I found where. It comes from people using mechanical drawing to draw the “perfect” egg. However, I realized that their “perfect” came from what they could draw.
A trip to the refrigerator for a flat of large free-range eggs and my caliper showed that nothing in that flat complied with that ratio. In reality, my average was closer to 1.39 times the diameter with a lot of variation. I went another step and figured out how to stretch my formula. It was all a waste of time.
My process now is to:
- Turn a cylinder and measure the diameter.
- Mark the big end of the egg.
- Mark one half the diameter to indicate the transition from big end to small end.
- Calculate 1.39 times the diameter. -This is the longest I will turn but shorter is okay too.
- Turn the big end using an adapted octagon method.
- Wing it (chicken wing?) for the small end.
This leaves the small end with a rough nub on the end. The question now is how to finish the end. Three choices include:
- Sand the rough end preferably with a sanding pad.
- Use a doughnut chuck to hold the egg to the lathe.
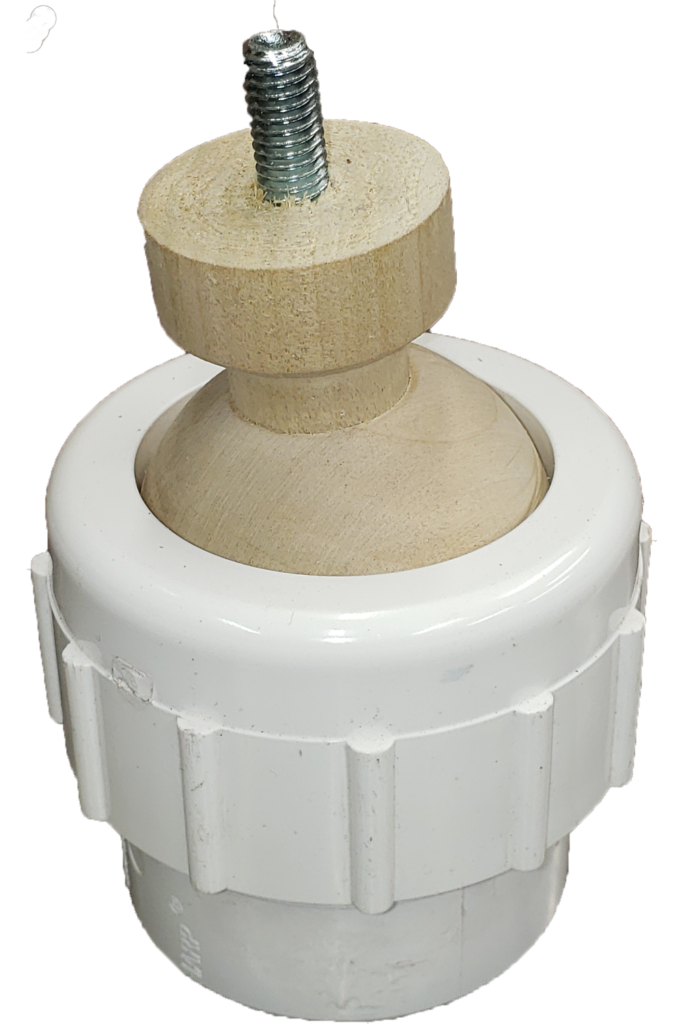
- Use a special egg chuck such as in my video
Woodturn Simple Egg Chuck From PVC Fitting
I am ready for spring.
Enjoy!
Woodturning A Bunny To Hop Into Spring
This video is best viewed right here on this page. However, in case of difficulty, it is also posted on YouTube and FaceBook.
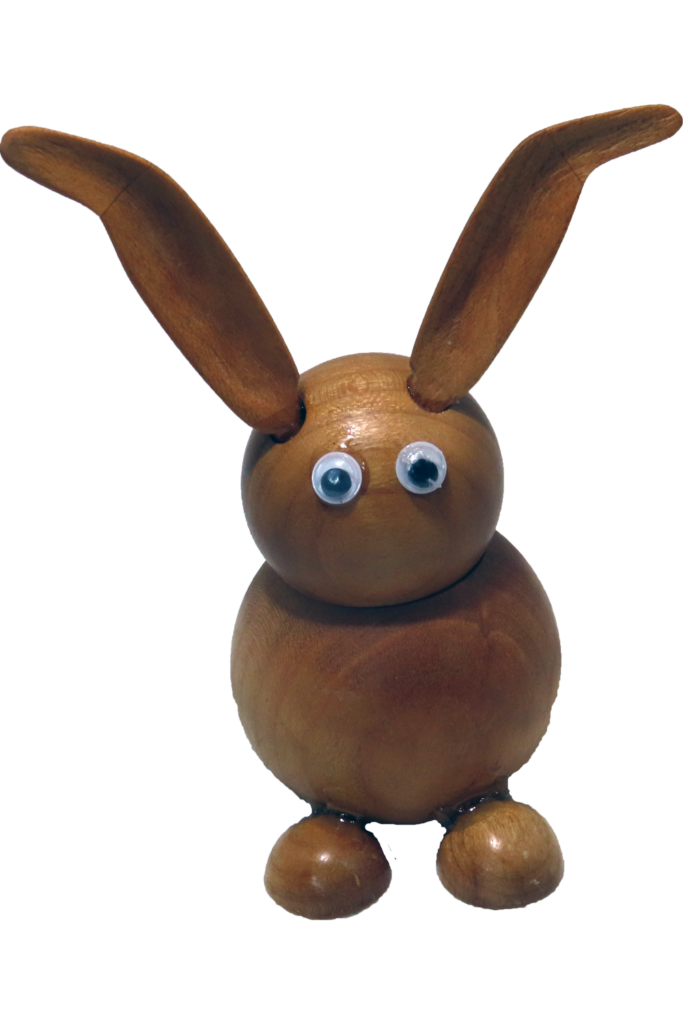
My wife happened to be looking through a magazine and showed me a picture of a craft project the magazine featured. It was a simple project that used two hardware store balls to make a bunny rabbit. She asked if I could make it. But I do not like to make crude projects. I had to upscale it.
My bunny has two different sized hand-turned spheres for the body and the head. I decided to make a small secret compartment in the body sphere.
Instead of a friction joint or a threaded joint from the opposite end of the joint spectrum, I used a bayonet style joint. With this joint, the bunny can be picked up from the head portion and will stay together. It also only take a simple 20 degree twist to separate. So it holds together when needed and comes apart when desired. These joints are available on my Etsy site referenced at the bottom of this page.
I turned two more spheres about 3/4 inch for feet and a tail. These had to be split in half.
The ears are a split turning. After the outer shape was formed, I split them apart, cut a wedge, and reglued the pieces back together at an angle. After the glued dried, I hollowed each ear and finished them.
Many small doses of epoxy holds everything together.
For more on turning a perfect sphere, please see
Woodturning Perfect Spheres – For Wise Turners
- Three bolts are sufficient – four bolts make tightening more difficult
- The bolt heads enter through the top plate and are held by t-nuts in the bottom plate.
- The bolt heads are recessed to protect my hands if I happened to lose track of where they are.
- A 3/4″ hole in the bottom plate received various custom centers to hold spheres or to center smaller objects.
- Inserts for the top plate allow for smaller vessels to be held with the same chuck.
I am ready for spring.
Enjoy!
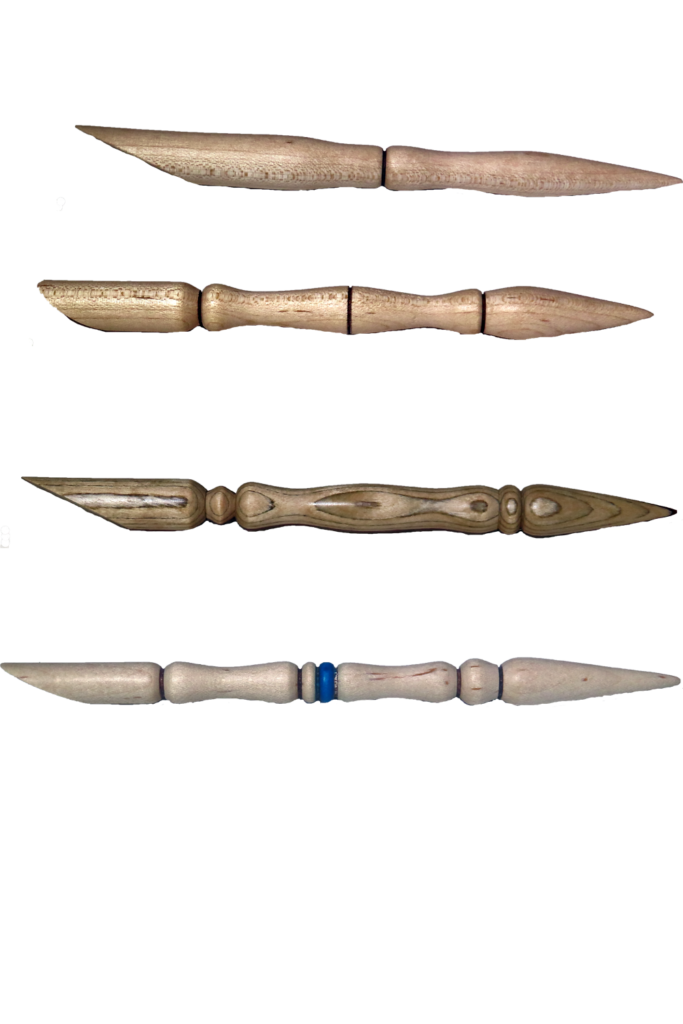
Woodturning Another Batch of Quilting Tools – Special Request
This video post is best viewed on this page. However, in case of difficulty, it is also posted on YouTube and FaceBook.
My sister uses these quilting tools in her quilting to press seams.
She asked me for some more. She must eat them?
They are easy to turn.
Three are maple; 1 is colored laminated wood.
I also used my tri-wire burning tool to accent the pieces.
All are finished with shellac
Enjoy!
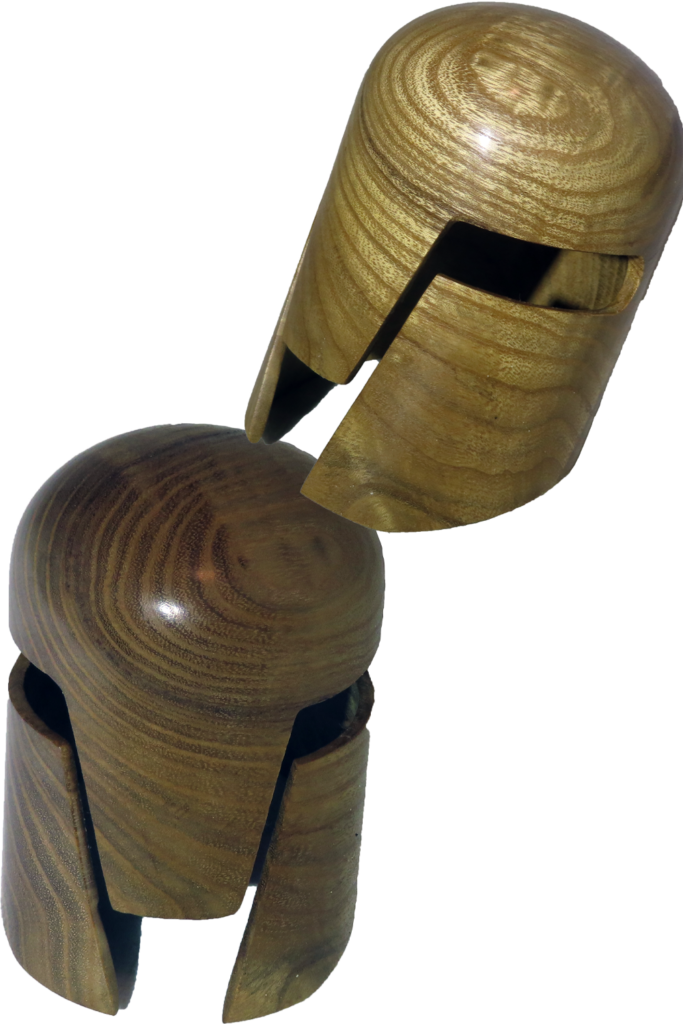
Woodturning & Carving Medieval Helmet
This post is best viewed right here. However, in case of difficulty, it is also posted on YouTube and FaceBook.
This miniature medieval helmet is a hollow form with additional carving. This is based on a demonstration by George Watkins. His helmet was a hybrid wood and resin but he only display turning and carving.
I am not sure what species of wood this is.
Steps:
- Turn and hollow the hollow form.
- Sand a slant back so that the helmet leans back.
- Carve the eye slots and nose guard.
A fun turning and discussion piece.
Walnut oil brings out the color and grain.
Enjoy! But please do not attempt to wear it!
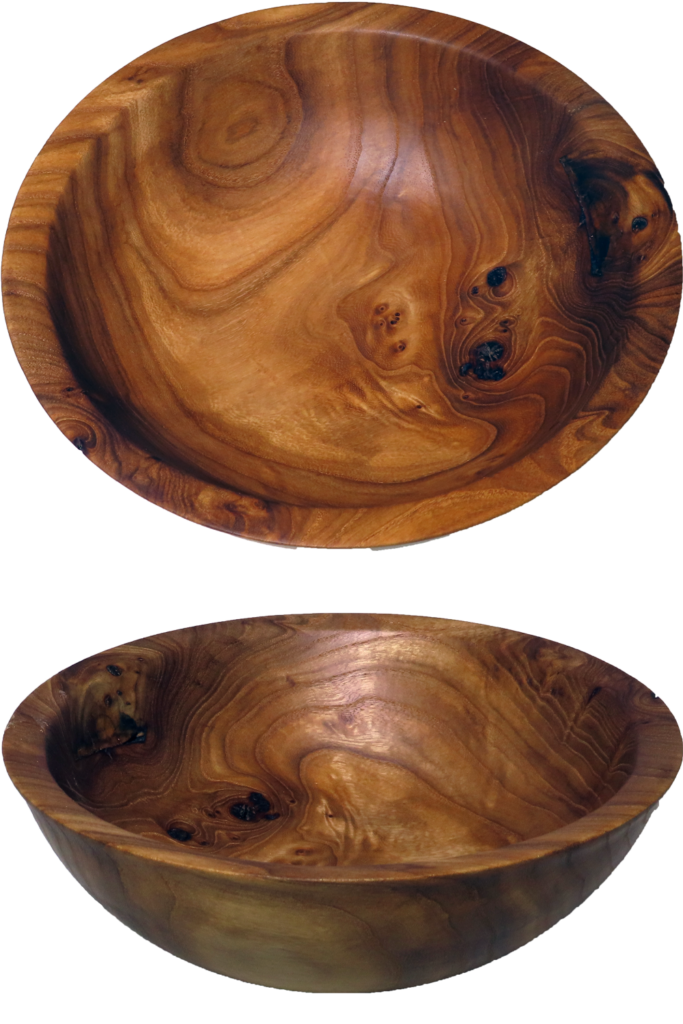
Twice Turned Bowl – Green To Beauty
This video is best viewed right here on this page. However, in case of difficulty, it is also posted on YouTube and FaceBook.
This elm was harvested almost 2 years ago. Whoever cut it down was not a wood turner because the shape of this block of wood was awful. It was trapezoidal with some of the heart side corners cut off. I could have reversed it but chose not to.
When rough turning, I left the wall about 1 inch thick since I did not know how much this wood would warp while drying.
After rough turning, I coated it with a PVA based sealer, Tree Saver, available from Craft Supplies, USA. Periodically, I weighed and recorded the weight each time. This is the most reliable way for me to know when a bowl is dry and stable.
I remounted the bowl against a wood faceplate held in place with the live center in the original divot from the live center. The enabled the mounting tenon to be again turned round and with a flat top. As a bonus, I could also trim back some of the exterior wood.
After reversing the bowl into a chuck, I could finish turning the bowl except for the tenon area.
While I have a set of Cole jaws, I chose to again press the bowl against a wood faceplate while finishing the foot area. My intent was to then sand the remaining area for the nub left by the live center. However, I pushed it one cut too far; the nub broke away before I was finished. So back to the Cole jaws to sand the foot.
Walnut oil brings out the color and grain.
Enjoy!
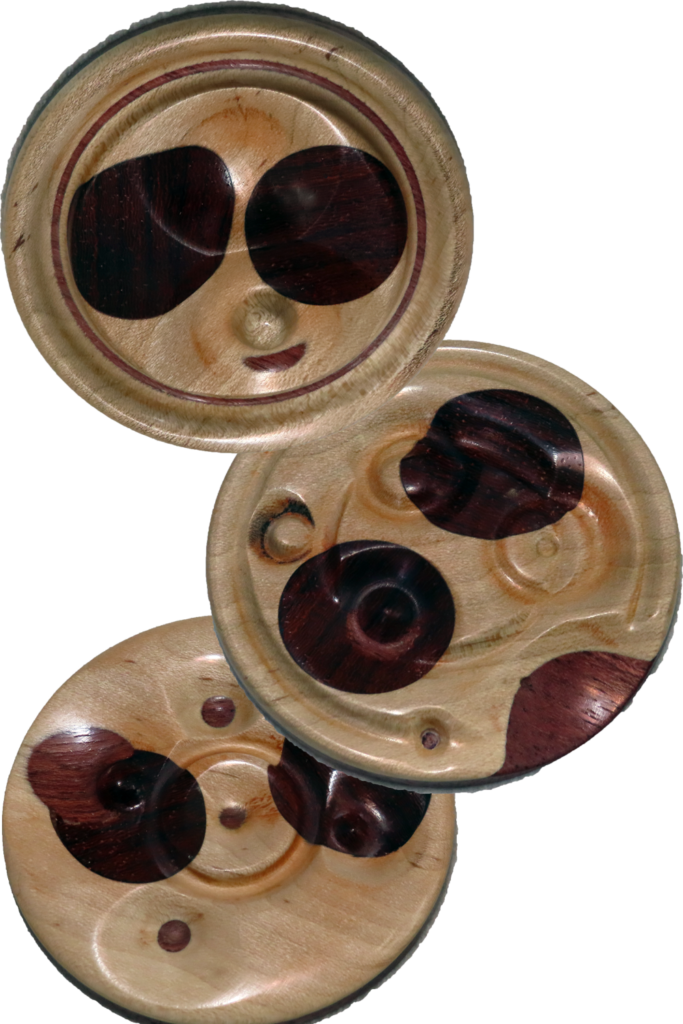
Eccentric – Off-Axis Turning With Infinite Axis Chuck
This video is best viewed right here. However, in case of difficulty, it is also posted on YouTube and FaceBook.
In this video, I attempt to inset ovals into my wood blank.
To get the oval shape, I planned to drill into the medallion at an angle, thus yielding an oval.
First, I tried to use a drill guide at the lathe. However, I did not have enough leverage for sufficient pressure to drive a large bit into the hard wood.
Next, I created a small tilt table. I can mount either a chuck using a chuck hub or my eccentric work platform to the tilt table. Knobs on the side adjust the tilt. A couple of wedges at the front edge maintain the angle under pressure from the drill press. Chuck hubs and bandsaw knobs are availabe at https://www.etsy.com/shop/AsWoodTurnsTools
After drilling the holes and filling them with spindles turned to fit and gluing them with epoxy, I could proceed as usual for a medallion. This time, I used the Infinite Axis Chuck to give the medallions both visual and tactile interest.
Please see last weeks’s video on how to build your own Infinite Axis Chuck.
Project Videos
- Beyond Ordinary Eccentric Woodturning – Infinite Axes
- Woodturning Valentine’s Box With Infinite Axis Chuck
- Woodturning Christmas Ornament Using Infinite Axis Chuck
- Eccentric Bottle Stopper With Infinite Axis Chuck
- Woodturning Eccentric Twig Vase With Infinite Axis Chuck
- Eccentric Spindle Woodturning With Infinite Axis Chuck
- Woodturning Jewelry With Infinite Axis Chuck
- Eccentric Woodturning Off Axis Necklace Pendant
- Eccentric Woodturning Off Axis Medallions
- Eccentric Woodturning Necklace Centered Inserts
- Build Your Own Infinite Axis Chuck
Enjoy!
Build Your Own Infinite Axis Chuck
This post is best viewed right here on this page. But, in case of difficulty, it is also posted on YouTube and FaceBook.
Let us build your own Infinite Axis Chuck.
Here are useful links for supplemental information.
Where to purchase the PVC fitting.
- My Etsy Store – https://www.etsy.com/shop/AsWoodTurnsTools – while supplies last
- Big Box and Plumbing Suppliers such as https://www.supplyhouse.com/PVC-Schedule-40-Fittings-14952000
Threaded Wood Faceplates
- Five Options For Woodturning Lathe Faceplates
- Easy Wood Faceplates For Woodturning
- Pin Face Plate and Threaded Wood Face Plates For Woodturning
Hand cut Spheres
- Woodturning Perfect Spheres – For Wise Turners
- How To Turn Perfect Hollow Sphere – No Jig
- Woodturning – Adjustable Sphere Tower
Project Videos
- Beyond Ordinary Eccentric Woodturning – Infinite Axes
- Woodturning Valentine’s Box With Infinite Axis Chuck
- Woodturning Christmas Ornament Using Infinite Axis Chuck
- Eccentric Bottle Stopper With Infinite Axis Chuck
- Woodturning Eccentric Twig Vase With Infinite Axis Chuck
- Eccentric Spindle Woodturning With Infinite Axis Chuck
- Woodturning Jewelry With Infinite Axis Chuck
Related:
- Eccentric Woodturning Off Axis Necklace Pendant
- Eccentric Woodturning Off Axis Medallions
- Eccentric Woodturning Necklace Centered Inserts
The Infinite Axis Chuck works in harmony with another shop-made chuck based on “Build A Shopmade Chuck For Offset Turnings” by David Mueller. American Woodturner February 2015. I have adapted this chuck to have exchangeable work platforms that interchange with this Infinite Axis Chuck. The eccentric chuck article is available to read or download from
- https://kawarthawoodturners.ca/wp-content/uploads/2018/10/Shopmade-Jig-AW3001p35-40.pdf
courtesy of Kawartha Woodturners.
When using the Infinite Axis chuck, the turning axes are NOT parallel. In space, they may never meet. They almost meet the definition of a skew axis.
Turning went much easier with a couple more accessories:
- 2 screw chucks (3/8″) for direct mount of the work platform to the lathe spindle.
- Flat faced faceplate sized for target diameter also used to press double sided tape bonding.
- Live center with #2 Morse taper and 1 1/4 x 8 tpi.
- Spindle adapter 1″x8 tpi female to 1.25″x8tpi male to adapt the live center from 1″ to 1.25″
- Large adjustable pliers or Oil Filter wrench or spanner
Enjoy!
Beyond Ordinary Eccentric Woodturning – Infinite Axes
This video is best viewed right here. However, in case of difficulty, it is also posted on YouTube and FaceBook.
This video continues a series on eccentric turning in preparation for Valentine’s Day.
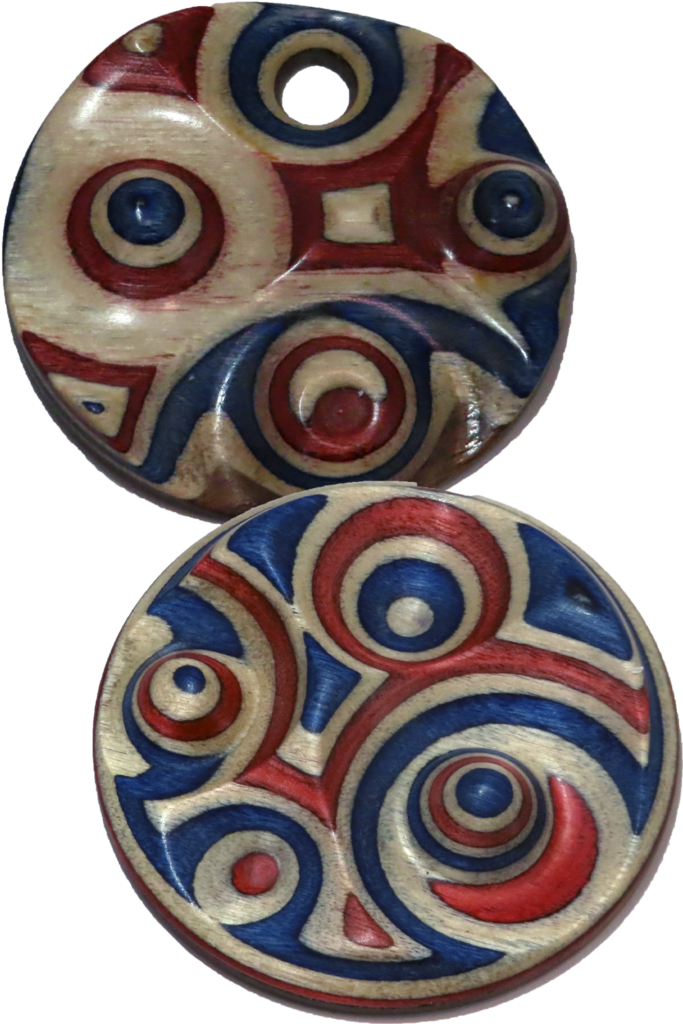
This time, I am using wood with colored layers and my Infinite Axis Chuck for a very usual effect. The wood comes from Frog Blanks. The Infinite Axis Chuck is shop-made. I will show how to build the chuck next week.
The Infinite Axis Chuck works in harmony with another shop-made chuck based on “Build A Shopmade Chuck For Offset Turnings” by David Mueller. American Woodturner February 2015. I have adapted this chuck to have exchangeable work platforms that interchange with the Infinite Axis Chuck that I designed. The eccentric chuck article is available to read or download from https://kawarthawoodturners.ca/wp-content/uploads/2018/10/Shopmade-Jig-AW3001p35-40.pdf
courtesy of Kawartha Woodturners.
When using the Infinite Axis chuck, the turning axes are NOT parallel. In space, they may never meet. They almost meet the definition of a skew axis.
Turning went much easier with a couple more accessories:
- 2 screw chucks (3/8″) for direct mount of the work platform to the lathe spindle.
- Flat faced faceplate sized for target diameter also used to press double sided tape bonding.
- Live center with #2 Morse taper and 1 1/4 x 8 tpi.
- Spindle adapter 1″x8 tpi female to 1.25″x8tpi male to adapt the live center from 1″ to 1.25″
Enjoy!
