Turning And Carving Acorn Candy Box Ornament
This video is best viewed here on this page. In case of gremlins getting loose, it is also posted on YouTube and FaceBook.
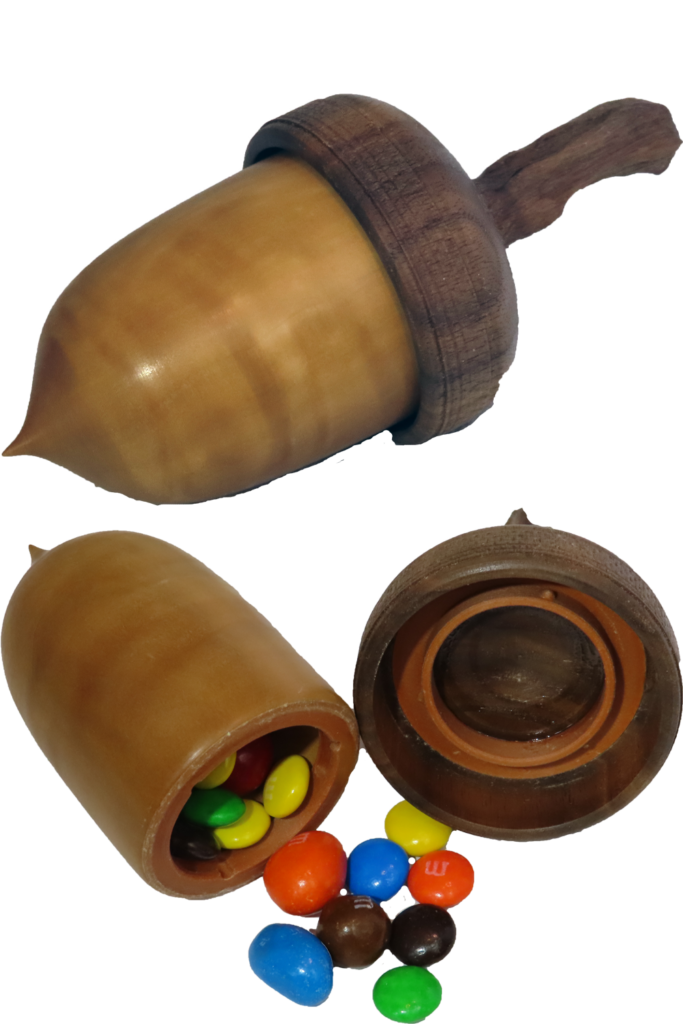
This project is an ornament for the Christmas Ornament Challenge which is now open. The shell is maple; the cap is walnut. They are joined together with a bayonet style bushing which makes it very easy to open and close to get at the candy inside.
The acorn is about 2.5 inches diameter and 5.5 inches long, finished with shellac.
The bayonet style bushing is available at https://www.etsy.com/shop/AsWoodTurnsTools
Get inspired by the ornaments already entered to this year’s challenge at www.OrnamentChallenge.com
Enjoy.
Transforming Ugly Duckling Cracked Wood To ???? Ornament
In case of gremlin attack, this is also posted on YouTube and FaceBook.
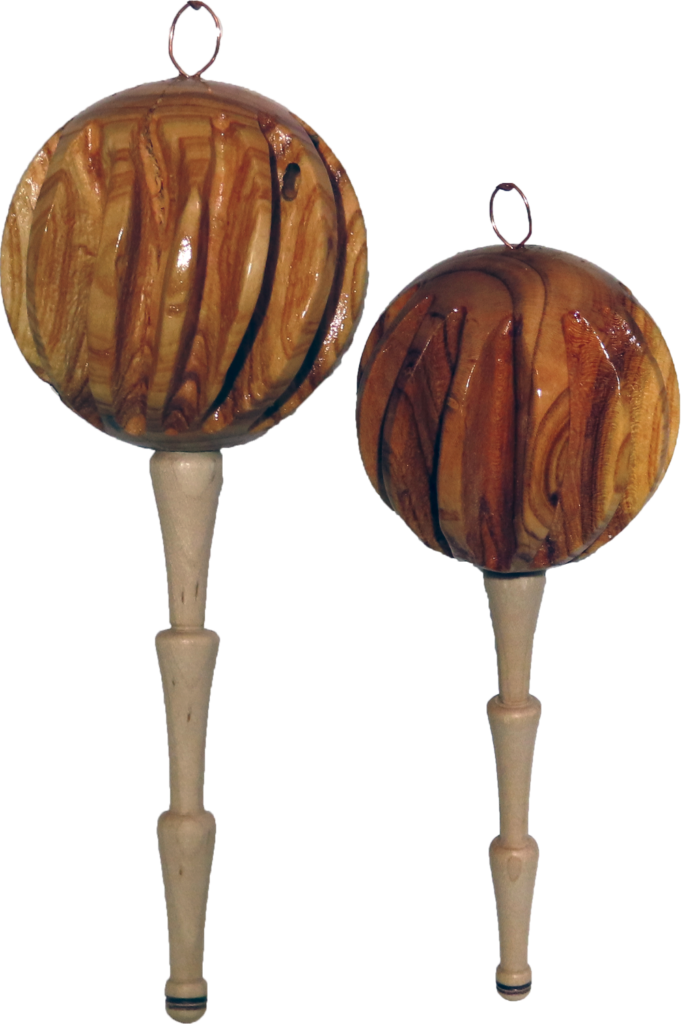
I received this wood in our club wood exchange raffle. It was so nasty, I almost threw it away. Then, well, I have turned spheres from worse. So, why not a sphere. Once I had a sphere, it was still a cracked mess. I dug out the carving gear and ground out the cracks. It you cannot hide something, highlight it. Then added a finial and a loop.
In the end, my ugly duckling is still a duck – not a swan. But, it is an okay duck. It can serve well as a Christmas ornament for the challenge. The challenge for me, was dealing with the nasty wood.
The ornament is 2 inches diameter and 6 inches long.
Don’t forget – the Ornament Challenge is opens shortly. Details at www.OrnamentChallenge.com
Enjoy.
Repairing Cracked Olive Bowl With Ultra Violet Light
In case of a gremlin attack, this video is also posted on YouTube and FaceBook.
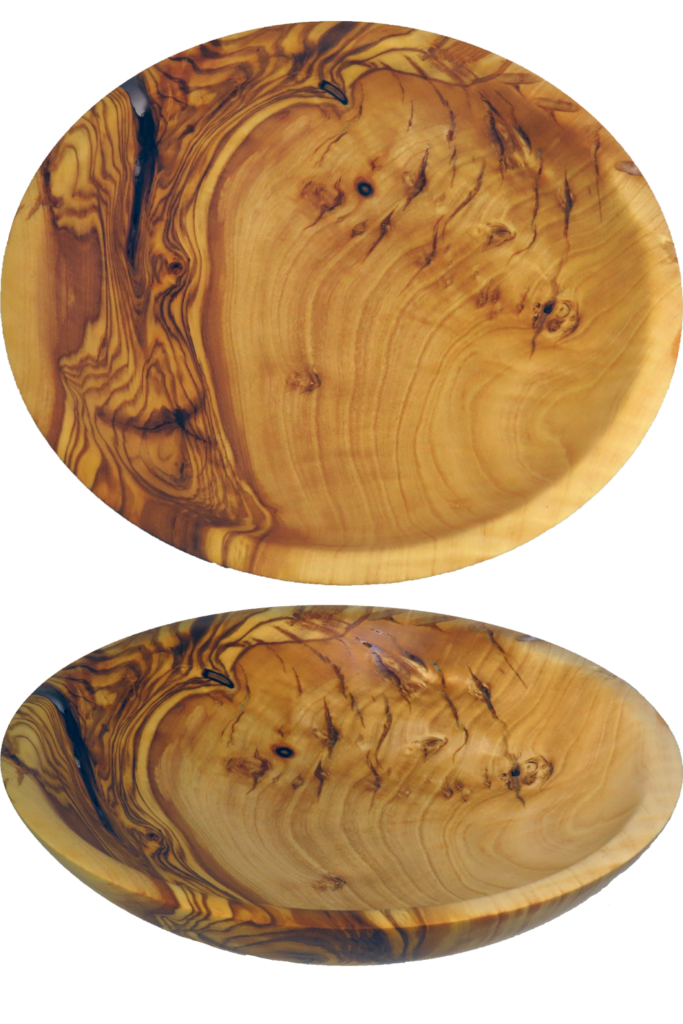
I obtained this olive wood on a trip to Phoenix just before the pandemic. I love olive wood but this block had issues. As I roughed it out, it exposed large nasty drying checks and a split area.
Since the wood is so pretty, I contemplated how to repair it. The checks I could live with, but I had to do something with the split area. I considered many ways to fix the crack. All would detract from the pretty wood and call attention to the repair.
At SWAT, I attended a presentation involving ultra violet cured resin. I had heared of this resin previously at a Utah Woodturning Symposium. The SWAT presentation context was exotic pen turning but my mind went to my olive bowls needing repair.
The resin came from Amazon. It cures with ultra violet light. I purchased a UV flashlight from Harbor Freight. With its limited power, it could only partially cure a fresh bead at a time. This was enough to keep it from running. When finished, I left it outside in direct sun, flipping it over to expose both sides.
This bowl is 8 inches diameter, finished with walnut oil.
Don’t forget the Ornament Challenge is just a short time away. Details at www.OrnamentChallenge.com
Enjoy.
Woodturning Scoop Series – Double Scoop
Best place to view this post – right here. If gremlins attack, try YouTube or FaceBook.
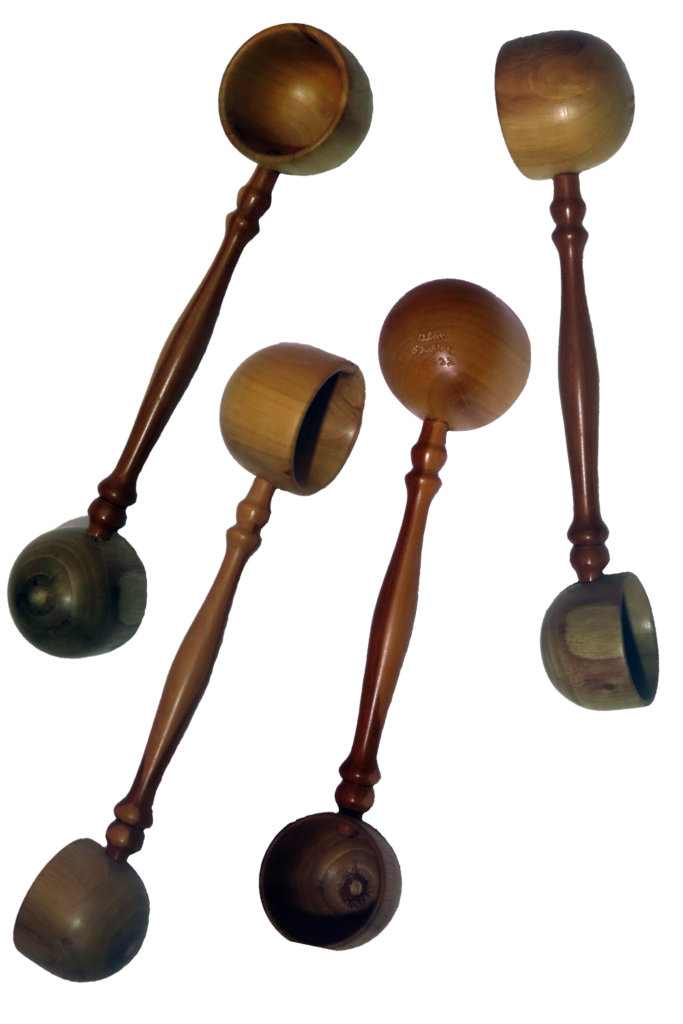
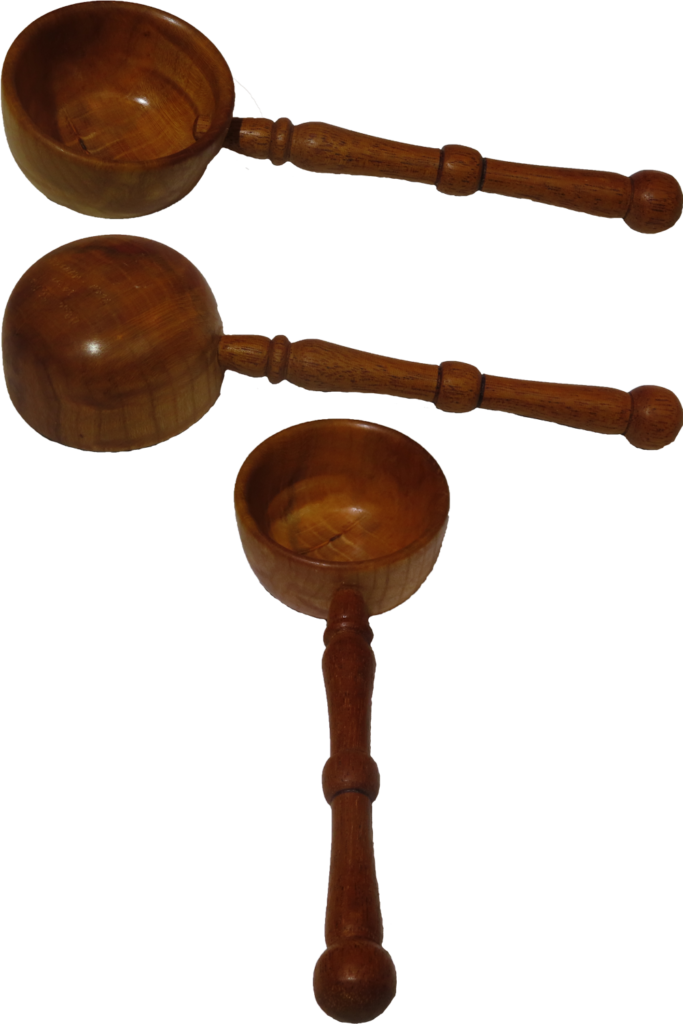
I am exploring turning various scoops of styles or types. While a double bowl scoop is not that different than a single bowl scoop, it is fun and there are some complications with the handle. This scoop is a fun conversation turning.
The scoop is about 8 inches long and 2 inches in diameter, finished with shellac.
Other scoops:
- Woodturning Easiest Scoop Yet In This Series
- Woodturning Multi-Axis Single Piece Wood Scoop
- Another Scoop Of Wood Please – With Bonus Chuck
- Woodturning Third Scoop Style Two Piece Eccentric Ladle
Links:
In this year’s Christmas Ornament Challenge, our sponsors will be providing discounts and coupons for everyone who enters their ornament. This is in addition to a larger number of grand prizes. I’m still working to line up additional vendor sponsors.
Prepare now for the November submission time. Check www.OrnamentChallenge.com for more details and to submit your ornament (in November)
Enjoy.
Woodturning Vessel With Lid – Wood From Puerto Rico
This post is best viewed right here on this site. However, in case gremlins attach, it is also posted on YouTube and FaceBook.
The Puerto Rican woodturning club sent me the wood for this project after I gave them a zoom (IRD) demonstration earlier this year. They had won the demonstration due to their club members’ participation in last year’s Christmas Ornament Challenge.
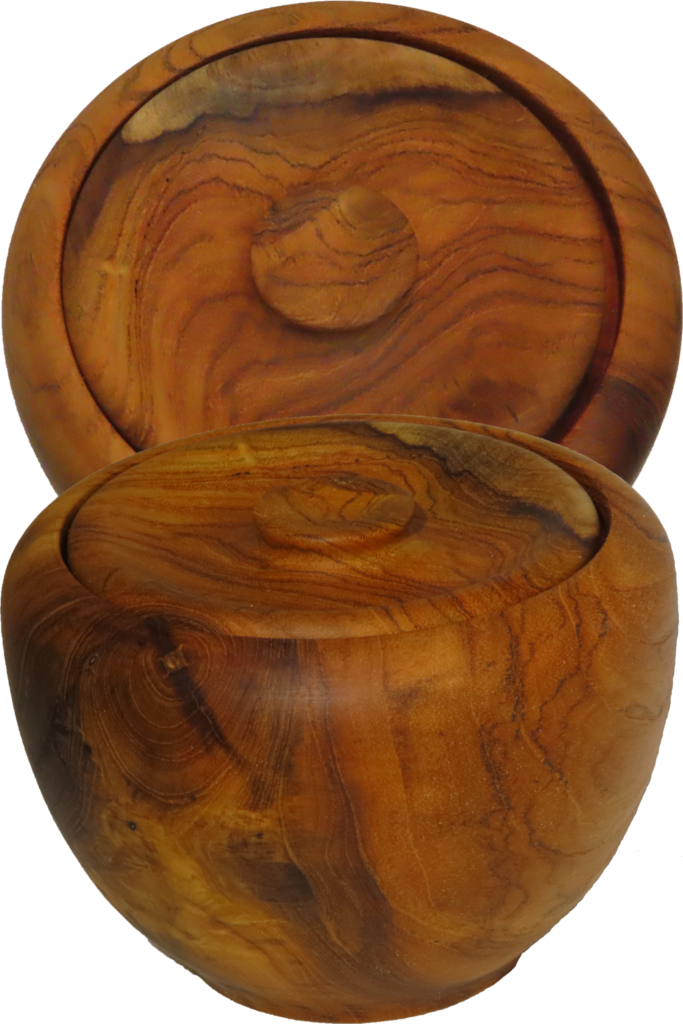
This wood is Teca (probably Teak in English) starting at 6x6x5. The lid was cut from the top of the vessel with a 45 degree cut to the center. Then the lid was inset to the base container. The vessel is 5.5 inches diameter and 4 inches tall, finished with walnut oil.
I had planned to finish the bottom using an expansion grip with metal jaws. They did not fit. Instead, I used my DIY wood soft jaws in yet another context.
Links:
Three Options For DIY Soft Jaws
Enjoy.
Ornament Challenge 2022 Kickoff
This post is best viewed right here. In case of difficulty, it is also posted on YouTube.
It is time to make your ornament for the 2022 Christmas Ornament Challenge. The time to submit your picture is during the month of November 2022.
This year, there is something for everyone. Grand prizes for the top ornaments selected by public vote and the two hosts in the form of gift cards. Other vendors are providing discount codes for EVERYONE who submits an ornament. The top three craft clubs will receive a free zoom remote demonstration.
This video has all of last years ornaments for your inspiration. Draw from what you see and interpret an ornament your way.
We love to see the pattern of inspiration and people stretching their limits.
For official rules, go to www.OrnamentChallenge.com
For inspiration, go to www.OrnamentChallenge.com
During November, go to www.OrnamentChallenge.com to enter your ornament.
Enjoy!
Woodturning Stabilized OSB Into Amazing Vase
This post is best viewed right here. But, in case of difficulty, it is also posted on YouTube and FaceBook.
Before SWAT, I turned a vase in OSB because I saw such a demonstration on the agenda and wanted to be prepared to ask relevant questions. Greg Stehle’s vase used OSB as flat rings. His were not segmented and only the edge of the OSB was visible in the project.
In contrast, I wanted to turn OSB 90 degrees and display the face flakes in the OSB. This required a segmented approach. I tried turning one before SWAT. What I found was that OSB in this orientation tended to flake off. This limited how much of a curve I could use.
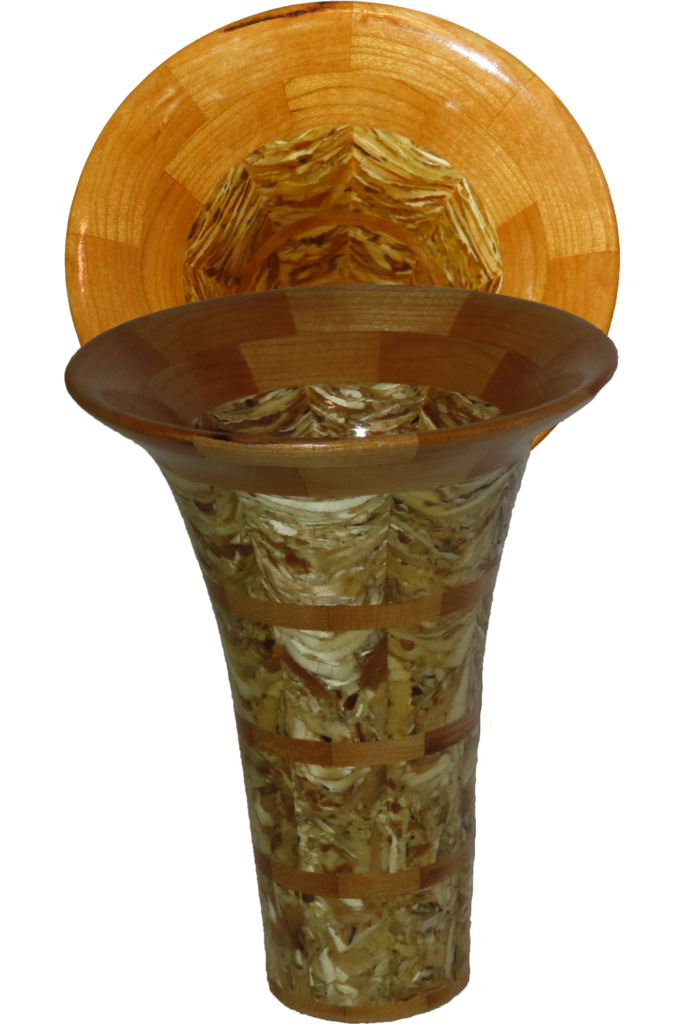
After seeing the demonstration at SWAT, I still prefer my choice for orienting the OSB. I completed long outstanding project to setup my stabiling rig and stabilized a couple of OSB boards. Then segmented it as I did on my first vase. This had dramatically different results. Flaking was greatly reduced and the wood was very hard. I successfully increased the flare on the vase. My second vase was again finished with spray lacquer. it is 5″ diameter and 6″ tall.
Again, my wood soft jaws played an important role replacing the need for a jam chuck.
Links:
Woodturning Segmented Vase From Face Out OSB
Three Options For DIY Soft Jaws
Prepare now for the November submission time. Check www.OrnamentChallenge.com for more details and to submit your ornament (in November)
Enjoy.
Woodturning Easiest Scoop Yet In This Series
This post is best viewed right here. However, in case of gremlins, it is also posted on YouTube and FaceBook.
This scoop was demonstrated at SWAT by Sally Ault. I missed her demo. so if you have an opportunity to see her demonstration, do it. Meanwhile, this is my version. It is the easiest because there is no offset axis or wildly flying handle. Yet, there is one very important tip. Drill the hole for the handle tenon before sanding the interior or even earlier.
Again, my wood soft jaws played an important role replacing the need for a jam chuck.
The bowl is plum; the handle appears to be mahogany. Both are finished with shellac.
Links:
Woodturning Multi Axis Single Piece Wood Scoop
Another Scoop Of Wood Please – With Bonus Chuck
Woodturning Third Scoop Style Two Piece Eccentric Ladle
In this year’s Christmas Ornament Challenge, our sponsors will be providing discounts and coupons for everyone who enters their ornament. This is in addition to a larger number of grand prizes. I’m still working to line up additional vendor sponsors.
Prepare now for the November submission time. Check www.OrnamentChallenge.com for more details and to submit your ornament (in November)
Enjoy.
Woodturning Tri Winged Christmas Ornament
This post is best viewed right here. In case of difficulty, it is also posted on YouTube and FaceBook.
I have to postpone SWAT inspired projects in favor of preparation for this year’s Christmas Ornament Challenge. However, this project draws inspiration from SWAT and from last year’s challenge.
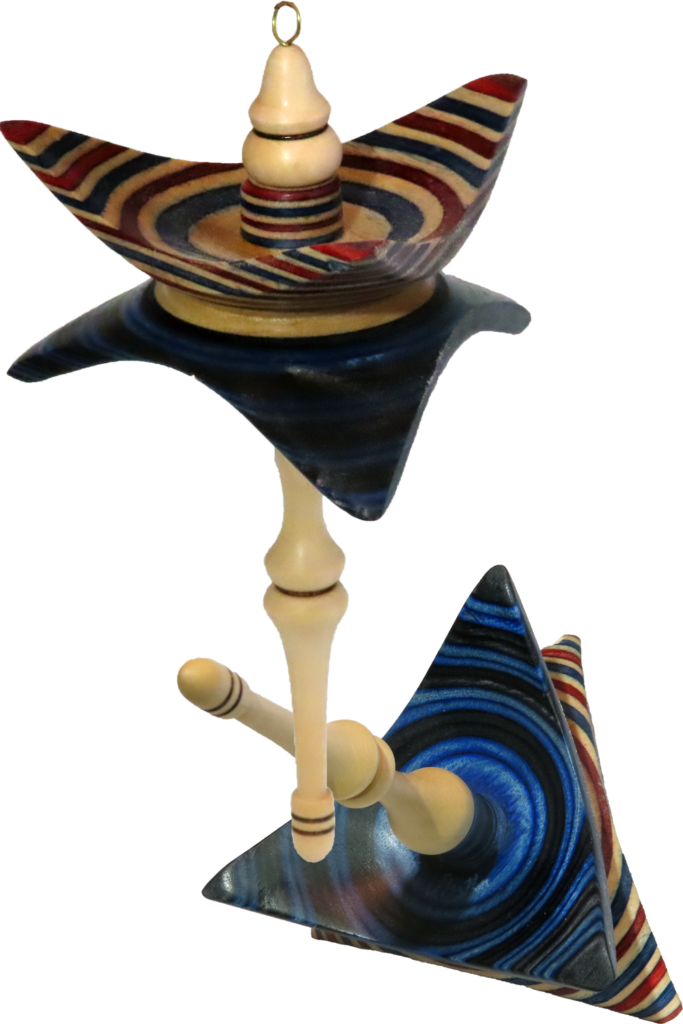
The ornament uses laminated dyed birch from FrogBlanks.com plus just a bit of maple for the center and hazelnut for the finial.
The ornament is 3×6 finished with shellac.
In this year’s Christmas Ornament Challenge, our sponsors will be providing discounts and coupons for everyone who enters their ornament. This is in addition to a larger number of grand prizes. I’m still working to line up additional vendor sponsors.
Prepare now for the November submission time. Check www.OrnamentChallenge.com for more details and to submit your ornament (in November)
Enjoy.
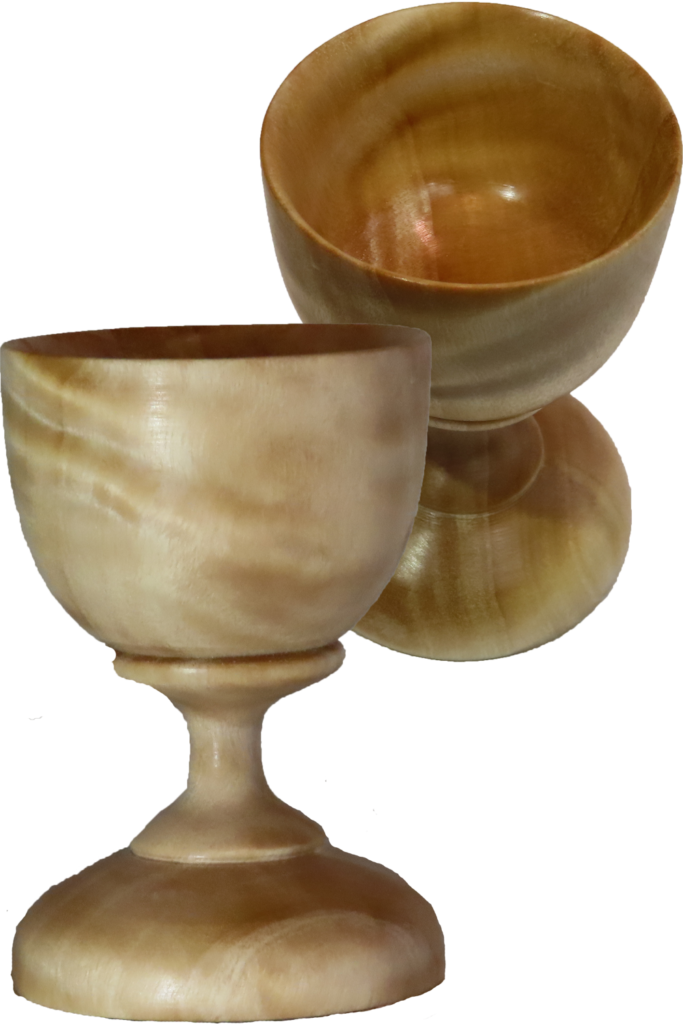
Woodturning Small Goblet – Stabilized (Experiment) Cottonwood
This post is best viewed right here on this page. In case of viewing difficulty, it is also posted on YouTube and FaceBook.
I am testing my stabilizing setup. An early experiment was a 2x2x3 block of cottonwood. It is quite a long process to dry wood, vacuum wood, and soak wood.
After all the work, the wood is different: heavy, dense. Also, the grain seems to be popping as if well buffed.
I also used my new soft jaws. These are great. IMHO, they will replace jam chucks. I will wind up with several bases with jaws of different sizes. As I adapt a set, the jaws will become larger until I face them off to start over. When too thin, I will glue on a fresh set of wood pieces for the next go around.
You may want to rewatch my video on the soft jaws.
Three Options For DIY Soft Jaws
Enjoy.
