Woodturning End Grain Box – From Tree To Display
This post is best viewed here on this page. However, in case of video difficulties, it is also posted on YouTube and FaceBook.
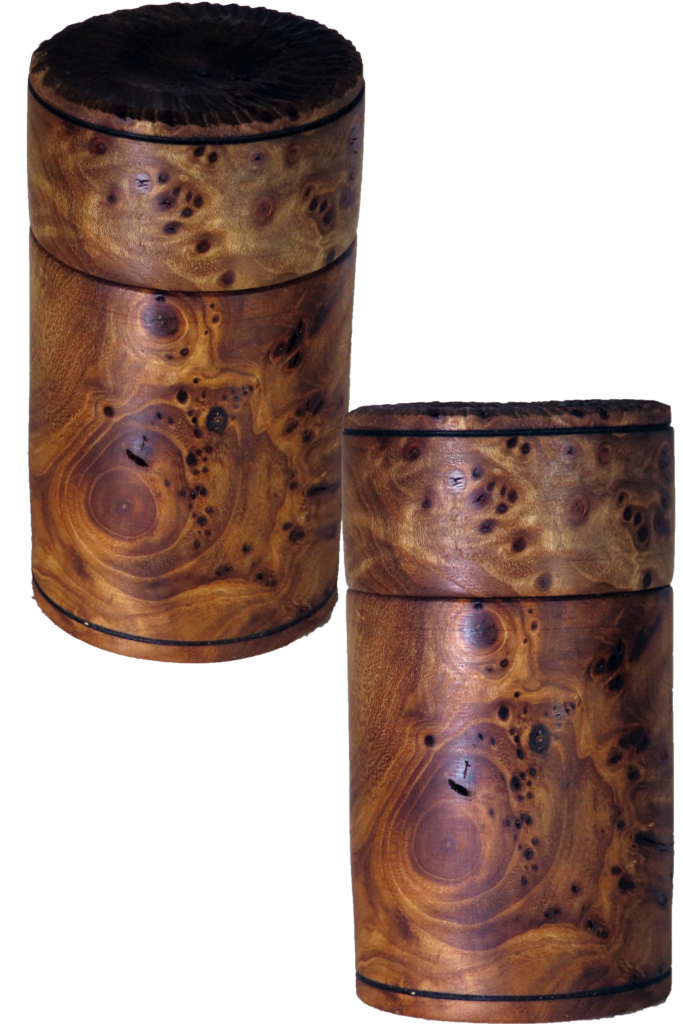
Instead of turning a smooth top, I used a chain saw bit to texture the surface.
This project is a end grain box from elm. End grain is dramatically different from cross grain. Some good things – some (well) not so good.
Generally, an end grain box is turned from one species of wood and generally one piece of wood. A big issue is expansion/contraction as humidity changes. When made from the same species, this should be uniform. Since there is no cross grain, there should be no difference.
However, in this project, I stabilized the wood at the joint with CA glue to further reduce wood movement.
Again, mounting is critical. Keeping track of how to mount is essential.
My box is 2.5″ diameter and 4.5″ tall, finished with walnut oil.
Enjoy.
Woodturning Cross Grain Box – Beautiful Zebra Wood
This post is designed for this page. But, in case of technical difficulties, it is also posted on YouTube and FaceBook.
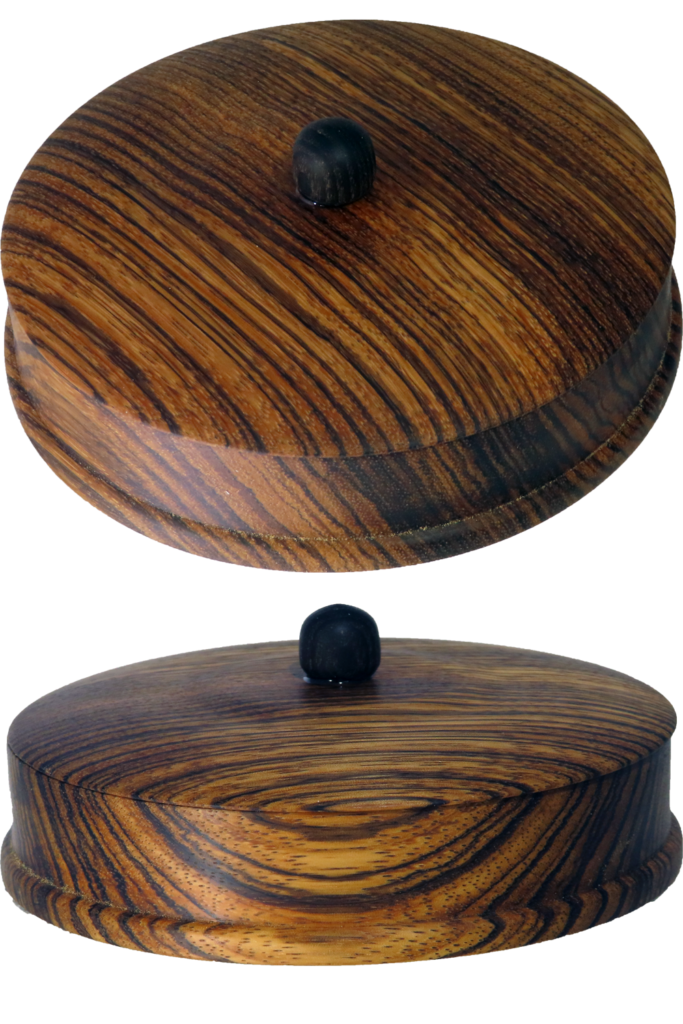
This project is a cross grain box from Zebra wood.
One challenge is turning a box both base and lid from 2 inch wood. Often I use two different blocks of wood and potentially from different species.
Another challenge is the joint. A cross grain box requires a loose fix.
Yet, this is a good challenge. A good exercise is mounting a project. Keeping track of how to mount is essential.
Also, in this project, I wet sanded with 220 and 320 grit paper with walnut oil. This kept the dust down by keeping dust trapped as a slurry in the oil. I was able to breath much more easily.
My box is 5″ diameter and 2″ tall, finished with walnut oil.
Enjoy.
Woodturning Toothpick Dispenser – Not A Box
This post is designed to view here on this page. However, in case of technical difficulties, it is also posted on YouTube and FaceBook.
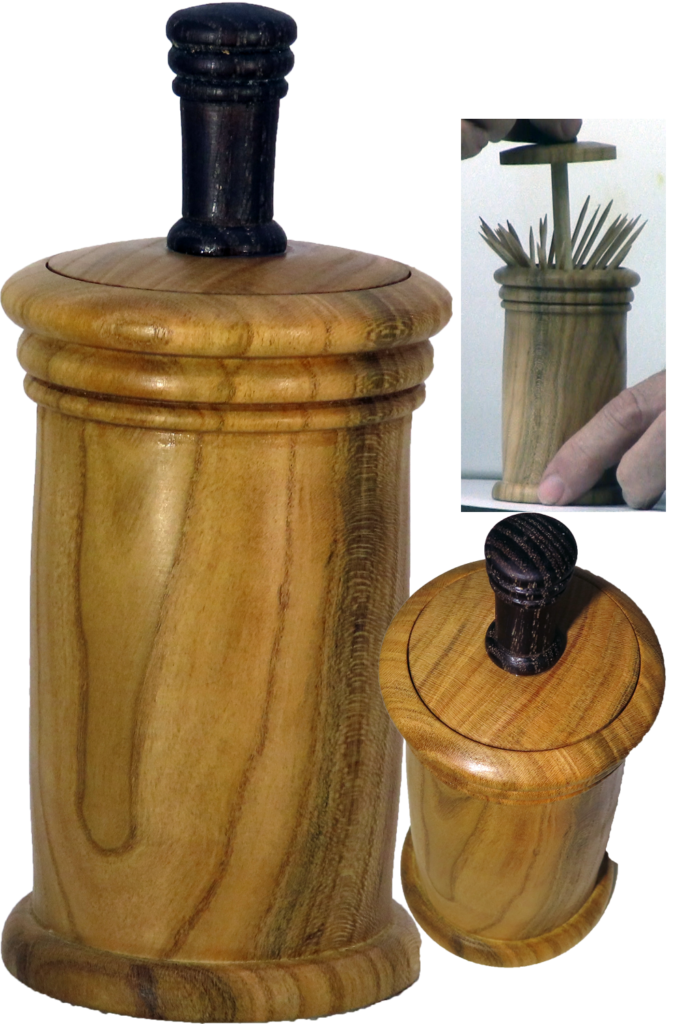
Inspired by a my friend and mentor, Frank Young, I turned a toothpick dispenser from Apricot.
Many times, this would be a box turning. However, a box requires opening a lid and reaching into the cavity to retrieve the contents – in this case – a toothpick.
For this dispenser, one would simply lift the top knob. The toothpicks inside would come up and fan out for easy selection. To close, lower the knob and everything slides back inside.
The challenge for this project different from the original design is that it requires a center hole deeper than my longest Forstner bit. The adaptation to overcome this challenge is to turn a hollow cylinder. Then plug the bottom with the same wood with a tenon and hide the joint.
The body is apricot. The knob is stabilized heat treated ash. Both finished with shellac.
After completing this project, I reordered the steps. While both accomplish the same thing, this is what I would do next time:
- Rough cylinder
a. Cut mounting tenon – both ends
b. Reverse - Drill ¼” hole thru tray & top
- Part off tray
a. Cut new tenon on remainder. - Part off top cover
a. Cut new tenon on remainder. - Body
a. Drill 1.75” hole 3/16 deep in top
b. Drill 1.5” hole as deep as possible
c. Part to length
d. Reverse mount
e. Finish 1.5” hole. - Base
a. Cut & fit tenon to body.
b. Glue body to base. - Tray.
a. Drill inner hole.
b. Fit to base.
c. Final shaping. - Cover
a. Fit to top 1.75” hole.
b. Insert (no glue) to body with paper towel. - Entire unit
a. Shape.
b. Finish? - Jam chuck
a. Finish bottom - Knob
a. Glue dowel to bottom tray.
b. Glue dowel to cover.
c. Glue knob.
Enjoy.
Woodturning Olive Bowl – UV Resin To The Rescue
This post is best viewed here on this page. But, in case of technical difficulties, it is also posted on YouTube and FaceBook.
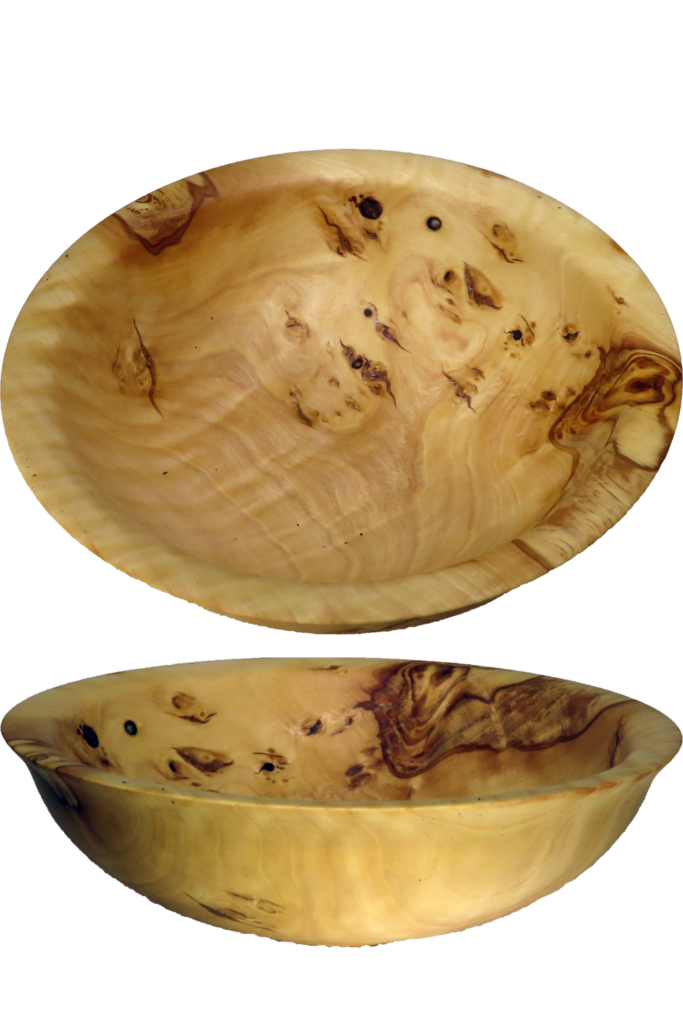
I started and rough turned this bowl from olive about three years ago after a trip to Arizona where one of you hooked me up with fresh mesquite and olive trunks.
As I turned the wood and later as it dried, I found a lot of interesting figure, eyes, and grain. But I also found cracks and loose knots which dismayed me. I did not want to fill with CA glue and did not want to use anything to detract from the olive.
UV resin to the rescue. UV resin is a special resin which hardens when exposed to ultra-violet light. Using a small UV flashlight, I can squeeze out a small bead. Then shine the UV flashlight on it to start the curing process. Then move on to another area.
The flashlight is not strong enough to drive a full cure. I must expose it to direct sunlight for a full cure. That is a little more difficult in a winter snowstorm. There are powered stronger UV lights available but I do not use one. Yet?
I trust UV resin is stronger and more durable than CA glue. It is more convenient than 2 part epoxy where I would need to mix up at least a small batch and then hurry to use it in several areas. While treating additional areas, epoxy would run out of earlier treated areas.
I cannot endorse any brand or formulation. I picked a clear resin. Additives may block the sunlight from curing.
I would appreciate you sharing your experiences with UV resin.
Enjoy.
Woodturning Live Centers – What Works – What Does Not Work
This post is best viewed here on this page. However, in case of technical difficulties, it is also posted on YouTube and FaceBook.
A short while ago, I had a conversation with another club member about live center options. He is an experienced turner, so the conversation was mutually beneficial.
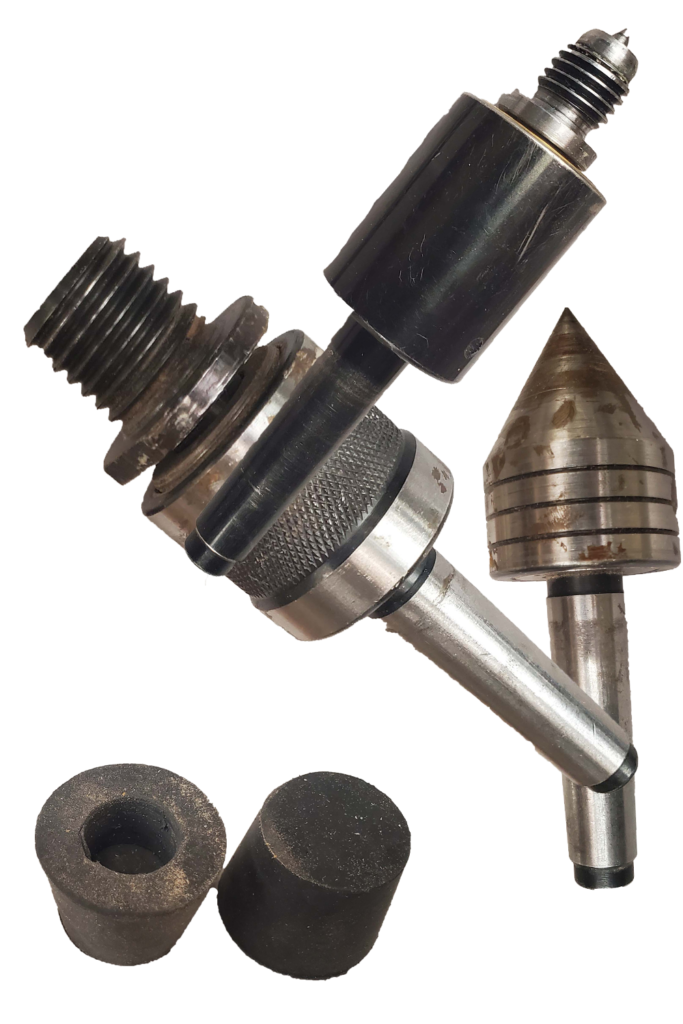
Sometimes a new turner is constrained by how their lathe was initially equipped. That begs the question of where to go from this point. What to do when you do not want a point poking into your beautiful wood?
Some options include:
-removing the center point (if it comes out) but then it can get lost in wood shavings.
-padding the point with a coin.
-covering the live center with wood.
-purchasing a more capable live center. But then often the issues repeat themselves as projects come.
one upgraded live center has 3/4-10 threads and a cone accessory. Then
-perhaps a covering wood piece could be threaded to be secure when on.
-what about a dedicated cone center so you do not have to look for where the cone piece is hiding.
-how about a rubber stopper drilled to match that slips on but is still secure?
Another upgraded live center has 1-8 threads but no accessories.
-The threads match more lathe spindles as is. An inexpensive adapter covers more options.
-With matching threads, many other possibilities emerge. Limitless.
Enjoy.
Woodturning Bracelets and Bangles With Custom Mini Longworth Chuck
This video is best viewed here on this page. However, in case of someone having watered the gremlins, it is also posted on YouTube and FaceBook.
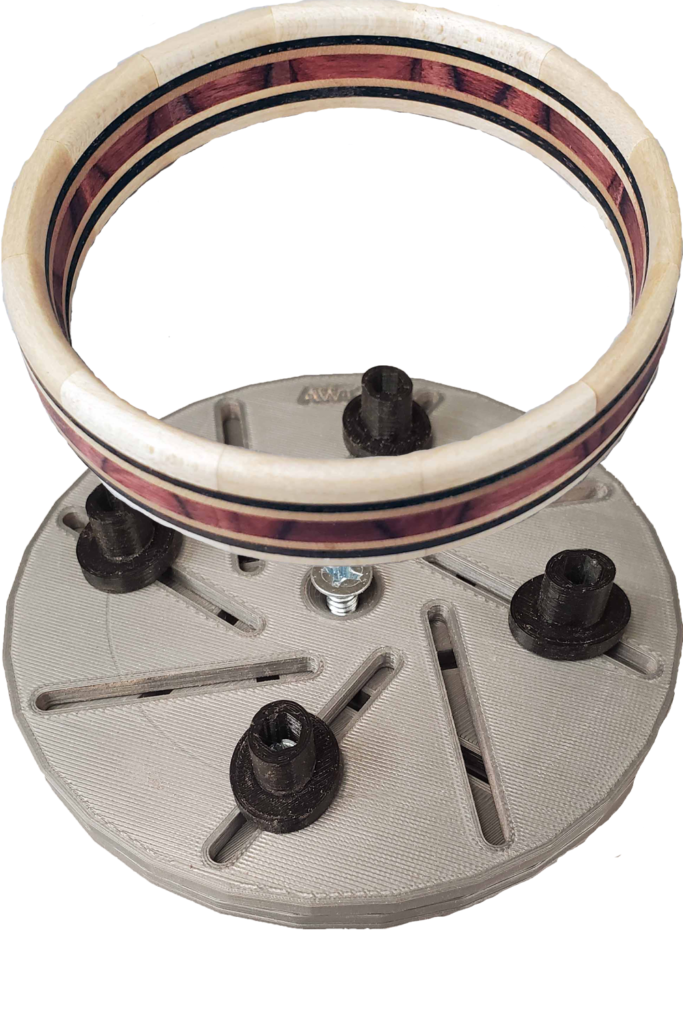
Inspired by a great demonstration at our club meeting by Kip Christiansen and a visit with Nelson Cassinger year ago, last week I miniaturized a Longworth chuck to use instead of other custom chucks made for specific sizes. Now it is time to put it to use.
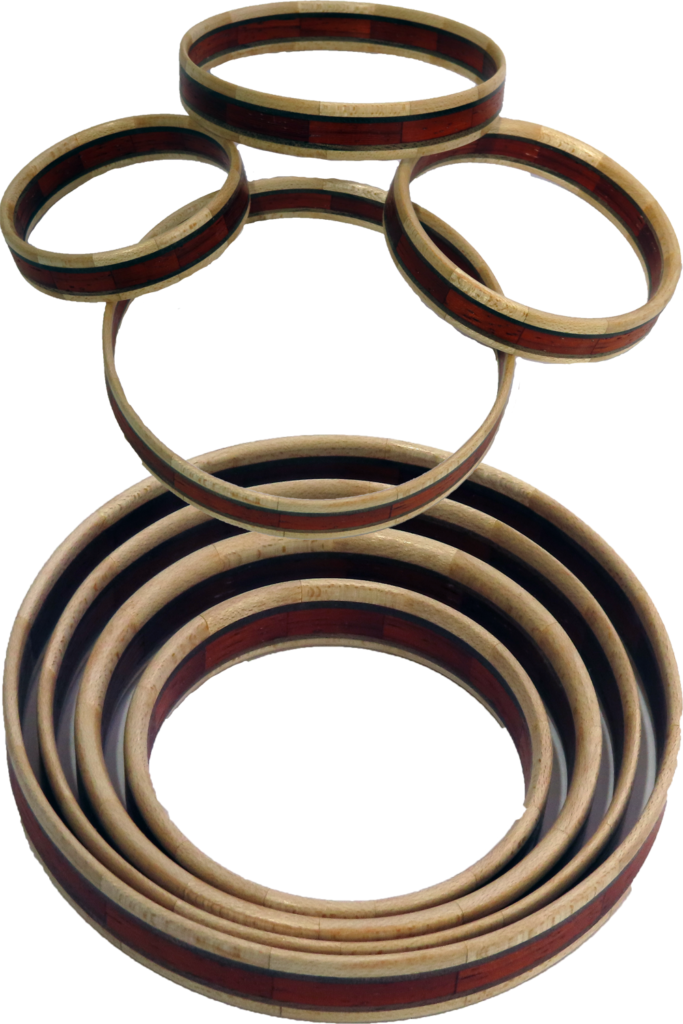
I glued up segmented rings of padauk, maple, heat treated ash, cherry, and laminated birch. Each was twelve segments and about four inches in diameter. I also prepared similar squares of walnut, maple, and cherry veneer.
For there, assembling the bracelets is a process of using double stick tape, glue, parting off, and facing off. I did not thin down any ring before gluing. Instead, a ring was glued to previous rings and then parted off at the target width. Then I would face it off to be ready for the next glue joint.
In use, I used my metal lathe for facing off rather than the wood lathe. The metal lathe is rigged with a similar spindle to my wood lathe. This enables me to switch between lathes to use whichever is best able to do the job. A metal lathe is great at cutting straight cuts at precise distances. The wood lathe is better at cutting curves and removing wood quickly.
You’ll have to watch to appreciate it.
To yield 4 bracelets from one glue up, I used a 1/8×1/8 High Speed Steel bit. My usual parting tool is too tall to effecting cut a small circle. The bit is available from machinist supply stores.
Enjoy.
Custom Longworth Chucks For Bracelets & Bangles
This post is best viewed here on this website. However, in case of technical difficulties, it is also posted on YouTube and FaceBook.
After a great demonstration at our club meeting by Kip Christiansen, I decided to try to upgrade jigs for bracelets. Since I have some experience with Longworth chucks, I decided to make small Longworth chucks and see if they could help with bracelets.
My chucks are 3D printed with PLA. I am also investigating PLA filament strength for these chucks. My small chucks use a 1/4-20 center bolt and #8 bolts for the button bolts. I also designed a variety of button styles to accomodate different situations.
Longworth chucks can be made from Baltic birch plywood, acrylic, phenolic, etc.
Next week, I will turn a bracelet using my chuck system.
Enjoy.
This Burl Spoke To Me – Don’t Cut Me With A Tenon
This video is best viewed right here on this page. However, in case of gremlin attack, it is also posted on YouTube and FaceBook.
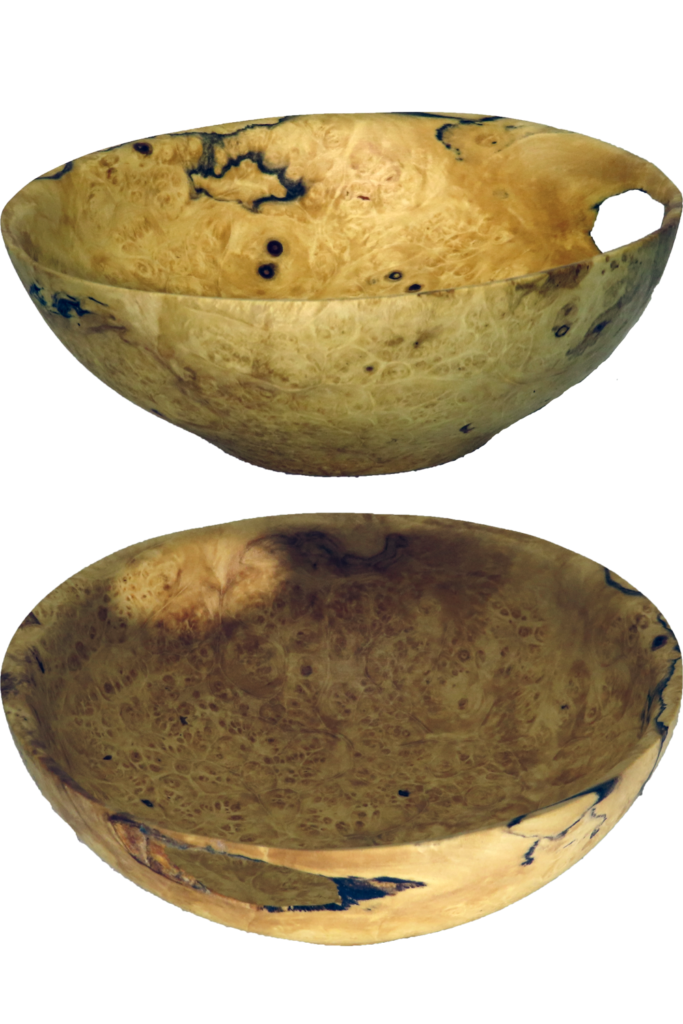
The wood for this project came from my club’s wood exchange. It is cottonwood burl – somewhat on the small size. But this meant that there was no wood to spare – nothing much to use for a tenon. I also wanted to keep as much of the burl figure as possible in the walls of the bowl.
This requires a different process – and no scroll chuck. Instead, lots of hot melt glue and some creative thinking.
This begs the question – what would you have done with the beautiful, but small, burl?
Enjoy.
p.s. If you would like a more in depth demonstration, please contact me for an IRD (Zoom Demo) on this or other topics.
Revealing The Mysteries of Turned Volcano Salt Urn In Difficult Wood
Please view this post here on this page. In case of difficulty, it is also posted on YouTube and FaceBook.
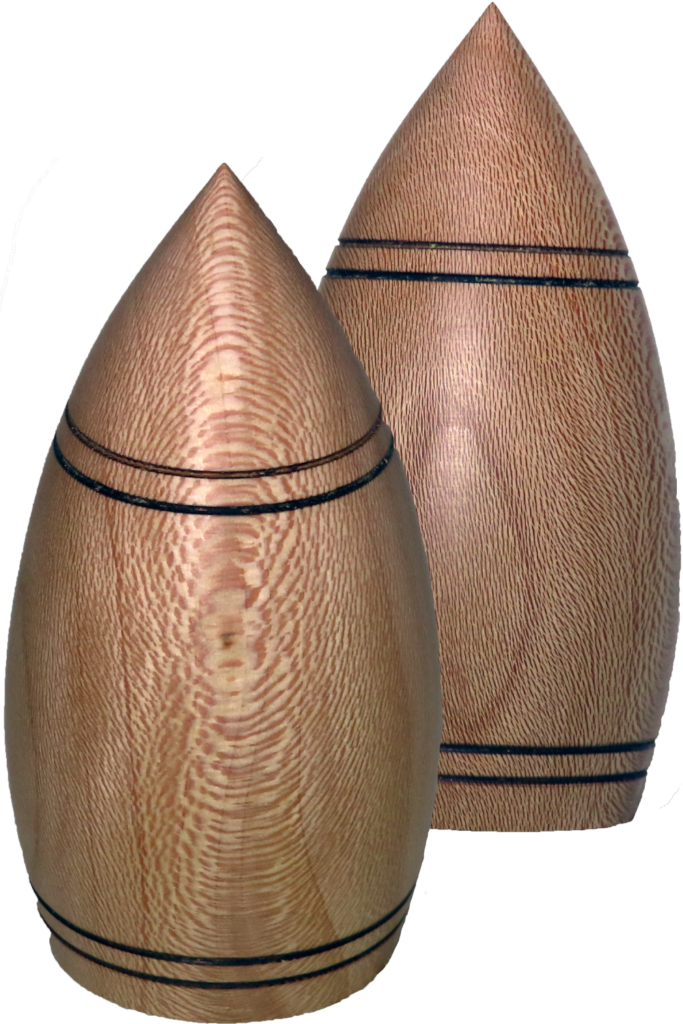
This project is another volcano salt urn. This time in a burl with voids that would interfer with it being a salt shaker. The same consideration would be necessary for “stinky” woods.
In addition to the usual two questions: How to add salt? and, How to salt my food? Add two more: Won’t that flavor the salt? or How will that wood keep the salt inside?
A short answer to the new questions – insert a liner made from a food friendly wood.
In addition to the creator’s choice of style, size, and shape, add any wood for the exterior.
The new requirement is to turn a liner to separate and contain the salt.
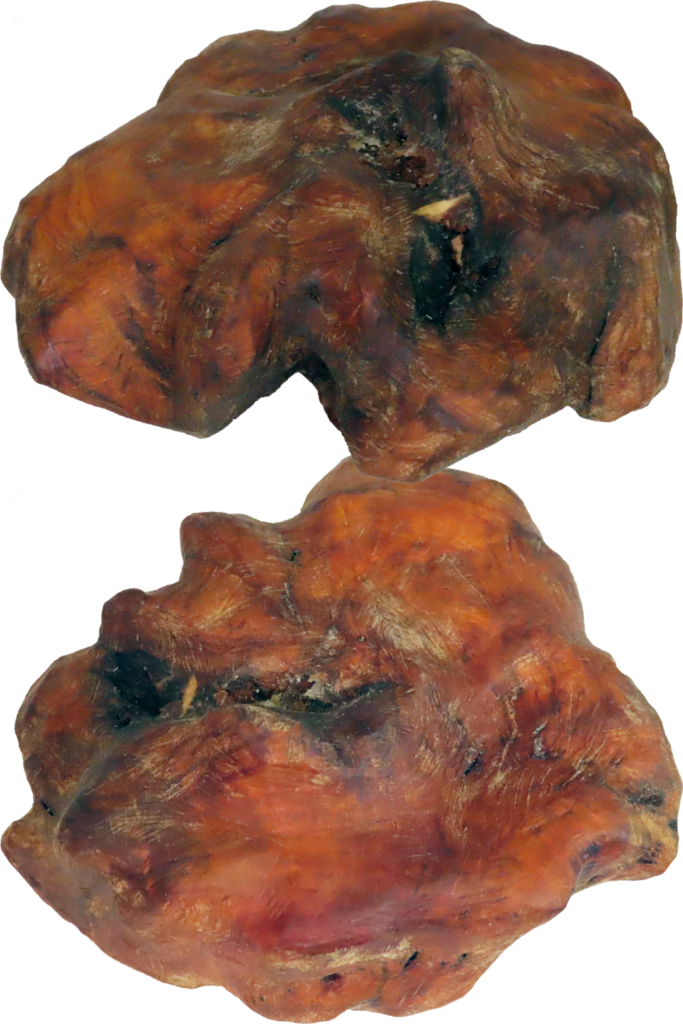
Is this a rock or an apple fritter.
Links:
UV Resin on Amazon
SANAAA UV Resin Clear Hard Type 500g Transparent UV Solar Curing Resin
Enjoy.
p.s. If you would like a more in depth demonstration, please contact me for an IRD (Zoom Demo) on this or other topics.
Revealing The Mysteries Of Turned Volcano Salt Urn
This video is best viewed right here on this page. In case of media failure, it is also posted on YouTube and FaceBook.
This project is a volcano salt urn. These are unique in that there is no cap, lid, or trapdoor through which to add salt. Nor are there holes in the top to shake out salt.
There are always two questions: How to add salt? and, How to salt my food? Let’s answer these questions in this video.
Meanwhile, the style, size, and shape of the salt urn are up to the creator. As long as the inside is not larger than the outside, we’re golden.
The only requirement is to turn the bottom funnel part to fit the decorative shell.
The drill bits referred to are “Center Drills” such as in this link:
https://littlemachineshop.com/products/product_view.php?ProductID=2990
Enjoy.
p.s. If you would like a more in depth demonstration, please contact me for an IRD (Zoom Demo) on this or other topics.
