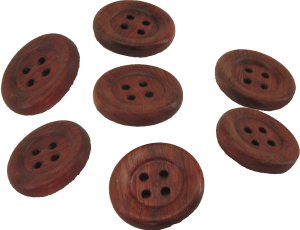
Handcrafted Wood Buttons For A Coat or Jacket
 Recently a viewer, Jari Hirvonen from Finland, asked how to make wood buttons.
Hmmm.
Buttons need to be all the same size and same decorations. They’re also small and have those four closely spaced holes in the middle.
After some research, I made a drill press jig to conquer the drilling problem. My blanks then had four equally and uniformly spaced holes in the middle. So far so good.
Then how to get them all the same diameter. I made wood faceplates for both the spindle and live center. A center hole in each faceplates aligned to a scrap block drilled to the same pattern as the buttons but with an extra hole exactly in the center. I glued these scrap blocks to the faceplates using the center holes for alignment.
Now to turn the faces. Yet another chuck — this time a jamb chuck to hole one button at a time while turning the face and the back. I could not turn the outer edge at this time — it would damage the jamb chuck and reduce the wood holding the button in the jamb chuck.
So finally, I resorted to another faceplate — this time reusing one from when the buttons were stacked. This time two short brass rods held the button in alignment while the outer rim was refined. A rubber stopper on the live center kept buttons from flying around the shop.
The buttons are about 1.25 inches in diameter and just less than 0.25 inches thick. They are finished with a blend of beeswax and mineral oil. I only lost one button to a catch when turning the outer rim.
This project took some figuring, a new jig, new faceplates, new jam chuck. After that, the rest was easy.
I’ll show more of the drilling jig in a separate video.
Nice work, amasing technics, very stylish buttons.
Jos
Thank you
Give it a try.
Alan